Categories
Entertainment & Arts

Brigitte Bardot: The French Bombshell of the 60s

Introduction:

In the glamorous world of 1960s cinema, few stars shone as brightly or left as indelible a mark as Brigitte Bardot. With her smoldering beauty, magnetic charisma, and uninhibited sensuality, Bardot captivated audiences around the world and became an enduring symbol of sex appeal and liberation. Throughout the decade, she pushed boundaries, challenged conventions, and redefined the role of women in film, solidifying her status as the quintessential French bombshell. In this extensive exploration, we delve into the life, career, and enduring legacy of Brigitte Bardot, the iconic sex symbol of the 60s.

Early Life and Career Beginnings:

Brigitte Bardot was born on September 28, 1934, in Paris, France, to affluent parents. From a young age, she exhibited a natural talent for performance and a striking beauty that would later propel her to stardom. Bardot began her career as a model, gracing the covers of magazines and catching the eye of filmmakers with her ethereal beauty and alluring presence.

Bardot’s breakthrough came in 1956 with her role in Roger Vadim’s controversial film “And God Created Woman.” As Juliette, a free-spirited and sexually liberated young woman, Bardot captivated audiences with her uninhibited sensuality and raw vulnerability. The film catapulted Bardot to international fame and established her as a symbol of sexual freedom and female empowerment.

Rise to International Stardom:

Throughout the 1960s, Brigitte Bardot reigned as the undisputed queen of European cinema, captivating audiences with her captivating performances, sultry beauty, and undeniable charisma. With her tousled blonde hair, smoky eyes, and pouty lips, Bardot embodied the epitome of sex appeal and became a global icon of beauty and glamour.

Bardot’s collaboration with director Jean-Luc Godard in films such as “Contempt” (1963) and “Masculin Féminin” (1966) further solidified her reputation as a cinematic luminary and muse of the French New Wave. Her magnetic screen presence and naturalistic acting style captivated audiences and critics alike, earning her accolades and admiration from around the world.

Beyond her achievements on screen, Brigitte Bardot’s personal life and outspoken activism also garnered attention and controversy. A vocal advocate for animal rights and environmental conservation, Bardot used her platform to raise awareness about issues close to her heart and to champion causes she believed in.

Later Years and Legacy:

As the 1960s drew to a close, Brigitte Bardot began to retreat from the spotlight, preferring to focus on her personal life and her growing menagerie of animals. Despite her early retirement from acting, Bardot’s influence and legacy endure to this day, inspiring generations of performers, artists, and activists around the world.

In conclusion, Brigitte Bardot’s impact on the world of cinema and popular culture is undeniable. With her unparalleled beauty, magnetic charisma, and fearless approach to her craft, she transcended the confines of her time and left an indelible mark on the history of film. As we celebrate her life and legacy, we honor Brigitte Bardot as the quintessential French bombshell of the 60s, a true icon of beauty, glamour, and liberation whose influence continues to resonate with audiences around the world.

Categories
Entertainment & Arts

Sophia Loren: From Italy to International Stardom

Introduction:

Sophia Loren, born Sofia Villani Scicolone on September 20, 1934, in Rome, Italy, is one of the most celebrated actresses in the history of cinema. With her striking beauty, undeniable talent, and magnetic screen presence, Loren rose from humble beginnings to become a global icon of beauty and sophistication. Throughout her illustrious career, she captivated audiences with her memorable performances, earning critical acclaim and numerous accolades along the way. In this extensive exploration, we delve into the life, career, and enduring legacy of Sophia Loren, tracing her journey from Italy to international stardom.

Early Life and Career Beginnings:

Sophia Loren was born into poverty in the Ponte neighborhood of Rome, Italy, during a tumultuous period marked by economic hardship and political instability. Raised by her single mother, Loren endured a challenging childhood, but her innate talent and determination soon set her on a path to success.

At the age of 14, Loren entered a beauty pageant, where she caught the eye of film producer Carlo Ponti. Recognizing her potential, Ponti offered to mentor her and help launch her acting career. Loren made her film debut in 1950 with a small role in the Italian film “Quo Vadis, Baby?,” but it was her performance in Vittorio De Sica’s “The Gold of Naples” (1954) that garnered attention and established her as a rising star.

Rise to International Stardom:

In the late 1950s, Sophia Loren’s star began to ascend on the international stage, thanks to a series of acclaimed performances in both Italian and Hollywood productions. Her breakout role came in 1957 with “The Pride and the Passion,” opposite Cary Grant and Frank Sinatra, which catapulted her to international fame and earned her widespread acclaim.

Loren’s talent and versatility were further showcased in films such as “Houseboat” (1958), “It Started in Naples” (1960), and “Two Women” (1960), the latter of which earned her the Academy Award for Best Actress, making her the first actor to win an Oscar for a foreign-language performance.

Throughout the 1960s, Sophia Loren solidified her status as an international superstar with a string of successful films and collaborations with acclaimed directors such as De Sica, Marcello Mastroianni, and Charlie Chaplin. Her magnetic screen presence, combined with her sultry beauty and undeniable charisma, made her a favorite among audiences and critics alike.

Later Career and Legacy:

In the decades that followed, Sophia Loren continued to work prolifically in film and television, earning numerous awards and accolades for her performances. Despite the challenges of aging in an industry obsessed with youth and beauty, Loren remained a revered and respected figure, admired for her talent, grace, and enduring beauty.

Beyond her achievements on screen, Loren’s legacy extends to her advocacy work and philanthropic endeavors. Throughout her life, she has been a passionate advocate for causes such as children’s rights, animal welfare, and environmental conservation, using her platform to make a positive impact on the world.

In conclusion, Sophia Loren’s journey from humble beginnings in Italy to international stardom is a testament to her talent, resilience, and indomitable spirit. With her unparalleled beauty, formidable talent, and unwavering determination, she transcended cultural barriers and captivated audiences around the world, leaving an indelible mark on the history of cinema. As we celebrate her life and legacy, we honor Sophia Loren as a true icon of beauty, grace, and cinematic excellence, whose legacy will continue to inspire and enchant audiences for generations to come.

Categories
Entertainment & Arts

Elizabeth Taylor: The Jewel of Hollywood in the 60s

Introduction:

In the glittering realm of Hollywood’s golden age, few stars shone as brightly as Elizabeth Taylor. Renowned for her mesmerizing beauty, undeniable talent, and captivating screen presence, Taylor captivated audiences around the world and left an indelible mark on the silver screen. Throughout the 1960s, she dazzled audiences with her iconic performances, glamorous persona, and tumultuous personal life, solidifying her status as the jewel of Hollywood. In this extensive exploration, we delve into the life, career, and enduring legacy of Elizabeth Taylor during the vibrant and tumultuous decade of the 1960s.

Early Life and Rise to Stardom:

Elizabeth Taylor was born on February 27, 1932, in Hampstead, London, to American parents. Raised in the spotlight from a young age, Taylor made her film debut at the tender age of ten in the 1942 comedy “There’s One Born Every Minute.” However, it was her breakthrough performance in “National Velvet” (1944) that catapulted her to stardom and established her as one of Hollywood’s brightest young talents.

Throughout the 1950s, Taylor continued to rise to prominence with acclaimed performances in films such as “A Place in the Sun” (1951), “Giant” (1956), and “Cat on a Hot Tin Roof” (1958), earning critical acclaim and multiple Academy Award nominations along the way.

The 1960s: A Decade of Triumph and Turmoil:

As the 1960s dawned, Elizabeth Taylor found herself at the peak of her powers, both professionally and personally. In 1960, she delivered a tour de force performance in “Butterfield 8,” for which she won her first Academy Award for Best Actress. Her portrayal of the troubled call girl Gloria Wandrous showcased her range as an actress and solidified her status as one of Hollywood’s leading ladies.

Throughout the decade, Taylor continued to deliver memorable performances in a diverse array of films, including “Cleopatra” (1963), “Who’s Afraid of Virginia Woolf?” (1966), and “The Taming of the Shrew” (1967). Her portrayal of the tempestuous Martha in “Who’s Afraid of Virginia Woolf?” earned her a second Academy Award for Best Actress and further cemented her reputation as one of the finest actresses of her generation.

Beyond her achievements on screen, Elizabeth Taylor’s personal life captivated the public’s imagination and garnered headlines around the world. Her highly publicized marriages, including her tumultuous relationship with Richard Burton, made her a tabloid sensation and ensured that she remained a fixture in the public eye throughout the decade.

Later Years and Legacy:

In the years that followed, Elizabeth Taylor continued to work sporadically in film and television, though her output decreased as she focused on her philanthropic endeavors and personal life. Despite battling health issues and personal challenges, she remained a beloved and revered figure in Hollywood until her passing on March 23, 2011.

Elizabeth Taylor’s legacy endures as a testament to her talent, beauty, and indomitable spirit. Her contributions to film, philanthropy, and popular culture have left an indelible mark on the world and continue to inspire generations of artists, activists, and admirers around the globe.

In conclusion, Elizabeth Taylor’s journey from child star to Hollywood icon is a remarkable tale of talent, resilience, and perseverance. Through her iconic performances, glamorous persona, and tireless advocacy, she became the epitome of Hollywood royalty and a symbol of enduring beauty and grace. As we celebrate her life and legacy, we honor Elizabeth Taylor as the jewel of Hollywood in the 60s, a true legend whose brilliance continues to shine brightly in the hearts and minds of audiences everywhere.

Categories
Entertainment & Arts

Audrey Hepburn: Grace and Elegance on the Silver Screen

Introduction:

In the golden age of Hollywood, few stars radiated the same aura of grace, elegance, and charm as Audrey Hepburn. Born Audrey Kathleen Ruston on May 4, 1929, in Brussels, Belgium, Hepburn transcended her humble beginnings to become one of the most beloved and iconic actresses of all time. With her delicate features, impeccable style, and timeless sophistication, she captivated audiences around the world and left an indelible mark on the history of cinema. In this comprehensive exploration, we delve into the life, career, and enduring legacy of Audrey Hepburn, the epitome of grace and elegance on the silver screen.

Early Life and Career Beginnings:

Audrey Hepburn’s journey to stardom was as enchanting as any Hollywood fairy tale. Born into a privileged yet tumultuous family, Hepburn endured the hardships of World War II before finding her calling in the world of entertainment. Trained as a ballet dancer in her youth, she honed her craft on the stages of London’s West End before transitioning to film.

Hepburn’s breakthrough came in 1953 when she starred in William Wyler’s romantic comedy “Roman Holiday” opposite Gregory Peck. Her luminous performance as Princess Ann earned her an Academy Award for Best Actress, catapulting her to international fame and establishing her as a leading lady to watch.

The 1960s: A Decade of Iconic Roles and Enduring Style:

As the 1960s dawned, Audrey Hepburn was at the peak of her powers, both as an actress and a fashion icon. Collaborating with acclaimed directors such as Billy Wilder, Stanley Donen, and Blake Edwards, she showcased her versatility and range in a series of iconic roles that cemented her status as a cinematic legend.

In films such as “Breakfast at Tiffany’s” (1961), “Charade” (1963), and “My Fair Lady” (1964), Hepburn captivated audiences with her wit, charm, and undeniable presence. Whether portraying the quintessential New York socialite Holly Golightly or the lovable flower girl Eliza Doolittle, she brought warmth, intelligence, and humanity to every role she inhabited.

Beyond her acting talents, Audrey Hepburn was revered for her impeccable sense of style and fashion. With her gamine haircut, Givenchy wardrobe, and effortless chic, she became a muse to designers and photographers alike, epitomizing the epitome of elegance and sophistication.

Later Years and Legacy:

In the latter years of her life, Audrey Hepburn devoted herself to humanitarian causes, serving as a Goodwill Ambassador for UNICEF and advocating for children’s rights around the world. Despite battling personal challenges and health issues, she remained dedicated to her philanthropic work until her passing.

Audrey Hepburn’s legacy endures as a symbol of timeless beauty, grace, and humanitarianism. Her influence on fashion, film, and popular culture remains unparalleled, inspiring generations of women to embrace their individuality and pursue their passions with grace and dignity.

In conclusion, Audrey Hepburn’s legacy as a cinematic icon and humanitarian transcends the boundaries of time and space. From her humble beginnings in Belgium to her meteoric rise to stardom in Hollywood, she left an indelible mark on the world and continues to enchant audiences with her timeless elegance and timeless charm. As we celebrate her life and legacy, we honor Audrey Hepburn as the epitome of grace and elegance on the silver screen, a true icon of the 20th century.

Categories
Entertainment & Arts

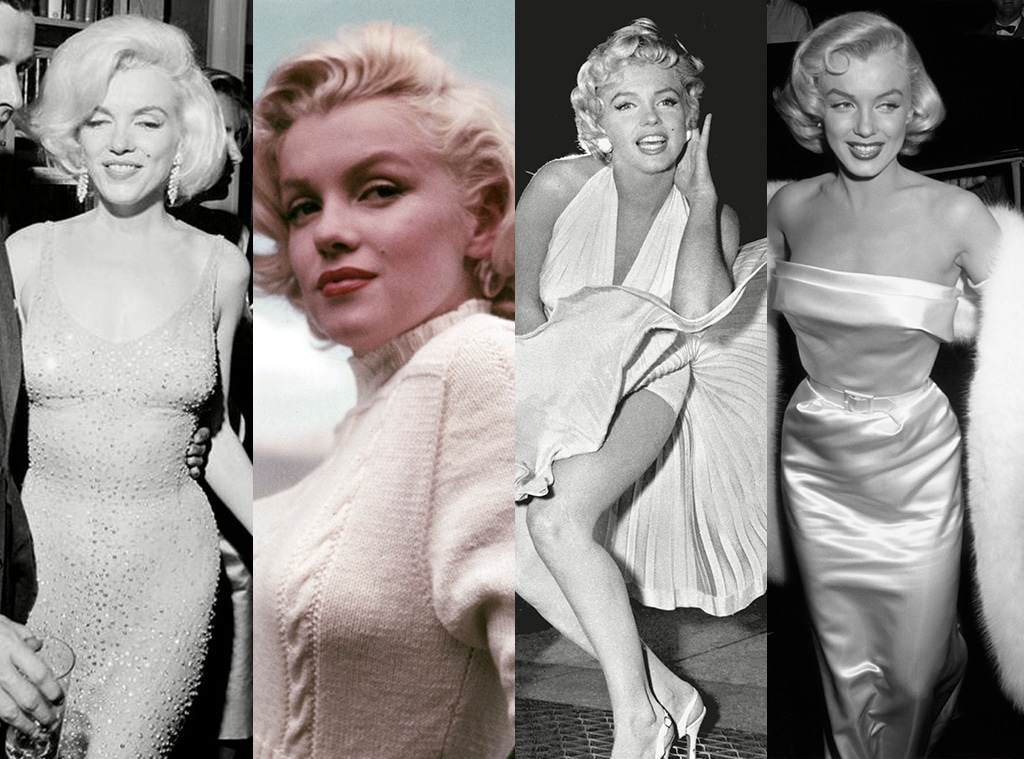
Marilyn Monroe: A Glittering Icon of the 60s

Introduction:

In the annals of Hollywood history, few names evoke the same aura of glamour, allure, and mystique as Marilyn Monroe. Born Norma Jeane Mortenson on June 1, 1926, in Los Angeles, California, Monroe transcended her humble beginnings to become one of the most iconic figures of the 20th century. With her platinum blonde locks, hourglass figure, and captivating on-screen presence, she captured the hearts of audiences worldwide and solidified her status as a cultural icon. In this comprehensive exploration, we delve into the life, career, and enduring legacy of Marilyn Monroe during the vibrant and tumultuous decade of the 1960s.

Early Life and Career Beginnings:

Marilyn Monroe’s journey to stardom was fraught with hardship and adversity. Raised in foster homes and orphanages, she endured a tumultuous childhood marked by instability and neglect. However, Monroe found solace and escape in the world of cinema, idolizing screen sirens such as Jean Harlow and dreaming of a life on the silver screen.

Monroe’s breakthrough came in the early 1950s when she signed a contract with 20th Century Fox and adopted the stage name Marilyn Monroe. Her star-making performance in “Gentlemen Prefer Blondes” (1953) catapulted her to fame, showcasing her comedic timing, seductive charm, and undeniable charisma. Throughout the 1950s, Monroe solidified her status as a sex symbol and leading lady with iconic roles in films such as “Some Like It Hot” (1959) and “The Seven Year Itch” (1955).

The 1960s: A Decade of Transformation:

As the 1960s dawned, Marilyn Monroe found herself at a crossroads in both her personal and professional life. Despite her enduring popularity and box office success, she struggled with the pressures of fame, insecurities about her talent, and tumultuous relationships with high-profile figures such as Joe DiMaggio and Arthur Miller.

Nevertheless, Monroe continued to captivate audiences with her performances, earning critical acclaim for her dramatic turn in “The Misfits” (1961), alongside Clark Gable and Montgomery Clift. Despite the film’s commercial failure, Monroe’s portrayal of a troubled woman searching for meaning resonated with audiences and showcased her depth as an actress.

Tragically, Marilyn Monroe’s life was cut short on August 5, 1962, at the age of 36, when she was found dead in her Brentwood home. Her death was officially ruled as a probable suicide, though conspiracy theories and speculation have persisted over the decades.

Enduring Legacy:

Despite her untimely passing, Marilyn Monroe’s legacy endures as a symbol of beauty, sensuality, and vulnerability. Her image continues to adorn posters, magazines, and memorabilia, captivating new generations of fans with her timeless allure.

Moreover, Monroe’s impact extends far beyond the realm of entertainment. As a cultural icon and feminist icon, she challenged societal norms and stereotypes, advocating for greater autonomy and recognition for women in Hollywood and beyond. Her influence on fashion, art, and popular culture remains indelible, inspiring countless artists, musicians, and filmmakers to this day.

In conclusion, Marilyn Monroe’s journey from a troubled young woman to a global superstar is a testament to the power of resilience, talent, and perseverance. Despite the challenges she faced, Monroe left an indelible mark on the world of entertainment and continues to shine as a beacon of glamour, beauty, and eternal mystique in the collective imagination of society. As we reflect on her life and legacy, we celebrate Marilyn Monroe as a glittering icon of the 60s and a timeless symbol of feminine grace and allure.

Categories
Science

Mastering Spectrophotometry: A Comprehensive Guide to Using a Spectrophotometer

Introduction: Spectrophotometry is a powerful analytical technique used in various scientific disciplines to measure the absorption or transmission of light by a sample. Whether you’re a student learning the basics of spectroscopy or a researcher conducting advanced experiments, understanding how to use a spectrophotometer is essential for quantitative analysis and characterization of substances. In this extensive guide, we’ll explore the step-by-step process of using a spectrophotometer, covering everything from instrument setup and calibration to sample preparation and data analysis, with practical tips and insights along the way.

Part 1: Understanding Spectrophotometry and Principles of Light Absorption

  1. Introduction to Spectrophotometry: Spectrophotometry is a technique used to measure the interaction between electromagnetic radiation (light) and matter. It involves analyzing the amount of light absorbed or transmitted by a sample at different wavelengths.
  2. Principles of Light Absorption: Light absorption occurs when photons of specific wavelengths are absorbed by molecules, causing electronic transitions or vibrational excitations. The extent of absorption depends on the concentration and nature of the absorbing species.

Part 2: Components and Operation of a Spectrophotometer

  1. Basic Components of a Spectrophotometer: Familiarize yourself with the main components of a spectrophotometer, including the light source, monochromator, sample holder, detector, and display/interface. Understand the function of each component in the measurement process.
  2. Operating Modes: Spectrophotometers can operate in various modes, including absorbance, transmittance, and concentration modes. Choose the appropriate mode for your experiment based on the type of analysis and the properties of the sample.

Part 3: Instrument Setup and Calibration

  1. Instrument Setup: Set up the spectrophotometer according to the manufacturer’s instructions, ensuring that all components are properly connected and aligned. Calibrate the instrument if necessary to ensure accurate and reliable measurements.
  2. Wavelength Selection: Select the appropriate wavelength range and resolution for your experiment based on the absorption characteristics of the sample. Use the monochromator or wavelength selector to adjust the wavelength settings.

Part 4: Sample Preparation and Measurement

  1. Preparing the Sample: Prepare the sample for analysis according to the specific requirements of your experiment. Ensure that the sample is homogeneous, free from contaminants, and compatible with the measurement mode (e.g., liquid samples for transmission measurements).
  2. Loading the Sample: Place the sample in the appropriate sample holder or cuvette, ensuring that it covers the optical path evenly. Use a clean cuvette without scratches or defects to minimize interference with the measurement.
  3. Taking Measurements: Initiate the measurement process by selecting the desired measurement mode (e.g., absorbance or transmittance) and setting the wavelength and other parameters. Record the baseline measurement using a blank sample (e.g., solvent) before analyzing the sample of interest.

Part 5: Data Analysis and Interpretation

  1. Recording Measurements: Record the absorbance or transmittance values obtained from the spectrophotometer for each sample at the specified wavelength(s). Take multiple measurements and calculate the average to improve accuracy and precision.
  2. Calculating Concentrations: Use the Beer-Lambert Law (A = εlc) to calculate the concentration of the analyte in the sample based on the absorbance (A), molar absorptivity (ε), path length (l), and concentration (c). Apply appropriate corrections and conversions as needed.

Part 6: Troubleshooting and Optimization

  1. Quality Control and Validation: Perform regular quality control checks and validation experiments to ensure the accuracy and reliability of spectrophotometric measurements. Use certified reference materials and standard operating procedures for calibration and verification.
  2. Optimizing Measurement Conditions: Optimize measurement conditions, such as wavelength range, path length, and sample volume, to maximize sensitivity and signal-to-noise ratio. Minimize sources of interference, such as scattering or stray light, to improve measurement accuracy.

Conclusion

Using a spectrophotometer is a versatile and powerful technique for quantitative analysis and characterization of substances in various scientific disciplines. By following the comprehensive guide outlined above, you’ll be equipped with the knowledge and skills to use a spectrophotometer effectively and accurately. Remember to carefully prepare samples, calibrate the instrument, and analyze data systematically to obtain meaningful results. With practice and proficiency, you can harness the capabilities of spectrophotometry to advance research, solve problems, and deepen our understanding of the natural world.

Categories
Science

Mastering Chemical Equations: A Comprehensive Guide to Balancing Chemical Equations

Introduction: Balancing chemical equations is a fundamental skill in chemistry that allows scientists to describe chemical reactions accurately. Whether you’re a student learning the basics of chemistry or a seasoned researcher analyzing complex reactions, understanding how to balance chemical equations is essential for predicting reaction outcomes and understanding chemical behavior. In this extensive guide, we’ll explore the step-by-step process of balancing chemical equations, covering everything from identifying reactants and products to applying the principles of conservation of mass and charge, with practical tips and insights along the way.

Part 1: Understanding Chemical Equations and Stoichiometry

  1. Introduction to Chemical Equations: Chemical equations are symbolic representations of chemical reactions, showing the reactants on the left side and the products on the right side. Each chemical species is represented by its chemical formula, and the coefficients indicate the relative amounts of reactants and products.
  2. Stoichiometry Basics: Stoichiometry is the branch of chemistry that deals with the quantitative relationships between reactants and products in chemical reactions. It involves balancing equations, determining reaction stoichiometry, and calculating reactant and product amounts.

Part 2: Identifying Reactants and Products

  1. Recognizing Chemical Species: Identify the chemical species involved in the reaction, including reactants and products. Determine the chemical formulas of each species based on their elemental composition.
  2. Writing Chemical Equations: Write the chemical equation for the reaction, representing the reactants on the left side and the products on the right side. Ensure that the chemical formulas are correct and balanced, with appropriate subscripts and coefficients.

Part 3: Applying Conservation Principles

  1. Conservation of Mass: Balancing chemical equations involves applying the principle of conservation of mass, which states that mass is neither created nor destroyed in a chemical reaction. The total mass of reactants must equal the total mass of products.
  2. Conservation of Charge: In addition to mass, chemical equations must also satisfy the principle of conservation of charge. The total charge of reactants must equal the total charge of products, accounting for the transfer of electrons in ionic reactions.

Part 4: Balancing Chemical Equations

  1. Start with the Most Complex Compound: Begin balancing the equation by adjusting coefficients for the most complex compound or species in the reaction. Balance elements that appear in only one reactant and one product first.
  2. Adjusting Coefficients: Use coefficients to balance the number of atoms of each element on both sides of the equation. Start with elements that appear in multiple compounds and balance them one at a time, ensuring that the total number of atoms is equal on both sides.
  3. Using Trial and Error: Experiment with different coefficients to achieve balance in the equation. Adjust coefficients incrementally and systematically, checking the balance of each element after each adjustment.

Part 5: Verifying and Refining

  1. Check for Balance: Verify that the equation is balanced by counting the number of atoms of each element on both sides. Ensure that the total mass and charge are conserved and that all coefficients are in the simplest whole-number ratio.
  2. Refine as Needed: Refine the coefficients further if necessary to achieve the simplest and most balanced equation possible. Use common multiples to simplify coefficients and ensure that the equation is clear and concise.

Part 6: Practice and Application

  1. Practice Problems: Reinforce your understanding of balancing chemical equations by practicing with a variety of problems and reactions. Start with simple reactions and gradually progress to more complex scenarios.
  2. Real-World Applications: Apply your knowledge of balancing chemical equations to real-world scenarios, such as industrial chemical processes, environmental reactions, and biological pathways. Analyze reaction stoichiometry and predict reaction outcomes based on balanced equations.

Conclusion

Balancing chemical equations is a fundamental skill in chemistry that requires practice, patience, and attention to detail. By following the comprehensive guide outlined above, you’ll be equipped with the knowledge and techniques to balance chemical equations effectively and accurately. Remember to apply the principles of conservation of mass and charge, start with the most complex compounds, and refine coefficients systematically to achieve balance. With dedication and proficiency, you can master the art of balancing chemical equations and gain a deeper understanding of chemical reactions and their significance in the world around us.

Categories
Science

Mastering Titration: A Comprehensive Guide to Performing Titration Experiments

Introduction: Titration is a fundamental technique used in chemistry to determine the concentration of a substance in a solution. Whether you’re a student, researcher, or professional chemist, understanding how to perform titration accurately is essential for conducting precise and reliable experiments. In this extensive guide, we’ll explore the step-by-step process of performing titration experiments, covering everything from preparing solutions and choosing indicators to conducting the titration and calculating results, with practical tips and insights along the way.

Part 1: Understanding Titration and Its Principles

  1. Introduction to Titration: Titration is a quantitative analytical technique used to determine the concentration of a known substance (the analyte) in a solution by reacting it with a known volume and concentration of another substance (the titrant).
  2. Principles of Titration: Titration relies on the principle of stoichiometry, where the reaction between the analyte and titrant occurs in a precise and controlled manner. The endpoint of the titration is determined by a visual or instrumental indicator, signaling the completion of the reaction.

Part 2: Preparing Solutions and Equipment

  1. Preparing the Analyte Solution: Start by preparing the analyte solution, which contains the substance whose concentration you want to determine. Measure and dilute the analyte to the appropriate concentration using a volumetric flask and deionized water.
  2. Preparing the Titrant Solution: Prepare the titrant solution, which contains the substance of known concentration that will react with the analyte. Use a standardized solution of the titrant, carefully measured and diluted as needed.
  3. Setting Up Equipment: Set up the necessary equipment for titration, including burettes, pipettes, Erlenmeyer flasks, and a magnetic stirrer (if applicable). Rinse all glassware with the appropriate solvents to remove any contaminants.

Part 3: Choosing Indicators and Endpoint Detection

  1. Selecting an Indicator: Choose a suitable indicator based on the nature of the reaction and the pH range of the titration. Common indicators include phenolphthalein, methyl orange, and bromothymol blue, each with its own color change at a specific pH.
  2. Determining the Endpoint: Decide on the endpoint of the titration, which is the point at which the reaction between the analyte and titrant is complete. Use visual cues, such as color changes in the indicator solution, or instrumental methods, such as pH meters or conductivity meters, to detect the endpoint.

Part 4: Conducting the Titration

  1. Filling the Burette: Fill the burette with the titrant solution, taking care to remove any air bubbles and ensure the meniscus is at the zero mark. Record the initial volume of the titrant.
  2. Adding the Indicator: Add a few drops of the selected indicator to the analyte solution in the Erlenmeyer flask. Swirl the flask gently to mix the solutions and ensure uniform color distribution.
  3. Titration Process: Begin the titration by slowly adding the titrant solution from the burette to the analyte solution in the Erlenmeyer flask, while swirling the flask continuously. Observe any changes in color or other indicators of the endpoint.
  4. Reaching the Endpoint: Continue adding the titrant solution drop by drop as you approach the expected endpoint. Slow down the addition of titrant as you get closer to the endpoint to avoid overshooting.
  5. Recording the Final Volume: Stop the titration when the endpoint is reached, indicated by a persistent color change or other predetermined criteria. Record the final volume of the titrant solution in the burette.

Part 5: Calculating Results and Analyzing Data

  1. Calculating the Concentration: Use the volume and concentration of the titrant solution, as well as the stoichiometry of the reaction, to calculate the concentration of the analyte solution. Apply the appropriate formula based on the reaction equation.
  2. Analyzing Data and Errors: Analyze the data obtained from the titration experiment, including any sources of error or uncertainty. Consider factors such as burette reading errors, indicator choice, and experimental conditions that may affect the accuracy of the results.

Part 6: Troubleshooting and Optimization

  1. Troubleshooting Common Issues: Identify and troubleshoot common issues that may arise during titration experiments, such as titrant contamination, equipment calibration errors, or incorrect indicator selection. Take corrective actions to address any issues and improve the reliability of your results.
  2. Optimizing Experimental Conditions: Optimize experimental conditions, such as temperature, pH, and reaction kinetics, to ensure reproducibility and accuracy in titration experiments. Conduct control experiments and validation studies to verify the reliability of your results.

Conclusion

Performing titration experiments is a fundamental skill in chemistry that requires careful planning, precision, and attention to detail. By following the comprehensive guide outlined above, you’ll be equipped with the knowledge and techniques to conduct titration experiments effectively and obtain reliable results. Remember to practice proper laboratory techniques, adhere to safety protocols, and consult reference materials and experienced professionals when needed. With dedication and proficiency, you can master the art of titration and contribute to the advancement of scientific knowledge in your field.

Categories
Science

Mastering Microscopy: A Comprehensive Guide to Using a Microscope

Introduction: Microscopes are invaluable tools used in scientific research, education, and various fields of industry for observing and analyzing microscopic specimens. Whether you’re a student, researcher, or professional, understanding how to use a microscope effectively is essential for exploring the intricate details of the microscopic world. In this extensive guide, we’ll delve into the step-by-step process of using a microscope, covering everything from setting up the microscope to adjusting magnification and focusing techniques, with practical tips and insights along the way.

Part 1: Understanding Microscopes and Their Components

  1. Types of Microscopes: Familiarize yourself with the different types of microscopes, including light microscopes, electron microscopes, and stereo microscopes. Understand their principles of operation and applications in various fields.
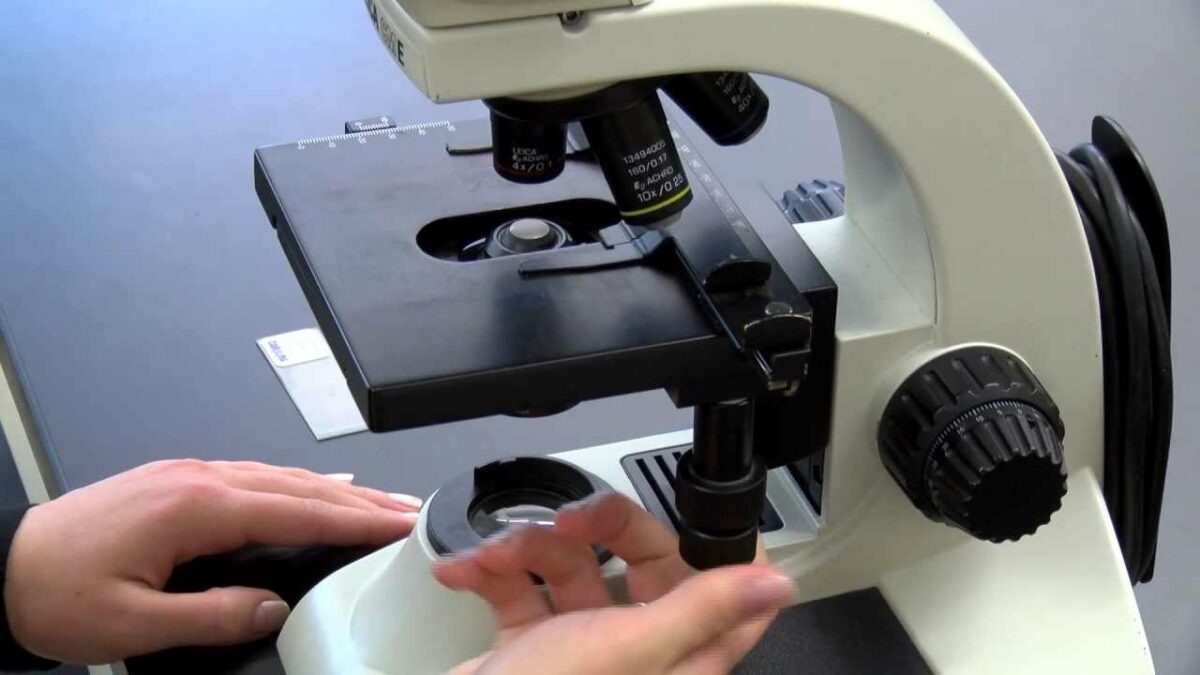
  2. Components of a Microscope: Learn about the essential components of a microscope, such as the eyepiece, objective lenses, stage, condenser, and light source. Understand the function of each component and how they work together to magnify and illuminate specimens.

Part 2: Setting Up the Microscope

  1. Preparing the Workspace: Choose a clean and well-lit workspace to set up your microscope. Ensure that you have access to a stable surface and adequate lighting for observing specimens.
  2. Assembling the Microscope: Follow the manufacturer’s instructions to assemble the microscope, including attaching the eyepieces, objective lenses, and stage. Ensure that all components are securely fastened and aligned properly.

Part 3: Adjusting Magnification and Illumination

  1. Selecting the Objective Lens: Choose the appropriate objective lens based on the level of magnification required for your specimen. Start with the lowest magnification objective and gradually increase magnification as needed.
  2. Adjusting the Focus: Use the coarse and fine focus knobs to adjust the focus of the microscope. Start with the coarse focus knob to roughly focus on the specimen, then use the fine focus knob for precise adjustments.
  3. Optimizing Illumination: Adjust the intensity and angle of the light source to optimize illumination of the specimen. Use the condenser and diaphragm controls to control the amount and direction of light passing through the specimen.

Part 4: Observing and Analyzing Specimens

  1. Placing the Specimen: Carefully place the specimen on the microscope stage, ensuring that it is centered and securely mounted. Use clips or slide holders to hold the specimen in place.
  2. Exploring the Specimen: Use the microscope controls to move the stage and adjust the position of the specimen. Explore different areas of the specimen by scanning horizontally and vertically.
  3. Recording Observations: Take notes and record observations of the specimen, including its appearance, structure, and any notable features or characteristics. Use a camera attachment or digital imaging software to capture images of the specimen for documentation and analysis.

Part 5: Maintenance and Care

  1. Cleaning and Maintenance: Regularly clean and maintain your microscope to ensure optimal performance and longevity. Use lens paper and cleaning solutions to remove dust and debris from the lenses and other components.
  2. Storage and Protection: Store your microscope in a clean and dry environment, away from dust, moisture, and direct sunlight. Cover the microscope with a dust cover when not in use to protect it from damage and contamination.

Conclusion

Using a microscope is a skill that requires patience, precision, and attention to detail. By following the comprehensive guide outlined above, you’ll be equipped with the knowledge and techniques to use a microscope effectively for observing and analyzing specimens in various fields of study. Remember to practice regularly, familiarize yourself with the specific features and controls of your microscope, and seek guidance from experienced users or instructors when needed. With dedication and proficiency, you can unlock the fascinating world of microscopy and uncover hidden insights and discoveries in the microscopic realm.

Categories
Science

Crafting Scholarly Insights: A Comprehensive Guide to Writing a Scientific Research Paper

Introduction: Writing a scientific research paper is a rigorous and methodical process that requires careful planning, thorough research, and precise communication of findings. Whether you’re a seasoned researcher or a novice scholar, mastering the art of writing a research paper is essential for contributing to the advancement of knowledge in your field. In this extensive guide, we’ll explore the step-by-step process of writing a scientific research paper, covering everything from selecting a topic and conducting research to structuring your paper and presenting your findings, with practical tips and academic insights along the way.

Part 1: Selecting a Topic and Defining Objectives

  1. Choosing a Research Topic: Start by identifying a topic that interests you and aligns with your expertise and academic goals. Consider current trends, gaps in existing literature, and potential research questions or hypotheses that warrant investigation.
  2. Defining Research Objectives: Clearly articulate the objectives and aims of your research, outlining the specific questions you intend to address and the hypotheses you aim to test. Ensure that your research objectives are achievable, relevant, and aligned with the scope of your study.

Part 2: Conducting Literature Review and Background Research

  1. Reviewing Existing Literature: Conduct a comprehensive review of existing literature and research related to your topic. Identify key theories, methodologies, and findings that inform your research and provide context for your study.
  2. Gathering Background Information: Gather background information and relevant data from various sources, including scholarly articles, books, journals, and online databases. Critically evaluate the credibility and reliability of sources to ensure the validity of your research.

Part 3: Formulating Hypotheses and Research Design

  1. Formulating Hypotheses: Based on your literature review and background research, formulate clear and testable hypotheses that address your research objectives. Ensure that your hypotheses are specific, measurable, and grounded in existing theory and evidence.
  2. Designing Research Methodology: Choose appropriate research methods and methodologies to test your hypotheses and collect data. Consider factors such as sample size, data collection techniques, and statistical analysis methods to ensure the rigor and validity of your research.

Part 4: Writing the Research Paper

  1. Structuring the Paper: Organize your research paper into distinct sections, including an introduction, literature review, methodology, results, discussion, and conclusion. Follow the guidelines and formatting requirements of your target journal or academic institution.
  2. Writing the Introduction: Introduce your research topic, objectives, and significance in the introduction section. Provide background information, review relevant literature, and clearly state the research questions or hypotheses that guide your study.
  3. Presenting Methodology and Results: Describe your research methodology in detail, including the study design, data collection procedures, and statistical analysis methods. Present your findings objectively and concisely in the results section, using tables, figures, and graphs to enhance clarity and comprehension.
  4. Analyzing and Discussing Results: Analyze your research findings in the discussion section, interpreting the implications and significance of your results in relation to your research objectives and hypotheses. Compare your findings with existing literature and discuss any limitations or constraints of your study.
  5. Concluding the Paper: Summarize the key findings and contributions of your research in the conclusion section. Revisit your research objectives and hypotheses, highlight the significance of your findings, and suggest avenues for future research or exploration.

Part 5: Revising and Refining the Paper

  1. Peer Review and Feedback: Seek feedback from peers, mentors, or colleagues on your research paper, soliciting constructive criticism and suggestions for improvement. Incorporate feedback and revisions to strengthen the clarity, coherence, and impact of your paper.
  2. Editing and Proofreading: Review your research paper for grammar, spelling, punctuation, and formatting errors. Ensure consistency in style, tone, and citation format throughout the paper. Consider using professional editing services or proofreading tools to enhance the quality of your writing.

Conclusion

Writing a scientific research paper is a challenging yet rewarding endeavor that requires diligence, precision, and clarity of thought. By following the comprehensive guide outlined above, you’ll be equipped with the knowledge and skills to navigate the complexities of the research process and communicate your findings effectively to the academic community. Remember to approach each stage of the research process with curiosity, rigor, and integrity, and strive to contribute meaningfully to the advancement of knowledge in your field. With dedication and perseverance, you can craft scholarly insights that inspire curiosity, spark dialogue, and drive innovation in your discipline.