Introduction: Titration is a fundamental technique used in chemistry to determine the concentration of a substance in a solution. Whether you’re a student, researcher, or professional chemist, understanding how to perform titration accurately is essential for conducting precise and reliable experiments. In this extensive guide, we’ll explore the step-by-step process of performing titration experiments, covering everything from preparing solutions and choosing indicators to conducting the titration and calculating results, with practical tips and insights along the way.
Part 1: Understanding Titration and Its Principles
- Introduction to Titration: Titration is a quantitative analytical technique used to determine the concentration of a known substance (the analyte) in a solution by reacting it with a known volume and concentration of another substance (the titrant).
- Principles of Titration: Titration relies on the principle of stoichiometry, where the reaction between the analyte and titrant occurs in a precise and controlled manner. The endpoint of the titration is determined by a visual or instrumental indicator, signaling the completion of the reaction.
Part 2: Preparing Solutions and Equipment
- Preparing the Analyte Solution: Start by preparing the analyte solution, which contains the substance whose concentration you want to determine. Measure and dilute the analyte to the appropriate concentration using a volumetric flask and deionized water.
- Preparing the Titrant Solution: Prepare the titrant solution, which contains the substance of known concentration that will react with the analyte. Use a standardized solution of the titrant, carefully measured and diluted as needed.
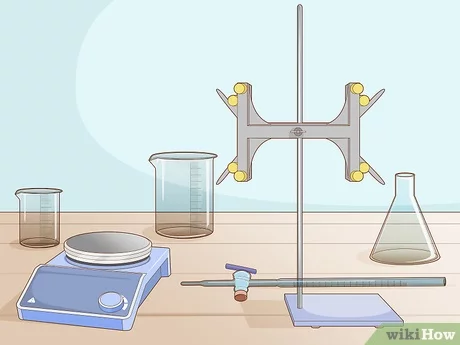
- Setting Up Equipment: Set up the necessary equipment for titration, including burettes, pipettes, Erlenmeyer flasks, and a magnetic stirrer (if applicable). Rinse all glassware with the appropriate solvents to remove any contaminants.
Part 3: Choosing Indicators and Endpoint Detection
- Selecting an Indicator: Choose a suitable indicator based on the nature of the reaction and the pH range of the titration. Common indicators include phenolphthalein, methyl orange, and bromothymol blue, each with its own color change at a specific pH.
- Determining the Endpoint: Decide on the endpoint of the titration, which is the point at which the reaction between the analyte and titrant is complete. Use visual cues, such as color changes in the indicator solution, or instrumental methods, such as pH meters or conductivity meters, to detect the endpoint.
Part 4: Conducting the Titration
- Filling the Burette: Fill the burette with the titrant solution, taking care to remove any air bubbles and ensure the meniscus is at the zero mark. Record the initial volume of the titrant.
- Adding the Indicator: Add a few drops of the selected indicator to the analyte solution in the Erlenmeyer flask. Swirl the flask gently to mix the solutions and ensure uniform color distribution.
- Titration Process: Begin the titration by slowly adding the titrant solution from the burette to the analyte solution in the Erlenmeyer flask, while swirling the flask continuously. Observe any changes in color or other indicators of the endpoint.
- Reaching the Endpoint: Continue adding the titrant solution drop by drop as you approach the expected endpoint. Slow down the addition of titrant as you get closer to the endpoint to avoid overshooting.
- Recording the Final Volume: Stop the titration when the endpoint is reached, indicated by a persistent color change or other predetermined criteria. Record the final volume of the titrant solution in the burette.
Part 5: Calculating Results and Analyzing Data
- Calculating the Concentration: Use the volume and concentration of the titrant solution, as well as the stoichiometry of the reaction, to calculate the concentration of the analyte solution. Apply the appropriate formula based on the reaction equation.
- Analyzing Data and Errors: Analyze the data obtained from the titration experiment, including any sources of error or uncertainty. Consider factors such as burette reading errors, indicator choice, and experimental conditions that may affect the accuracy of the results.
Part 6: Troubleshooting and Optimization
- Troubleshooting Common Issues: Identify and troubleshoot common issues that may arise during titration experiments, such as titrant contamination, equipment calibration errors, or incorrect indicator selection. Take corrective actions to address any issues and improve the reliability of your results.
- Optimizing Experimental Conditions: Optimize experimental conditions, such as temperature, pH, and reaction kinetics, to ensure reproducibility and accuracy in titration experiments. Conduct control experiments and validation studies to verify the reliability of your results.
Conclusion
Performing titration experiments is a fundamental skill in chemistry that requires careful planning, precision, and attention to detail. By following the comprehensive guide outlined above, you’ll be equipped with the knowledge and techniques to conduct titration experiments effectively and obtain reliable results. Remember to practice proper laboratory techniques, adhere to safety protocols, and consult reference materials and experienced professionals when needed. With dedication and proficiency, you can master the art of titration and contribute to the advancement of scientific knowledge in your field.