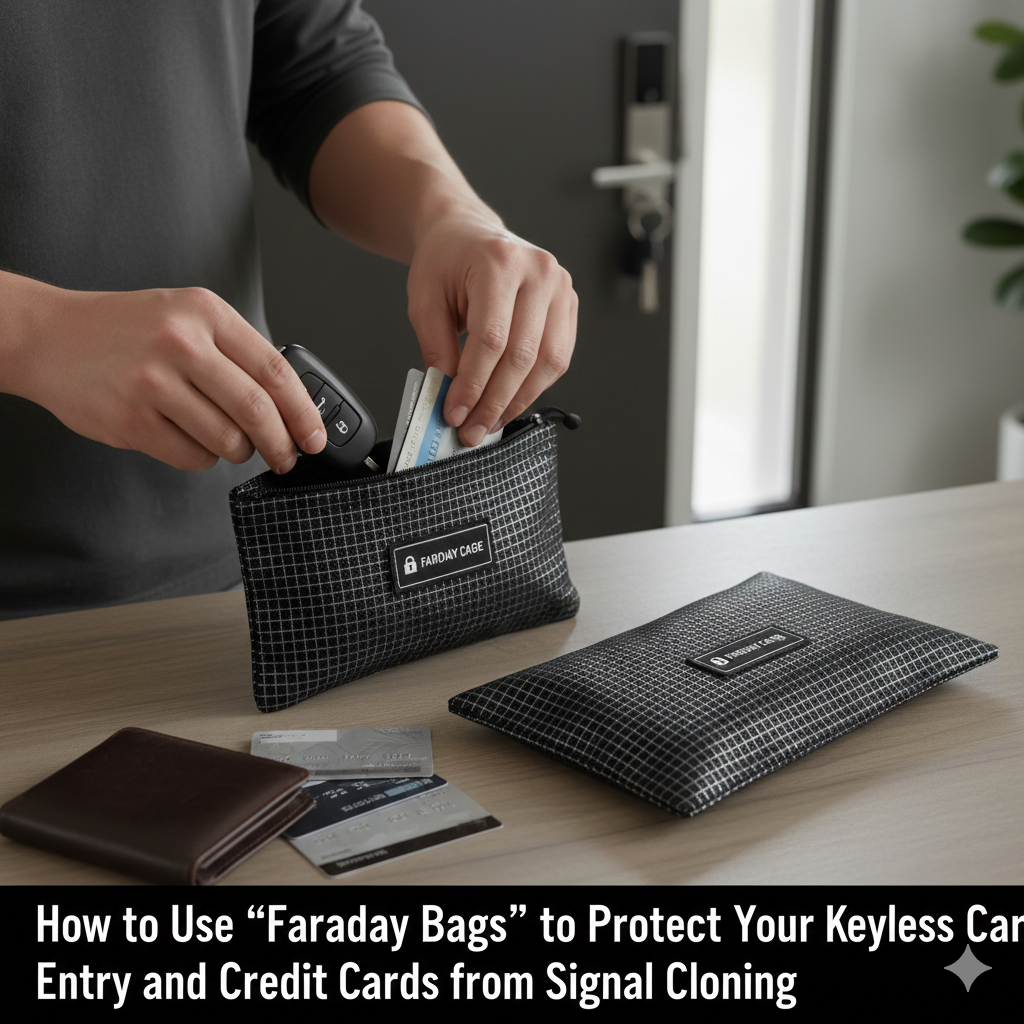
Categories
Business

How to Write a Business Plan

Writing a business plan is a crucial step for any entrepreneur or business owner looking to start a new venture, secure funding, or guide the growth of an existing business. A well-crafted business plan serves as a roadmap, outlining your business goals, strategies, market analysis, financial projections, and more. In this comprehensive guide, we will cover everything you need to know about how to write a business plan effectively.

Table of Contents

  1. Introduction to Writing a Business Plan
    • Importance of a Business Plan
    • Types of Business Plans
  2. Executive Summary
    • Overview of Your Business
    • Mission Statement
    • Key Objectives
  3. Business Description
    • Business Model
    • Products or Services Offered
    • Unique Selling Proposition (USP)
  4. Market Analysis
    • Industry Overview
    • Target Market Identification
    • Competitor Analysis
  5. Organization and Management
    • Legal Structure
    • Management Team Profiles
    • Organizational Structure
  6. Marketing and Sales Strategy
    • Marketing Plan
    • Sales Strategy
    • Pricing Strategy
  7. Product or Service Line
    • Detailed Description
    • Development and Production
    • Intellectual Property
  8. Funding Request
    • Financial Needs
    • Use of Funds
    • Financial Projections
  9. Appendix
    • Supporting Documents
    • Resumes
    • Legal Agreements
  10. Review and Revision
    • Feedback and Adjustments
    • Continuous Improvement
  11. Conclusion

1. Introduction to Writing a Business Plan

Importance of a Business Plan

A business plan is a foundational document that outlines the vision, mission, and strategies of a business. It serves multiple purposes:

  • Guiding Document: Provides a roadmap for the business’s future direction and growth.
  • Communication Tool: Communicates the business idea and strategy to stakeholders, including investors, partners, and employees.
  • Decision-Making Tool: Helps in making informed decisions based on market analysis and financial projections.

Types of Business Plans

  • Startup Business Plan: Used by entrepreneurs starting a new business to outline their business idea and strategies to attract investors or secure funding.
  • Internal Business Plan: Used for internal purposes to guide the operations and strategies of an existing business.
  • Strategic Business Plan: Focuses on long-term goals and strategies for growth and expansion.

2. Executive Summary

Overview of Your Business

  • Business Name: Name of the business and location.
  • Business Concept: Brief description of the business, its products/services, and market niche.
  • Business Objectives: Key goals and objectives of the business.

Mission Statement

  • Purpose: Core purpose and values of the business.
  • Vision: Long-term goals and aspirations.
  • Values: Ethical and cultural principles guiding the business.

Key Objectives

  • Short-Term Goals: Immediate milestones and objectives.
  • Long-Term Goals: Future aspirations and growth targets.

3. Business Description

Business Model

  • Description: Overview of how the business operates and generates revenue.
  • Revenue Streams: Sources of income and pricing strategy.

Products or Services Offered

  • Description: Detailed description of products/services offered.
  • Differentiation: Unique features or benefits compared to competitors.
  • Development Stage: Current status and future plans for product/service development.

Unique Selling Proposition (USP)

  • Value Proposition: What sets your business apart from competitors.
  • Customer Benefits: Benefits and advantages offered to customers.

4. Market Analysis

Industry Overview

  • Market Size: Size and scope of the industry.
  • Trends: Current trends and future growth projections.
  • Regulations: Regulatory environment affecting the industry.

Target Market Identification

  • Demographics: Profile of target customers (age, gender, income, etc.).
  • Needs and Preferences: Customer needs, preferences, and buying behavior.
  • Market Segmentation: Dividing the market into segments based on demographics, psychographics, or behavior.

Competitor Analysis

  • Direct Competitors: Identify main competitors and their strengths and weaknesses.
  • Competitive Advantage: Analysis of how your business will compete effectively.
  • Barriers to Entry: Potential challenges and barriers for new entrants.

5. Organization and Management

Legal Structure

  • Business Entity: Type of legal entity (sole proprietorship, partnership, LLC, corporation, etc.).
  • Ownership Structure: Details of ownership and shareholding.

Management Team Profiles

  • Key Personnel: Profiles of key management team members.
  • Roles and Responsibilities: Responsibilities and functions of each team member.
  • Skills and Experience: Relevant skills, qualifications, and industry experience.

Organizational Structure

  • Hierarchy: Organizational chart showing reporting relationships.
  • Departments: Functions and responsibilities of different departments (e.g., sales, marketing, operations).

6. Marketing and Sales Strategy

Marketing Plan

  • Marketing Goals: Goals and objectives of the marketing efforts.
  • Target Audience: Detailed description of the target audience.
  • Marketing Channels: Channels used to reach target customers (e.g., online marketing, social media, traditional advertising).
  • Promotional Strategies: Strategies for promoting products/services (e.g., promotions, discounts, partnerships).

Sales Strategy

  • Sales Goals: Sales targets and objectives.
  • Sales Tactics: Tactics and techniques used to generate sales (e.g., direct sales, partnerships, distribution channels).
  • Sales Forecast: Projected sales figures and growth expectations.

Pricing Strategy

  • Pricing Model: Pricing structure and strategy (e.g., cost-plus pricing, competitive pricing, value-based pricing).
  • Profit Margins: Expected profit margins and pricing adjustments.

7. Product or Service Line

Detailed Description

  • Product/Service Description: Detailed description of each product/service offered.
  • Features and Benefits: Key features, benefits, and uses.
  • Development Stage: Current stage of development and future plans.

Development and Production

  • Production Process: Process of producing goods or delivering services.
  • Supply Chain: Overview of suppliers and logistics.
  • Quality Control: Measures taken to ensure product/service quality.

Intellectual Property

  • IP Protection: Steps taken to protect intellectual property (e.g., patents, trademarks).
  • Licensing: Opportunities for licensing or franchising.

8. Funding Request

Financial Needs

  • Funding Requirements: Amount of funding needed and how funds will be used.
  • Investment Opportunity: Potential returns for investors.

Use of Funds

  • Allocation: Breakdown of how funds will be allocated (e.g., equipment purchase, marketing, working capital).
  • Financial Projections: Financial forecasts and expected ROI for investors.

9. Appendix

Supporting Documents

  • Resumes: Resumes of key team members.
  • Financial Statements: Balance sheet, income statement, cash flow statement.
  • Legal Agreements: Contracts, leases, licenses, and other legal documents.

10. Review and Revision

Feedback and Adjustments

  • Feedback: Seek feedback from stakeholders, advisors, and mentors.
  • Adjustments: Make necessary adjustments based on feedback and market conditions.
  • Continuous Improvement: Continuously update and revise the business plan as the business evolves.

11. Conclusion

Writing a business plan is a comprehensive process that requires careful research, analysis, and planning. A well-written business plan not only serves as a roadmap for your business but also demonstrates your commitment, vision, and preparedness to stakeholders. Whether you are starting a new business, seeking funding, or planning for growth, following the steps outlined in this guide will help you create a compelling and effective business plan. Regularly review and update your business plan to adapt to changing market conditions and achieve your business goals effectively.

Categories
Tech

How to Optimize Startup Programs

Optimizing startup programs is essential for improving your computer’s boot time and overall performance. When you start your computer, various programs and services may automatically launch in the background, which can slow down startup and consume system resources. This comprehensive guide will walk you through the step-by-step process of optimizing startup programs on Windows, macOS, and Linux systems, including how to manage startup items, prioritize essential programs, and enhance system performance effectively.

Understanding Startup Programs

What are Startup Programs?

Startup programs are applications, services, or processes that automatically launch when you start your computer. They can include essential system services, software updaters, drivers, and user-installed applications. While some startup programs are necessary for system functionality or convenience, others may be unnecessary and contribute to longer boot times and reduced system performance.

Impact of Excessive Startup Programs

  1. Slower Boot Times: Too many startup programs can increase the time it takes for your computer to start up and become usable.
  2. System Resource Usage: Startup programs running in the background can consume CPU, memory, and disk resources, affecting overall system performance.
  3. User Experience: Excessive startup programs can clutter the system tray, desktop, or taskbar, causing confusion and making it harder to manage active applications.

How to Optimize Startup Programs: Step-by-Step Guide

Step 1: Identify Startup Programs

  1. Windows
  • Task Manager:
    • Right-click on the taskbar and select “Task Manager” or press Ctrl + Shift + Esc to open Task Manager.
    • Go to the “Startup” tab to view a list of programs that launch automatically with Windows.
    • Review the list to identify programs that you may not need to start automatically.
  • Third-Party Software:
    • Use tools like CCleaner, Autoruns, or Sysinternals Suite to manage startup programs more comprehensively.
    • Download and install the software, launch it, and navigate to the startup section to view and manage startup items.
  1. macOS
  • System Preferences:
    • Go to the Apple menu > System Preferences > Users & Groups.
    • Click on your username and go to the “Login Items” tab to view programs that launch at startup.
    • Select unnecessary items and click the “-” button to remove them from startup.
  • Third-Party Software:
    • Use apps like CleanMyMac, AppCleaner, or Onyx to manage startup items and improve macOS startup performance.
    • Download and install the software, launch it, and navigate to the startup management section.
  1. Linux
  • System Settings:
    • Depending on your Linux distribution, startup programs may be managed through system settings or desktop environment preferences.
    • Open “Startup Applications” or similar settings in your desktop environment (e.g., GNOME, KDE) to view and manage startup items.
    • Disable unnecessary items by unchecking them or removing them from the startup list.
  • Terminal Commands:
    • Use commands like systemctl, update-rc.d, or modify systemd service files to control startup services and programs.
    • Consult distribution-specific documentation or online resources for detailed instructions on managing startup services in Linux.

Step 2: Determine Program Necessity

  1. System Services: Identify essential system services and drivers required for system stability and functionality.
  2. User Applications: Evaluate installed applications and consider whether they need to launch automatically at startup or can be opened manually when needed.

Step 3: Disable or Remove Unnecessary Startup Programs

  1. Windows
  • Task Manager:
    • In Task Manager’s “Startup” tab, right-click on unnecessary programs and select “Disable” to prevent them from launching at startup.
  • Third-Party Software:
    • Use third-party tools like CCleaner or Autoruns to manage startup items more comprehensively.
    • Launch the tool, navigate to the startup section, and disable or remove unnecessary startup programs.
  1. macOS
  • System Preferences:
    • Open “Users & Groups” in System Preferences, click on your username, and go to the “Login Items” tab.
    • Select unnecessary items and click the “-” button to remove them from the startup list.
  • Third-Party Software:
    • Use apps like CleanMyMac or AppCleaner to manage startup items on macOS.
    • Launch the app, navigate to the startup management section, and disable or remove unnecessary startup items.
  1. Linux
  • System Settings:
    • Open “Startup Applications” or similar settings in your desktop environment.
    • Disable unnecessary items by unchecking them or removing them from the startup list.
  • Terminal Commands:
    • Use terminal commands to manage startup services and programs in Linux.
    • Modify systemd service files or use tools like systemctl to disable or enable services as needed.

Step 4: Monitor and Test Startup Changes

  1. Restart Your Computer:
    • Restart your computer to apply changes and observe the impact on startup time and system performance.
  2. Check Task Manager or Activity Monitor:
    • After startup, check Task Manager (Windows) or Activity Monitor (macOS) to ensure that unnecessary programs are not running in the background.

Step 5: Automate Updates and Maintenance

  1. Schedule Updates: Regularly update operating system, drivers, and applications to ensure compatibility and security.
  2. Automate Maintenance Tasks: Use built-in or third-party tools to automate disk cleanup, defragmentation (Windows), or maintenance tasks (macOS).

Best Practices for Startup Optimization

  1. Prioritize Essentials: Keep essential system services and security software enabled for optimal system stability and protection.
  2. Regular Review: Periodically review and manage startup programs to adapt to changing needs and software installations.
  3. Monitor Performance: Use system monitoring tools to assess the impact of startup programs on overall system performance.
  4. Backup and Restore: Before making significant changes, create backups or restore points to revert changes if necessary.
  5. Educate Users: Train users on managing startup programs and the impact on system performance for better user experience.

Conclusion

Optimizing startup programs is essential for improving computer performance, reducing boot times, and ensuring efficient use of system resources. By following the steps outlined in this guide and using built-in tools or reputable third-party software, you can effectively manage and optimize startup programs on Windows, macOS, and Linux systems. Regularly review startup items, disable unnecessary programs, monitor system performance, and automate updates and maintenance tasks to maintain optimal system efficiency and user productivity. If unsure about any steps or encountering technical challenges, consult system documentation, seek assistance from IT professionals, or refer to online resources for additional guidance on startup program optimization.

Categories
Tech

How to check for malware

Checking for malware on your computer is crucial to ensure its security and protect your data from malicious threats. Malware, short for malicious software, includes viruses, worms, Trojans, ransomware, spyware, and adware, among others. This comprehensive guide will walk you through the step-by-step process of checking for malware on Windows, macOS, and Linux systems, using both built-in tools and reputable third-party software for effective detection and removal.

Understanding Malware

What is Malware?

Malware is any software intentionally designed to cause damage to a computer, server, client, or computer network. It can disrupt operations, steal sensitive information, gain unauthorized access to systems, and extort money from users.

Types of Malware

  1. Viruses: Programs that replicate themselves and spread to other computers or files, often causing damage.
  2. Worms: Self-replicating malware that spreads over networks without user intervention.
  3. Trojans: Malicious programs disguised as legitimate software to trick users into installing them, often leading to unauthorized access or data theft.
  4. Ransomware: Encrypts files on a computer and demands payment for decryption, often causing data loss.
  5. Spyware: Secretly gathers user information and activity without their consent, often for advertising or espionage purposes.
  6. Adware: Displays unwanted advertisements and may collect user data to deliver targeted ads.

Symptoms of Malware Infection

  • Slow Performance: Sluggish operation, long startup or shutdown times.
  • Pop-up Ads: Unexpected ads appearing, even when not browsing.
  • Unexplained Data Usage: Network activity when not actively using the internet.
  • Changed Browser Settings: Homepage, default search engine, or toolbar changes without user action.
  • Unusual Programs: Unknown programs appearing on the computer.
  • Missing Files: Important files disappearing or becoming inaccessible.

How to Check for Malware: Step-by-Step Guide

Step 1: Use Built-in Security Tools

1. Windows

  1. Windows Security (Windows 10 and 11):
    • Open Windows Security from Start menu or search bar.
    • Go to “Virus & threat protection” > “Quick scan” to scan for malware quickly.
    • Use “Full scan” for a more thorough check of all files and folders.
  2. Microsoft Defender Antivirus:
    • Open Microsoft Defender from Start menu or search bar.
    • Go to “Virus & threat protection” > “Scan options” > “Full scan” for comprehensive malware detection.

2. macOS

  1. Malware Removal Tool (macOS Catalina and later):
    • Open Finder and go to Applications > Utilities > Malware Removal Tool.
    • Click “Scan” to check for malware on your Mac.
  2. Gatekeeper (macOS Mojave and later):
    • Go to System Preferences > Security & Privacy.
    • Ensure “App Store and identified developers” is selected under “Allow apps downloaded from.”
    • Gatekeeper helps protect your Mac from running apps downloaded from the internet.

3. Linux

  1. ClamAV (Open-source Antivirus):
    • Install ClamAV using package manager (e.g., sudo apt-get install clamav on Debian-based systems).
    • Run clamscan --scan-all / to scan the entire filesystem for malware.

Step 2: Use Reputable Antivirus Software

  1. Download and Install Antivirus:
    • Choose reputable antivirus software such as Norton, McAfee, Bitdefender, or Avast.
    • Install the antivirus program and follow on-screen instructions to set up.
  2. Perform Full System Scan:
    • Launch the antivirus software and initiate a full system scan to check for malware.
    • Follow prompts to quarantine or remove detected threats.

Step 3: Scan Specific Files or Folders

  1. Windows:
    • Right-click on a file or folder and select “Scan with [Antivirus Software]” to check specific items.
  2. macOS:
    • Use antivirus software with on-demand scanning capabilities to check specific files or directories.
  3. Linux:
    • Use ClamAV or other antivirus tools with specific file scanning options to check individual files or folders.

Step 4: Monitor System Behavior

  1. Check Task Manager (Windows) or Activity Monitor (macOS):
    • Monitor running processes and CPU usage for unusual activity that may indicate malware.
  2. Review Firewall Settings:
    • Ensure firewall is enabled to block unauthorized network access and outgoing connections.

Step 5: Update Software and Operating System

  1. Keep Software Updated:
    • Regularly update operating system, web browsers, and software applications to patch security vulnerabilities.

Step 6: Educate and Practice Safe Computing

  1. Avoid Suspicious Links and Downloads:
    • Be cautious of email attachments, links, and downloads from unknown sources.
    • Verify URLs before clicking and use secure, reputable websites for downloads.
  2. Backup Important Data:
    • Regularly back up important files to an external drive or cloud storage to protect against data loss from malware or hardware failure.

Best Practices for Malware Prevention

  1. Use Strong Passwords: Secure accounts with complex passwords or passphrases to prevent unauthorized access.
  2. Enable Two-Factor Authentication (2FA): Add an extra layer of security to accounts requiring sensitive information.
  3. Educate Users: Train users on identifying phishing scams, safe browsing habits, and malware prevention.
  4. Backup Regularly: Create and maintain backups of important data to mitigate the impact of malware attacks.
  5. Update Security Software: Keep antivirus software, firewalls, and security tools updated to defend against new threats.

Conclusion

Checking for malware is essential to protect your computer and personal data from malicious threats. By following the steps outlined in this guide and using built-in security tools or reputable antivirus software, you can effectively detect and remove malware on Windows, macOS, and Linux systems. Regularly scan for malware, keep software updated, practice safe computing habits, and educate users to enhance your computer’s security posture and safeguard against potential cyber threats. If unsure about any steps or encountering persistent malware issues, consult antivirus software support, IT professionals, or refer to online resources for additional guidance on malware detection and prevention.

Categories
Tech

How to Encrypt a File

Encrypting files is a fundamental method of securing sensitive information from unauthorized access, ensuring confidentiality and privacy. Whether you’re protecting personal documents, financial records, or sensitive business data, understanding how to encrypt files is crucial. This comprehensive guide will walk you through the step-by-step process of encrypting files on various platforms and using different encryption methods to safeguard your data effectively.

Understanding File Encryption

What is File Encryption?

File encryption involves converting readable data into an unreadable format using encryption algorithms. Only authorized users with the decryption key or passphrase can access and decrypt the encrypted files, ensuring data remains secure against unauthorized access.

Benefits of File Encryption

  1. Data Security: Protects sensitive information from unauthorized access, data breaches, and cyberattacks.
  2. Confidentiality: Ensures privacy of personal and confidential data stored on computers, external drives, or cloud storage.
  3. Compliance: Helps organizations comply with data protection regulations and industry standards (e.g., GDPR, HIPAA).

Types of Encryption

  1. Symmetric Encryption: Uses a single key for both encryption and decryption. Fast and efficient for large data sets.
  2. Asymmetric Encryption (Public-Key Encryption): Uses a pair of keys—a public key for encryption and a private key for decryption. Provides secure communication and key exchange.
  3. File-Based Encryption: Encrypts individual files or folders rather than entire disk volumes. Allows selective encryption of sensitive data.

How to Encrypt a File: Step-by-Step Guide

Step 1: Choose Encryption Method

  1. Symmetric Encryption:
    • Suitable for encrypting large files or volumes.
    • Uses algorithms like AES (Advanced Encryption Standard) with key sizes (e.g., AES-256) for robust security.
  2. Asymmetric Encryption:
    • Ideal for secure communication and key exchange.
    • Uses algorithms like RSA (Rivest-Shamir-Adleman) or ECC (Elliptic Curve Cryptography).

Step 2: Encrypt Files on Different Platforms

1. Windows

  1. Using BitLocker (Pro and Enterprise editions):
    • Right-click on the file or folder you want to encrypt.
    • Select “Properties” > “Advanced” > “Encrypt contents to secure data.”
    • Follow the prompts to complete encryption.
  2. Using Encrypting File System (EFS):
    • Right-click on the file or folder and select “Properties.”
    • Go to the “General” tab and click “Advanced.”
    • Check “Encrypt contents to secure data” and click “OK.”
  3. Using Third-Party Software:
    • Download and install encryption software like VeraCrypt, AxCrypt, or 7-Zip.
    • Open the software, create a new encrypted volume or container, and add files to encrypt.

2. macOS

  1. Using FileVault:
    • Go to Apple menu > System Preferences > Security & Privacy > FileVault.
    • Click the lock icon, enter administrator credentials, and click “Turn On FileVault.”
    • Follow on-screen instructions to encrypt disk and files.
  2. Using Disk Utility:
    • Open Disk Utility from Applications > Utilities.
    • Select the disk or volume, go to File > New Image > Blank Image.
    • Choose encryption type (e.g., AES-128, AES-256), set size, and create an encrypted disk image.
    • Drag files into the encrypted image to encrypt them.
  3. Using Terminal (Command Line):
    • Use commands like openssl or gpg for file encryption using terminal-based encryption tools.

3. Linux

  1. Using GnuPG (GPG):
    • Open a terminal and use the command gpg --encrypt --recipient recipientname filename to encrypt a file using GPG.
    • Replace recipientname with the recipient’s GPG key identifier.
  2. Using OpenSSL:
    • Use commands like openssl enc -aes-256-cbc -salt -in filename -out filename.enc to encrypt files using OpenSSL.
    • Replace -aes-256-cbc with preferred encryption algorithm and -salt for additional security.

Step 3: Manage Encryption Keys

  1. Symmetric Encryption:
    • Securely store and manage the encryption key or passphrase used for both encryption and decryption.
    • Use strong, unique passwords or passphrases and consider using password managers to store them securely.
  2. Asymmetric Encryption:
    • Safeguard the private key used for decryption and avoid sharing it.
    • Share the public key securely with intended recipients for encrypted communication.

Step 4: Backup Encrypted Files

  1. Regular Backups:
    • Create backups of encrypted files and store them securely.
    • Ensure backups are also encrypted to maintain data security.

Step 5: Verify Encryption

  1. Confirm Encryption:
    • Check encrypted files or volumes to ensure they require decryption for access.
    • Attempt to open encrypted files without the decryption key to verify security.

Step 6: Decrypt Files (When Needed)

  1. Access Decryption Key:
    • Use the decryption key or passphrase to decrypt and access encrypted files.
    • Follow prompts or use decryption software to decrypt files securely.

Best Practices for File Encryption

  1. Use Strong Encryption Algorithms: Choose AES-256 or RSA with sufficient key lengths for robust security.
  2. Protect Encryption Keys: Store keys securely and separate from encrypted data.
  3. Regular Updates: Keep encryption software and tools updated to address security vulnerabilities.
  4. Monitor Compliance: Adhere to data protection regulations and industry standards when encrypting sensitive information.
  5. Educate Users: Train users on encryption best practices and importance of safeguarding encryption keys.

Conclusion

Encrypting files is a critical step in protecting sensitive information from unauthorized access and ensuring data security. By following the steps outlined in this guide and choosing appropriate encryption methods and tools for your platform, you can effectively encrypt files on Windows, macOS, and Linux systems. Remember to manage encryption keys securely, create backups of encrypted data, and regularly update encryption software for enhanced security. If unsure about any steps or encountering technical challenges, consult encryption software documentation, seek assistance from IT professionals, or refer to online resources for additional guidance on file encryption best practices.

Categories
Tech

How to Update Drivers

Updating drivers is essential for ensuring optimal performance, compatibility, and stability of hardware components on your computer. Whether you’re using Windows, macOS, or Linux, this comprehensive guide will walk you through the step-by-step process of updating drivers, understanding the importance of driver updates, and using tools to simplify the process.

Understanding Driver Updates

What are Drivers?

Drivers are software programs that allow your operating system to communicate with hardware devices such as graphics cards, sound cards, network adapters, and peripherals. They facilitate proper functioning and performance optimization of hardware components.

Importance of Updating Drivers

  1. Performance Optimization: Updated drivers often include performance improvements and bug fixes, enhancing the functionality of hardware.
  2. Compatibility: New drivers may add support for new features or improve compatibility with the latest software updates and operating system versions.
  3. Security: Driver updates can address security vulnerabilities that could potentially be exploited by malicious software.

Types of Drivers

  1. Graphics Drivers: Manage graphics processing units (GPUs) for enhanced visual performance in games and multimedia applications.
  2. Audio Drivers: Control audio output and input devices, ensuring clear sound quality and compatibility with audio peripherals.
  3. Network Drivers: Enable network adapters to connect to the internet and local network, optimizing data transfer speeds and stability.
  4. Peripheral Drivers: Support printers, scanners, keyboards, mice, and other peripherals, ensuring they function correctly with the operating system.

How to Update Drivers: Step-by-Step Guide

Step 1: Identify Drivers to Update

  1. Device Manager (Windows):
    • Right-click on the Start menu and select “Device Manager.”
    • Expand categories (e.g., Display adapters, Network adapters) to view installed hardware.
    • Right-click on a device and select “Update driver” to check for updates.
  2. System Information (macOS):
    • Click on the Apple menu > About This Mac > System Report.
    • Navigate to Hardware > Graphics/Displays, Network, or other categories to view hardware details.
    • Check manufacturer websites for driver updates.
  3. Package Manager (Linux):
    • Use package managers like apt, yum, or dnf depending on your Linux distribution.
    • Use commands like sudo apt-get update and sudo apt-get upgrade to update all installed packages, including drivers.

Step 2: Update Drivers Using Manufacturer’s Website

  1. Visit Manufacturer’s Website:
    • Go to the official website of the hardware manufacturer (e.g., NVIDIA, AMD, Intel).
    • Navigate to the Support or Downloads section to search for the latest drivers for your specific hardware model and operating system.
  2. Download and Install Drivers:
    • Download the latest driver package compatible with your hardware and operating system.
    • Run the installer and follow on-screen instructions to install updated drivers.

Step 3: Use Driver Update Software (Optional)

  1. Third-Party Tools (Windows):
    • Tools like Driver Booster, Driver Easy, or Snappy Driver Installer can automate driver updates.
    • Download and install the software, scan your system for outdated drivers, and follow prompts to update them.
  2. macOS and Linux:
    • Check for updates using built-in software update utilities or package managers.
    • Some third-party tools may offer driver update functionalities, but they are less common and often unnecessary on macOS and Linux.

Step 4: Windows Update (Windows Only)

  1. Windows Update:
    • Windows Update may automatically deliver updated drivers for hardware components.
    • Go to Settings > Update & Security > Windows Update and click “Check for updates” to install available driver updates.

Step 5: Verify and Troubleshoot

  1. Verify Driver Installation:
    • After updating drivers, restart your computer to apply changes.
    • Open Device Manager (Windows), System Information (macOS), or check via terminal commands (Linux) to verify driver versions.
  2. Troubleshoot Issues:
    • If encountering issues after updating drivers (e.g., performance problems, hardware malfunctions), roll back to previous driver versions via Device Manager (Windows) or reinstall the older drivers from manufacturer’s website.

Best Practices for Updating Drivers

  1. Regular Updates: Check for driver updates periodically to ensure hardware compatibility and performance.
  2. Backup Drivers: Before updating, create backups or restore points to revert changes if necessary.
  3. Manufacturer’s Recommendations: Follow manufacturer guidelines and instructions when updating drivers, especially for critical components like BIOS.
  4. Avoid Third-Party Tools (macOS and Linux): Use built-in utilities or official package managers to update drivers on macOS and Linux to avoid compatibility issues.
  5. Read Release Notes: Review release notes accompanying driver updates to understand improvements, fixes, and known issues.

Conclusion

Updating drivers is crucial for maintaining optimal performance, compatibility, and security of hardware components on your computer. By following the steps outlined in this guide and utilizing built-in tools, manufacturer websites, and optional driver update software, you can effectively update drivers on Windows, macOS, and Linux systems. Ensure to check for updates regularly, backup drivers before making changes, and troubleshoot any issues that may arise after updating drivers. If unsure about any steps or encountering technical challenges, consult manufacturer support, refer to online resources, or seek assistance from experienced professionals to update drivers effectively and enhance your computer’s performance and reliability.

Categories
Tech

How to set up a VPN

Setting up a Virtual Private Network (VPN) is essential for enhancing online privacy, security, and accessing geo-restricted content. Whether you’re a beginner or looking to set up a VPN on different devices and platforms, this comprehensive guide will walk you through the step-by-step process of setting up and configuring a VPN on Windows, macOS, Android, iOS, and routers, along with understanding VPN protocols, benefits, and best practices.

Understanding VPN Basics

What is a VPN?

A VPN creates a secure connection between your device and the internet, encrypting your internet traffic and routing it through a remote server. This enhances privacy by masking your IP address and location, protecting your data from hackers, ISPs, and other third parties.

Benefits of Using a VPN

  1. Enhanced Privacy: Encrypts internet traffic to prevent eavesdropping and tracking.
  2. Improved Security: Secures data transmission over public Wi-Fi networks.
  3. Access Geo-Restricted Content: Bypass geographical restrictions to access websites and services unavailable in your region.

How VPN Works

  1. Encryption: Encrypts data transmitted between your device and VPN server.
  2. Tunneling: Creates a secure tunnel for data to pass through, shielding it from external surveillance.
  3. IP Address Masking: Masks your IP address with the VPN server’s IP, providing anonymity online.

Choosing a VPN Service

Factors to Consider

  1. Security Features: Look for strong encryption (e.g., AES-256), no-logs policy, and kill switch.
  2. Server Network: Wide range of server locations for bypassing geo-blocks and improving speed.
  3. Device Compatibility: Supports various devices and platforms (Windows, macOS, iOS, Android).
  4. Speed and Performance: Minimal impact on internet speed and reliable performance.
  5. Customer Support: Responsive support for troubleshooting and assistance.

Setting Up a VPN on Different Platforms

Step-by-Step Guide

1. Windows

  1. Built-in VPN Setup:
    • Go to Settings > Network & Internet > VPN.
    • Click “Add a VPN connection” and enter VPN provider details (server address, VPN type, username, password).
    • Click “Save” and connect by clicking on the VPN name.
  2. Third-Party VPN Software:
    • Download and install preferred VPN software (e.g., NordVPN, ExpressVPN).
    • Launch the application, log in with your credentials, and connect to a server.

2. macOS

  1. Built-in VPN Setup:
    • Go to Apple menu > System Preferences > Network.
    • Click “+” to add a new network connection, choose VPN type (e.g., L2TP over IPSec, IKEv2).
    • Enter VPN configuration details provided by your VPN provider.
    • Click “Apply” to save settings and connect from the Network preferences.
  2. Third-Party VPN Software:
    • Download and install the VPN client for macOS.
    • Launch the application, log in with your credentials, and connect to a server.

3. Android

  1. Built-in VPN Setup:
    • Go to Settings > Network & internet > VPN.
    • Tap “+” or “Add VPN” and enter VPN details (name, type, server address, PPP encryption).
    • Save the configuration and connect by tapping the VPN profile.
  2. Third-Party VPN Apps:
    • Download and install a VPN app from Google Play Store (e.g., NordVPN, Surfshark).
    • Open the app, log in with your credentials, and connect to a server.

4. iOS (iPhone/iPad)

  1. Built-in VPN Setup:
    • Go to Settings > General > VPN.
    • Tap “Add VPN Configuration” and enter VPN details (type, server, account, password).
    • Save the configuration and toggle VPN to connect.
  2. Third-Party VPN Apps:
    • Download and install a VPN app from the App Store (e.g., ExpressVPN, CyberGhost).
    • Open the app, log in with your credentials, and connect to a server.

5. Router

  1. VPN Router Setup:
    • Access router settings through a web browser (usually 192.168.1.1 or 192.168.0.1).
    • Navigate to VPN settings or Advanced settings depending on router model.
    • Enter VPN configuration details (server address, VPN type, username, password).
    • Save settings and reboot router to apply changes.

VPN Protocols

  1. OpenVPN: Open-source protocol known for strong security and flexibility.
  2. IKEv2/IPSec: Offers good balance between security and speed, ideal for mobile devices.
  3. L2TP/IPSec: Provides encryption and tunneling, but less secure than OpenVPN or IKEv2/IPSec.
  4. WireGuard: Modern and lightweight protocol known for its simplicity and speed.

Best Practices for Using VPN

  1. Use Strong Passwords: Secure VPN accounts with strong, unique passwords.
  2. Enable Kill Switch: Prevents internet access if VPN connection drops to avoid data leaks.
  3. Regular Updates: Keep VPN software and apps updated for security patches and performance improvements.
  4. Avoid Free VPNs: Opt for reputable VPN services with transparent privacy policies and security features.
  5. Use Split Tunneling (if available): Choose which apps or websites use VPN while others access the internet directly.

Conclusion

Setting up a VPN enhances your online security and privacy by encrypting internet traffic and masking your IP address. By following the steps outlined in this guide and choosing a reliable VPN service, you can effectively set up and configure a VPN on various devices and platforms including Windows, macOS, Android, iOS, and routers. Ensure to select appropriate VPN protocols, adhere to best practices for using VPNs, and regularly update software for optimal performance and security. If unsure about any steps or encountering technical challenges, consult VPN provider support, refer to online resources, or seek assistance from knowledgeable professionals to set up your VPN successfully.

Categories
Tech

How to calibrate a monitor

Calibrating a monitor is crucial for ensuring accurate color representation, brightness levels, and overall display quality, whether for professional graphics work, photography, or simply improving visual experience. Here’s a comprehensive guide on how to calibrate a monitor:

Introduction to Monitor Calibration

  1. Importance of Monitor Calibration
    • Understanding why monitor calibration is essential for accurate color reproduction
    • Benefits of calibration for different purposes (graphic design, photo editing, gaming)
  2. Types of Calibration Devices

    a. Monitor Calibration Tools

    • Introduction to hardware calibration devices (colorimeters and spectrophotometers)
    • Software-based calibration tools and built-in OS utilities (Windows, macOS)
  3. Preparing for Calibration

    a. Environment Considerations

    • Choosing a well-lit room with consistent lighting conditions
    • Minimizing glare and reflections on the monitor screen

    b. Choosing Calibration Software

    • Selecting appropriate calibration software compatible with the monitor and operating system
    • Checking for updates or downloading the latest version of calibration software

Steps to Calibrate a Monitor

  1. Setting Up the Calibration Device

    a. Connecting the Colorimeter

    • Attaching the calibration device to the monitor screen according to manufacturer instructions
    • Ensuring the sensor is securely attached and positioned correctly
  2. Launching Calibration Software

    a. Opening Calibration Software

    • Starting the calibration software on the computer
    • Following on-screen instructions to begin the calibration process
  3. Adjusting Monitor Settings

    a. Adjusting Brightness and Contrast

    • Setting monitor brightness and contrast levels to optimal settings
    • Using built-in monitor controls or software adjustments for precise adjustments

    b. Color Temperature and Gamma

    • Adjusting color temperature (typically expressed in Kelvin) to desired levels
    • Setting gamma correction to match intended display characteristics (2.2 for general use)
  4. Calibrating Color

    a. Color Calibration

    • Running the color calibration process using the calibration software
    • Displaying a series of color patches to measure and adjust color accuracy

    b. White Point Calibration

    • Adjusting white point settings to achieve accurate white balance
    • Ensuring neutral grays and whites appear natural without color casts
  5. Profiling the Monitor

    a. Creating a Monitor Profile

    • Generating a monitor profile based on calibration results
    • Saving the profile for use in color-managed applications and system-wide settings
  6. Verifying Calibration Accuracy

    a. Verification Process

    • Using verification tools or software to validate calibration accuracy
    • Comparing color accuracy before and after calibration with test images or color patches

Troubleshooting and Tips

  1. Common Calibration Issues

    a. Improper Calibration Results

    • Troubleshooting steps for inaccurate colors or brightness levels after calibration
    • Repeating calibration process or adjusting settings as needed

    b. Maintaining Calibration

    • Regularly recalibrating the monitor to maintain accurate color representation
    • Updating monitor profiles periodically to account for environmental changes or aging monitors
  2. Advanced Calibration Techniques

    a. Custom Calibration Settings

    • Creating custom calibration settings for specific color spaces or workflows (sRGB, Adobe RGB)
    • Fine-tuning monitor settings based on professional requirements
  3. Safety and Maintenance

    a. Protecting Monitor and Calibration Device

    • Handling calibration equipment with care to prevent damage or calibration errors
    • Storing calibration profiles and settings securely for future reference

Conclusion

Calibrating a monitor enhances visual accuracy and ensures consistent color reproduction across different applications and environments. By following this comprehensive guide, users can effectively calibrate their monitors for improved viewing experiences, accurate color representation, and optimal performance in various professional and personal settings.

Categories
Tech

How to reset a router

Resetting a router is a basic troubleshooting step that can resolve network issues or restore the router to its default settings. Here’s a detailed guide on how to reset a router:

Introduction to Resetting a Router

  1. Purpose of Router Reset
    • Explanation of why resetting a router may be necessary
    • Common scenarios where resetting can resolve network problems
  2. Types of Resets

    a. Soft Reset

    • Definition of a soft reset and its implications
    • When to perform a soft reset and how it affects the router

    b. Hard Reset (Factory Reset)

    • Definition of a hard reset or factory reset
    • Circumstances where a hard reset is necessary

Steps to Reset a Router

  1. Preparing for Reset

    a. Gathering Necessary Equipment

    • Identifying the router model and accessing the user manual
    • Locating the reset button on the router

    b. Backup Configuration (If Applicable)

    • Saving current router settings or configurations if needed
    • Understanding that a hard reset will erase all customized settings
  2. Performing a Soft Reset

    a. Accessing Router Interface

    • Logging into the router’s web interface using a web browser
    • Entering the router’s IP address (commonly 192.168.1.1 or 192.168.0.1)

    b. Navigating to Reset Option

    • Finding the reset option within the router’s administrative settings
    • Selecting soft reset or reboot option and confirming the action
  3. Performing a Hard Reset (Factory Reset)

    a. Locating Reset Button

    • Identifying the reset button on the router (typically a small, recessed button)
    • Using a paperclip or similar tool to press and hold the reset button

    b. Executing Hard Reset

    • Pressing and holding the reset button for 10-30 seconds (consult router manual for exact duration)
    • Observing router lights for confirmation that reset process has started
  4. Reconfiguring the Router

    a. Waiting for Reset

    • Allowing the router time to reboot and reset to factory default settings
    • Patience during the process as it may take several minutes

    b. Accessing Router Settings

    • Logging back into the router’s web interface using default credentials (check router manual)
    • Setting up the router from scratch, including network name (SSID) and password
  5. Testing the Network

    a. Verifying Internet Connection

    • Connecting devices to the router’s Wi-Fi network
    • Testing internet connectivity to ensure the reset resolved the issue

Troubleshooting and Tips

  1. Common Issues

    a. Router Not Responding After Reset

    • Troubleshooting steps if the router fails to reset or reboot properly
    • Contacting technical support or referring to manufacturer guidelines for assistance

    b. Recovering Configuration

    • Restoring backed-up router configurations or settings after a hard reset
    • Ensuring all devices reconnect to the network with the new settings
  2. Safety and Maintenance

    a. Preventing Data Loss

    • Ensuring all critical data and settings are backed up before performing a hard reset
    • Using caution with router reset to avoid accidental data loss or network disruption

Conclusion

Resetting a router is a straightforward process that can resolve network issues and restore optimal performance. By following this comprehensive guide, users can effectively perform both soft and hard resets on their routers, ensuring reliable connectivity and troubleshooting network problems when needed.

Categories
Tech

How to upgrade RAM on a laptop

Upgrading RAM (Random Access Memory) on a laptop can significantly improve performance, especially when multitasking or running memory-intensive applications. Here’s a detailed guide on how to upgrade RAM on a laptop:

Introduction to Upgrading RAM on a Laptop

  1. Understanding RAM
    • Explanation of RAM and its role in computer performance
    • Benefits of upgrading RAM for laptops (faster multitasking, improved responsiveness)
  2. Determining Compatibility and Requirements

    a. Checking Current RAM

    • Identifying the current amount and type of RAM installed in the laptop
    • Accessing system information through operating system tools (e.g., Task Manager on Windows, Activity Monitor on macOS)

    b. Checking Laptop Specifications

    • Determining maximum RAM capacity supported by the laptop
    • Verifying RAM type (DDR3, DDR4) and speed compatibility with the laptop’s motherboard

Steps to Upgrade RAM on a Laptop

  1. Preparing for the Upgrade

    a. Gathering Necessary Tools

    • Tools required: new RAM module(s), small screwdriver (usually Phillips), antistatic wrist strap (optional)

    b. Choosing the Right RAM

    • Selecting compatible RAM modules based on laptop specifications (capacity, type, speed)
    • Ensuring the RAM modules match existing RAM characteristics if adding to existing memory
  2. Locating and Accessing RAM Slots

    a. Identifying RAM Slots

    • Locating RAM slots on the underside of the laptop or beneath a service panel
    • Consulting laptop manual or manufacturer’s website for specific instructions

    b. Preparing the Laptop

    • Shutting down the laptop and disconnecting it from power source
    • Removing the laptop battery (if removable) to avoid electrical hazards
  3. Removing Existing RAM (If Necessary)

    a. Opening RAM Compartment

    • Removing screws or latches securing the RAM compartment cover
    • Sliding or lifting the cover to access RAM modules

    b. Removing Existing RAM Modules

    • Releasing retention clips or levers holding RAM modules in place
    • Gently pulling out the RAM module(s) at a 45-degree angle
  4. Installing New RAM Modules

    a. Inserting New RAM

    • Aligning the notch on the RAM module with the key in the RAM slot
    • Inserting the RAM module at a 45-degree angle and pressing down until it clicks into place

    b. Securing RAM

    • Ensuring the retention clips or levers lock the RAM module securely in place
    • Closing the RAM compartment cover and securing it with screws or latches
  5. Testing and Verifying

    a. Powering On the Laptop

    • Reinserting the laptop battery (if removed) and reconnecting the power source
    • Powering on the laptop to initiate the boot process

    b. Checking System Recognition

    • Accessing system information to verify the new RAM capacity and configuration
    • Confirming that the laptop recognizes the upgraded RAM in the BIOS or operating system

Troubleshooting and Tips

  1. Troubleshooting Common Issues

    a. RAM Compatibility Issues

    • Addressing compatibility issues if the laptop does not recognize new RAM
    • Checking for BIOS updates or reseating RAM modules if necessary

    b. Handling Static Electricity

    • Using an antistatic wrist strap or working on a grounded surface to prevent static discharge
    • Avoiding touching the gold contacts of the RAM modules
  2. Safety and Maintenance

    a. Regular Maintenance

    • Monitoring laptop temperatures and ensuring proper ventilation around RAM modules
    • Cleaning dust from laptop vents and components to maintain optimal performance

Conclusion

Upgrading RAM on a laptop is a straightforward process that can enhance overall performance and responsiveness, especially for tasks requiring ample memory resources. By following this comprehensive guide, users can successfully upgrade RAM on their laptops, improving productivity and extending the lifespan of their devices.

Categories
Tech

How to set up a home network

Setting up a home network is essential for connecting multiple devices within a household to share resources, such as internet access, files, and printers. Here’s a comprehensive guide on how to set up a home network:

Introduction to Setting Up a Home Network

  1. Understanding Home Networks
    • Definition of a home network and its benefits
    • Types of devices that can be connected in a home network (computers, smartphones, printers, smart devices)
  2. Planning Your Home Network

    a. Assessing Needs

    • Determining the number of devices to be connected
    • Identifying the locations where network access is required (e.g., home office, living room)

    b. Choosing Network Equipment

    • Selecting a router suitable for home network size and internet speed
    • Deciding on wired (Ethernet) and wireless (Wi-Fi) network components

Steps to Set Up a Home Network

  1. Setting Up the Router

    a. Router Placement

    • Choosing a central location for the router to ensure optimal coverage
    • Considering factors like interference and signal strength

    b. Connecting to the Modem

    • Connecting the router to the modem using an Ethernet cable
    • Powering on the modem and router
  2. Configuring Network Settings

    a. Accessing Router Settings

    • Logging into the router’s administration interface (typically via a web browser)
    • Using default login credentials or setting up new ones

    b. Setting Network Name (SSID) and Password

    • Changing the default network name (SSID) to a unique identifier
    • Creating a strong network password to secure the Wi-Fi network
  3. Configuring Wi-Fi Settings

    a. Setting Up Wi-Fi Encryption

    • Choosing a Wi-Fi security protocol (e.g., WPA2-PSK) for encryption
    • Configuring wireless security settings to protect network data

    b. Guest Network Setup

    • Enabling a guest network for visitors with limited access to main network resources
    • Setting up a separate SSID and password for the guest network
  4. Connecting Devices

    a. Connecting Devices Wirelessly

    • Connecting computers, smartphones, tablets, and smart devices to the Wi-Fi network
    • Entering the network password when prompted on each device

    b. Connecting Devices via Ethernet

    • Connecting devices that require stable and high-speed connections directly to the router using Ethernet cables
    • Configuring network settings on devices if necessary
  5. Testing the Network

    a. Checking Internet Connectivity

    • Verifying internet access on connected devices
    • Troubleshooting connectivity issues if internet access is not available

    b. Testing File Sharing and Printer Access

    • Testing file sharing between connected computers or devices
    • Setting up printer sharing to enable printing from multiple devices

Network Security and Maintenance

  1. Ensuring Network Security

    a. Updating Router Firmware

    • Checking for and installing firmware updates regularly to protect against security vulnerabilities
    • Enabling automatic updates if available

    b. Using Firewalls and Antivirus Software

    • Configuring router firewalls and installing antivirus software on connected devices
    • Protecting the network from malware and unauthorized access
  2. Network Expansion and Troubleshooting

    a. Adding Network Devices

    • Adding new devices to the network as needed (e.g., smart home devices, additional computers)
    • Configuring network settings for new devices to ensure compatibility and security

    b. Troubleshooting Network Issues

    • Troubleshooting common network problems such as slow speeds or dropped connections
    • Consulting router documentation or contacting technical support if issues persist

Advanced Network Features

  1. Advanced Network Features

    a. Quality of Service (QoS) – Configuring QoS settings to prioritize certain types of network traffic (e.g., video streaming, online gaming) – Optimizing network performance for specific applications

    b. Network Storage and Backup – Setting up network-attached storage (NAS) for centralized file storage and backup – Configuring automatic backups of important data to NAS or cloud storage

Conclusion

Setting up a home network allows for efficient sharing of resources and internet access among multiple devices within a household. By following this comprehensive guide, users can establish a secure and reliable home network infrastructure to meet their connectivity needs effectively.