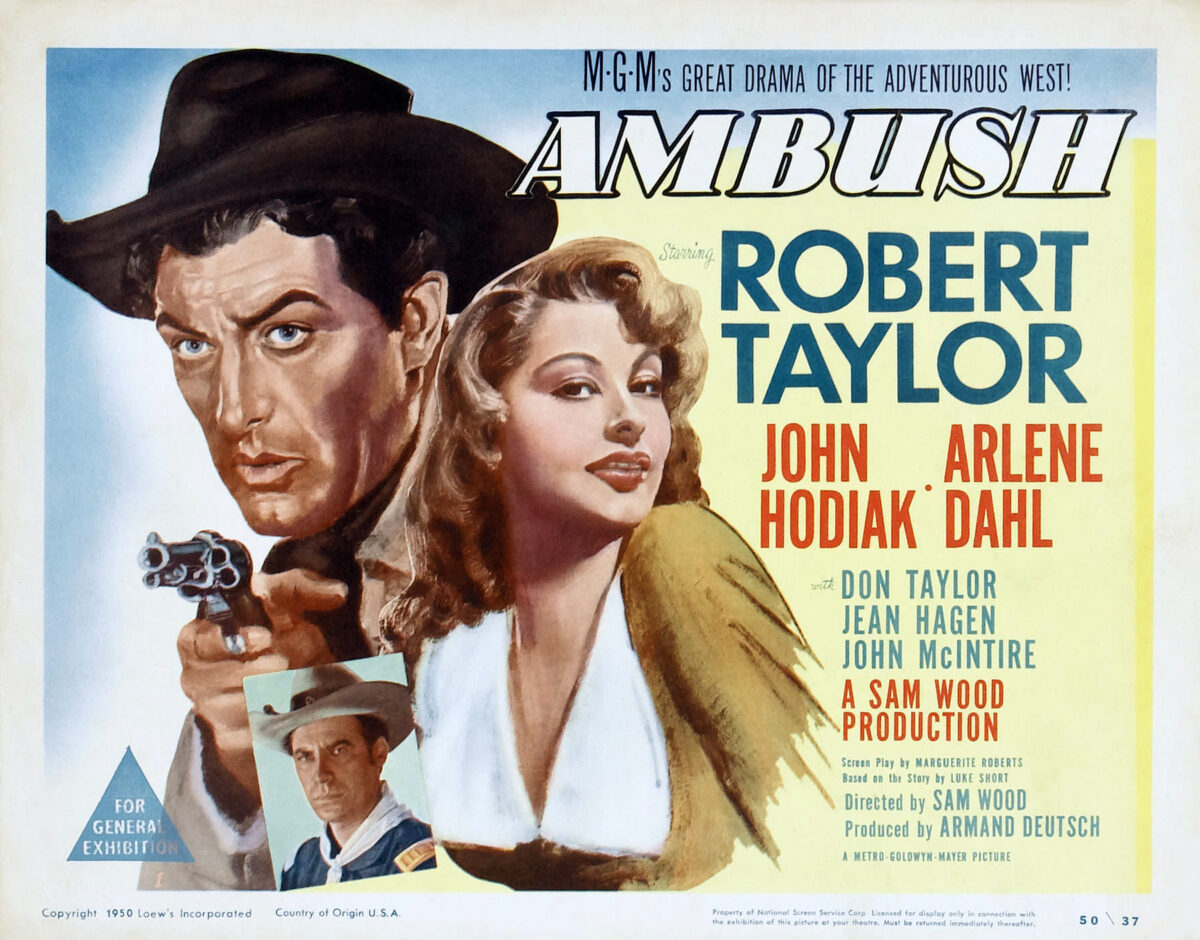
Categories
Entertainment & Arts

Mumtaz Askari Madhvani: A Cinematic Odyssey from Obscurity to Bollywood Stardom

In the vast and glamorous landscape of Bollywood, tales of rising stars often capture the imagination of audiences. One such compelling journey is that of Mumtaz Askari Madhvani, whose trajectory from obscurity to Bollywood stardom serves as an inspiration to aspiring actors and film enthusiasts alike. Born on July 31, 1947, in Bombay (now Mumbai), Mumtaz embarked on a journey that would see her become one of the most celebrated and iconic actresses in the history of Indian cinema.

Early Years and Entry into Bollywood

Mumtaz Askari, affectionately known as Mumu in her early years, was born into a middle-class family. Her father, Abdul Askari, was a noted automobile dealer, and her mother, Shadi Habib Agha, was a seasoned actress of her time. Mumtaz’s early exposure to the world of entertainment through her mother sowed the seeds of her passion for acting.

Her cinematic journey began at the tender age of 12 when she appeared as a child artist in the film “Sone Ki Chidiya” (1958). Despite this early introduction to the film industry, Mumtaz’s foray into Bollywood as a leading lady took time to materialize. Her initial roles were often limited to supporting characters, and success proved elusive in the competitive world of Hindi cinema.

Breakthrough with “Mela” and the Rise to Fame

Mumtaz’s breakthrough moment came with the film “Mela” (1971), where she played the lead role opposite superstar Dharmendra. The film’s success marked a turning point in Mumtaz’s career, propelling her into the limelight and garnering attention for her acting prowess and on-screen charisma. “Mela” not only established Mumtaz as a leading actress but also showcased her versatility in handling diverse roles.

However, it was her collaboration with actor Rajesh Khanna that truly catapulted her to Bollywood stardom. The pair’s on-screen chemistry was undeniable, and films like “Do Raaste” (1969), “Dushman” (1971), and “Apna Desh” (1972) became major hits. Mumtaz’s ability to effortlessly portray a range of characters, from the girl next door to the resilient and independent woman, endeared her to audiences across India.

Mumtaz’s Signature Style: The “Mumtaz Sari” Craze

Beyond her acting prowess, Mumtaz’s influence extended to the realm of fashion. Her unique and distinctive style, characterized by bold and vibrant saris draped in a way that accentuated her figure, led to the creation of the “Mumtaz sari” craze. Women across the country embraced this trend, turning Mumtaz into a fashion icon of her time. Her impact on the fashion scene remains an integral part of her legacy, with the “Mumtaz sari” continuing to inspire contemporary designers.

Awards and Accolades

Mumtaz’s contribution to Indian cinema did not go unnoticed, and she received several accolades for her outstanding performances. In 1970, she won the Filmfare Best Actress Award for her role in “Khilona,” solidifying her status as one of the industry’s leading actresses. Mumtaz’s ability to evoke emotions on screen and connect with the audience garnered praise from critics and peers alike.

Marriage and a Brief Hiatus

In 1974, at the height of her career, Mumtaz took a significant step in her personal life by marrying millionaire businessman Mayur Madhvani. This marked a brief hiatus from the silver screen, as Mumtaz chose to prioritize her family over her acting career. Despite her reduced presence in films during this period, Mumtaz’s popularity endured, and her fans eagerly awaited her return to the screen.

Return to Cinema and Later Works

Mumtaz returned to acting in the mid-1980s, appearing in films like “Aandhiyan” (1990) and “Khuda Gawah” (1992). While these later roles may not have reached the same heights as her earlier successes, Mumtaz’s enduring charm and screen presence remained intact. Her ability to seamlessly transition between different eras of Hindi cinema showcased her resilience and adaptability as an actress.

Legacy and Impact on Bollywood

Mumtaz Askari Madhvani’s legacy in Bollywood is immeasurable. Her journey from a young girl with dreams in Bombay to a celebrated actress who left an indelible mark on Indian cinema is a testament to her talent, perseverance, and magnetic screen presence. Mumtaz’s influence extends beyond the boundaries of her films; she is remembered as a style icon, a trendsetter, and a beloved figure in the hearts of her fans.

In a career spanning several decades, Mumtaz became a symbol of the changing landscape of Bollywood. Her roles challenged societal norms, and her on-screen presence showcased a range of emotions and character nuances. Her impact on fashion, with the enduring popularity of the “Mumtaz sari,” highlights her cultural significance and the lasting imprint she left on the industry.

Conclusion: Mumtaz Askari Madhvani’s Everlasting Aura

As we reflect on Mumtaz Askari Madhvani’s Bollywood journey, it is clear that her story transcends the silver screen. She remains an eternal muse, an embodiment of grace, talent, and the quintessential spirit of Hindi cinema. Mumtaz’s ability to connect with audiences, both on and off-screen, endows her with a timeless aura that continues to inspire generations of film enthusiasts and aspiring actors.

From her humble beginnings to becoming the reigning queen of Bollywood, Mumtaz’s journey is a testament to the magic of cinema and the enduring spirit of those who dare to dream. As we celebrate her contributions to Indian cinema, Mumtaz Askari Madhvani stands as a luminary, a beacon whose brilliance continues to illuminate the path for future generations of actors and storytellers in the vast and ever-evolving world of Bollywood.

Categories
Entertainment & Arts

Bonjour Paris! Audrey Hepburn’s Timeless Elegance in “Funny Face” and a Melodic Journey through “Bonjour Paris”

In the realm of cinematic classics, “Funny Face” stands as a masterpiece, a delightful confluence of romance, fashion, and the timeless elegance personified by the incomparable Audrey Hepburn. Released in 1957, this musical romantic comedy directed by Stanley Donen not only showcased Hepburn’s multifaceted talents but also provided a visually stunning ode to the enchanting allure of Paris. One of the film’s standout moments is undoubtedly the iconic “Bonjour Paris” sequence, a musical interlude that captures the essence of the City of Lights and celebrates Hepburn’s captivating presence.

Audrey Hepburn: A Timeless Muse

Before delving into the enchanting “Bonjour Paris” song sequence, it’s essential to acknowledge the extraordinary presence of Audrey Hepburn in the film. Hepburn, already established as a Hollywood icon, elevated her status with her portrayal of Jo Stockton, a bookstore clerk turned reluctant model. Her gamine charm, impeccable style, and unparalleled grace added layers to the character, making Jo Stockton an endearing and memorable figure in cinematic history.

Hepburn’s collaboration with Stanley Donen, who had previously directed her in “Roman Holiday,” once again proved to be magical. The chemistry between director and actress, combined with Hepburn’s innate ability to embody characters with authenticity, created a cinematic synergy that resonated with audiences worldwide.

“Funny Face”: A Cinematic Love Letter to Paris

The narrative of “Funny Face” unfolds against the backdrop of the glamorous world of fashion, taking the audience on a journey from the quaint bookshops of Greenwich Village to the haute couture runways of Paris. The juxtaposition of the bohemian and the luxurious sets the stage for a visual feast, and it is within this narrative tapestry that “Bonjour Paris” emerges as a shining gem.

As Jo Stockton reluctantly transforms into a fashion model, the film’s plot pivots to the fashion capital of the world – Paris. The decision to shoot on location in Paris was a stroke of brilliance, as it allowed the filmmakers to capture the city’s iconic landmarks and infuse the film with an authentic Parisian ambiance. The Eiffel Tower, the Louvre, and the River Seine become integral elements in the unfolding love story, and the city itself becomes a character in the film.

“Bonjour Paris”: A Melodic Celebration

The “Bonjour Paris” song sequence is a pivotal moment in the film, both visually and musically. Composed by George and Ira Gershwin, with lyrics by Leonard Gershe, the song encapsulates the joy and wonder of experiencing Paris for the first time. Sung by Fred Astaire as the charismatic fashion photographer Dick Avery, the song becomes a melodic journey through the city’s enchanting streets, capturing the essence of discovery and delight.

As Astaire strolls through the iconic locales of Paris, including the Louvre courtyard and the banks of the Seine, the audience is treated to a feast for the senses. The choreography, the cinematography, and the infectious energy of the song converge to create a cinematic moment that transcends time. Astaire’s smooth delivery of the lyrics, combined with the Gershwin brothers’ masterful composition, immerses the audience in the sheer magic of the moment.

Audrey Hepburn’s Dance of Delight

While Fred Astaire’s performance is undoubtedly enchanting, the heart of the “Bonjour Paris” sequence lies in Audrey Hepburn’s dance of delight. Hepburn, dressed in a simple yet elegant black dress, dances with an uninhibited joy that is contagious. Her effervescent spirit, coupled with the enchanting backdrop of Paris, encapsulates the very essence of the city’s allure.

The choreography, overseen by the legendary Fred Astaire himself, showcases Hepburn’s grace and agility. The dance is a celebration of freedom, a visual representation of Jo Stockton embracing the transformative power of love and the enchantment of Parisian beauty. Hepburn’s dance in the “Bonjour Paris” sequence is a testament to her versatility as an actress and a dancer, leaving an indelible mark on the cinematic landscape.

Fashion as an Art Form

In “Funny Face,” fashion transcends mere clothing; it becomes a visual language that communicates emotions, desires, and transformations. The collaboration between Audrey Hepburn and the renowned fashion photographer Richard Avedon, who served as the film’s visual consultant, elevated the representation of fashion on screen. The iconic fashion photo shoot sequence, set to the tune of “Think Pink,” and the subsequent “Bonjour Paris” sequence, seamlessly integrate fashion into the narrative, making it an integral element of the storytelling process.

Hepburn’s metamorphosis from a bookish intellectual to a glamorous model is beautifully captured through the lens of Avedon’s camera. The visual juxtaposition of Hepburn’s character against the vibrant couture gowns and the timeless backdrop of Paris creates a visual symphony that is both breathtaking and emotionally resonant.

Legacy and Cultural Impact

Over six decades since its release, “Funny Face” continues to be celebrated for its cultural impact and enduring charm. The film’s exploration of themes such as identity, transformation, and the power of love resonates with audiences of all ages. The “Bonjour Paris” sequence, in particular, has become an iconic representation of the magic of cinema, encapsulating the timeless allure of the City of Lights.

Audrey Hepburn’s legacy as a fashion and cinematic icon endures, with “Funny Face” serving as a testament to her ability to seamlessly blend grace, talent, and style. The film’s influence extends beyond the silver screen, inspiring subsequent generations of filmmakers, fashion enthusiasts, and dreamers captivated by the romance of Paris.

In Conclusion: A Cinematic Masterpiece

“Funny Face” remains a cinematic masterpiece that transcends genres. Its fusion of romance, comedy, music, and fashion creates an immersive experience that lingers in the hearts of those who have had the pleasure of witnessing its magic. The “Bonjour Paris” song sequence, with its melodic celebration of discovery and Hepburn’s dance of delight, stands as a timeless testament to the enduring appeal of classic cinema.

As we revisit “Funny Face” and embark on a musical journey through “Bonjour Paris,” we are transported to a world where love, fashion, and the enchantment of Paris converge. Audrey Hepburn’s luminous presence, coupled with the genius of Fred Astaire and the Gershwin brothers, ensures that the film remains eternally relevant, an evergreen testament to the transformative power of art and the enduring beauty of Parisian dreams.

Categories
Entertainment & Arts

Hubert de Givenchy: A French Aristocrat’s Enduring Legacy in the World of Fashion

In the realm of high fashion, the name Hubert de Givenchy stands as an icon, synonymous with elegance, sophistication, and timeless style. Born on February 20, 1927, in Beauvais, France, Givenchy’s journey from a young aristocrat to a legendary fashion designer is a tale of passion, innovation, and an unwavering commitment to beauty.

Early Years and Aristocratic Roots

Hubert James Taffin de Givenchy was born into an aristocratic family with roots deeply embedded in French history. Raised in the opulent surroundings of the Beauvais Château, Givenchy’s early exposure to art, culture, and refinement laid the foundation for his future in the world of aesthetics. His family’s lineage traced back to the 18th century, and this heritage infused in him a profound appreciation for craftsmanship and the finer things in life.

The Ascent in Fashion: From Apprenticeship to Stardom

Givenchy’s fascination with fashion blossomed during his formative years, leading him to pursue formal training at the École des Beaux-Arts in Paris. His journey into the world of haute couture took a decisive turn when he joined the prestigious Maison Piguet in 1945 as an apprentice. Under the guidance of designer Jacques Fath, Givenchy honed his skills and gained invaluable insights into the intricate artistry of fashion.

The turning point in Givenchy’s career came in 1952 when he founded his eponymous fashion house, “Givenchy.” The brand swiftly became synonymous with refinement and sophistication. His early designs, marked by a blend of simplicity and elegance, caught the attention of the fashion elite. Givenchy’s creations were characterized by clean lines, luxurious fabrics, and a keen attention to detail, setting the stage for his meteoric rise in the industry.

Audrey Hepburn: A Muse and Iconic Collaboration

One of the most enduring partnerships in the history of fashion blossomed between Hubert de Givenchy and the legendary actress Audrey Hepburn. The two first crossed paths in 1953, and a bond was forged that would forever change the landscape of fashion. Givenchy’s iconic association with Hepburn began with the black dress she wore in the movie “Sabrina” (1954) and reached its zenith with the iconic little black dress from “Breakfast at Tiffany’s” (1961).

Their collaboration extended beyond film sets, with Hepburn often choosing Givenchy’s designs for her personal life and public appearances. The designer’s creations for Hepburn embodied the epitome of timeless chic, and the duo’s friendship endured for over four decades, leaving an indelible mark on the world of fashion.

Innovations and Influence in Haute Couture

Givenchy’s innovative approach to haute couture earned him accolades and a devoted clientele. His designs were celebrated for their versatility, seamlessly blending traditional elegance with modern trends. The “Bettina blouse,” a revolutionary piece created in 1952, showcased his penchant for redefining women’s fashion. Givenchy’s contributions to the fashion industry extended beyond clothing; he introduced the concept of a luxury ready-to-wear line, making high-end fashion accessible to a broader audience.

The 1960s witnessed Givenchy’s exploration of geometric shapes and unconventional fabrics, further solidifying his reputation as a visionary in the fashion realm. His use of graphic prints and bold patterns challenged conventional norms, inspiring a new wave of creativity in the industry.

Global Expansion and Enduring Legacy

Givenchy’s influence transcended borders, and by the 1970s, his brand had expanded globally. The Maison Givenchy became synonymous with Parisian chic, attracting a diverse clientele ranging from Hollywood stars to royalty. The designer’s commitment to elegance, combined with his ability to adapt to changing tastes, ensured that the House of Givenchy remained at the forefront of haute couture.

In 1988, Givenchy sold his fashion house to the luxury conglomerate LVMH (Moët Hennessy Louis Vuitton), signaling a new chapter for the brand. Despite stepping down from the creative helm, Givenchy’s legacy continued to flourish under the guidance of subsequent creative directors.

Awards and Honors: Recognizing Excellence

Hubert de Givenchy’s contributions to the world of fashion garnered numerous accolades and honors throughout his illustrious career. In 1983, he received the Chevalier de la Légion d’Honneur, one of France’s highest civilian honors, in recognition of his outstanding achievements. The fashion world also celebrated his legacy with retrospective exhibitions, showcasing the evolution of Givenchy’s designs and their enduring impact.

The Enduring Allure of Givenchy: A Lasting Impact

Hubert de Givenchy’s influence on the world of fashion goes beyond the garments he created; it encompasses a philosophy of style and grace. His commitment to refining the art of dressing and his ability to capture the essence of timeless beauty continue to inspire designers and fashion enthusiasts alike.

Givenchy’s designs, characterized by their enduring elegance and simplicity, remain relevant in contemporary fashion. The House of Givenchy, under various creative directors, strives to honor and build upon the foundation laid by its visionary founder.

Hubert de Givenchy passed away on March 10, 2018, leaving behind a legacy that transcends trends and resonates with those who appreciate the transformative power of fashion. His impact on haute couture, coupled with his aristocratic charm, ensures that the name Givenchy will forever be synonymous with unparalleled style and sophistication.

Categories
Entertainment & Arts

Review of Mean Girls: A Fantastic Musical Refresh of the Teen Classic

In the beginning, the idea of successfully remaking Mean Girls seemed about as likely as making “fetch” happen. However, the new version, complete with a fresh screenplay from Tina Fey (based on her Broadway book, which was based on her 2004 movie script), manages to capture the essence of life with the Plastics in a pretty fantastic way.

The story follows the same beats as the 2004 hit film, with Cady Heron (played by Angourie Rice) navigating the challenges of a midwestern high school filled with cliques, gossip, and stolen boyfriends. Teaming up with her new friends Janis (Auli’i Cravalho) and Damian (Jaquel Spivey), Cady devises a plan to disrupt the lives of Regina George (Reneé Rapp) and her fellow Plastics, Gretchen (Bebe Wood) and Karen (Avantika). However, things take an unexpected turn as Cady herself becomes entangled in the world of pink power dynamics, especially in her rivalry with Regina for the attention of popular boy Aaron Samuels (Christopher Briney).

Though the core story remains the same, Fey wisely updates the script for a new generation of teens. Many of the iconic lines from the original movie are either eliminated or cleverly integrated into musical numbers. The collaborative efforts of Fey, directors Samantha Jayne and Arturo Perez Jr., and the cast pay homage to the original while creating a movie that stands on its own. The humor feels timeless, with some jokes possibly crafted by Fey years ago but reworked for today’s audience.

Teen culture has evolved since 2004, and this adaptation reflects positive changes in inclusivity and acceptance. Some problematic aspects of the original script have been removed, making it more suitable for today’s audience. However, this adjustment also lessens the sharp edge that made Mean Girls so memorable. The biting and vicious nature of teenage girls, a significant element of the original, feels somewhat subdued in this version.

Social changes, especially the impact of social media on pop culture and teenagers’ lives, are seamlessly integrated into the plot. Directors Jayne and Perez skillfully incorporate TikTok reaction vids, Instagram comments, and other modern elements to create a setting that feels relevant to North Shore High School in 2024.

Despite efforts to downplay its musical nature, Mean Girls is indeed a musical. While the overall score is average, there are standout numbers, such as the catchy “Revenge Party.” Jayne and Perez display a confident understanding of the musical genre, creating a visually engaging world that complements the story.

The true strength of Mean Girls lies in its cast. Angourie Rice, though slightly mild-mannered, leads the cast well. Reneé Rapp steals the show with her portrayal of Regina, delivering a powerful and daring performance. Auli’i Cravalho shines as Janis, adding depth and playfulness to her character. However, Bebe Wood as Gretchen is forgettable, and Avantika’s performance as Karen feels overacted.

While the new Mean Girls may not launch careers as its 2004 counterpart did, it remains a playground for fresh talent. Do we really need another film version? Perhaps not, but it’s quite grool that the one we have is so enjoyable. Grade: B

Categories
Entertainment & Arts

Breaking Down the Exciting 2024 Screen Actors Guild Awards Nominations: Hollywood’s Finest Recognized in Film and TV

Hollywood actors are getting recognition for their outstanding work in movies and TV shows at the 2024 Screen Actors Guild Awards. Barbie and Oppenheimer lead with four nominations each, including nods for Margot Robbie, Ryan Gosling, Cillian Murphy, Robert Downey Jr., and Emily Blunt.

Some surprises and snubs in the film category include Leonardo DiCaprio not getting a nomination for his role in Killers of the Flower Moon and Fantasia Barrino missing out for The Color Purple. Penélope Cruz’s supporting performance in Ferrari was an unexpected nominee.

On the TV side, HBO’s Succession’s final season earned five nominations, with Pedro Pascal, Bella Ramsey from The Last of Us, Quinta Brunson of Abbott Elementary, and stars of Ted Lasso also being major nominees.

Issa Rae and Kumail Nanjiani announced the nominees on Instagram Live. The Screen Actors Guild and the American Federation of Television and Radio Artists (SAG-AFTRA) had a significant year, including a four-month strike from July to November. Fran Drescher, who played a role in leading the guild during the strike, spoke during the announcement.

This year, SAG’s nominations overlap with the Emmys season due to the strike affecting the TV Academy’s schedule. SAG Awards are a crucial part of the awards season leading up to the Oscars, and the winners often align with the Academy’s choices.

Barbra Streisand will receive the 2024 SAG Life Achievement Award at the ceremony on Feb. 24, which will be streamed live on Netflix.

For a full list of the 2024 SAG Awards nominations, check below:

FILM NOMINEES:

  • Motion Picture Cast: American Fiction, Barbie, The Color Purple, Killers of the Flower Moon, Oppenheimer
  • Male Actor in a Leading Role (Motion Picture): Bradley Cooper, Colman Domingo, Paul Giamatti, Cillian Murphy, Jeffrey Wright
  • Female Actor in a Leading Role (Motion Picture): Annette Bening, Lily Gladstone, Carey Mulligan, Margot Robbie, Emma Stone
  • Male Actor in a Supporting Role (Motion Picture): Sterling K. Brown, Willem Dafoe, Robert De Niro, Robert Downey Jr., Ryan Gosling
  • Female Actor in a Supporting Role (Motion Picture): Emily Blunt, Danielle Brooks, Penélope Cruz, Jodie Foster, Da’Vine Joy Randolph
  • Stunt Ensemble in a Motion Picture: Barbie, Guardians of the Galaxy Vol. 3, Indiana Jones and the Dial of Destiny, John Wick: Chapter 4, Mission: Impossible — Dead Reckoning, Part One

TELEVISION NOMINEES:

  • Drama Series Ensemble: The Crown, The Gilded Age, The Last of Us, The Morning Show, Succession
  • Comedy Series Ensemble: Abbott Elementary, Barry, The Bear, Only Murders in the Building, Ted Lasso
  • Male Actor in a TV Movie or Miniseries: Matt Bomer, Jon Hamm, David Oyelowo, Tony Shalhoub, Steven Yeun
  • Female Actor in a TV Movie or Miniseries: Uzo Aduba, Kathryn Hahn, Brie Larson, Bel Powley, Ali Wong
  • Male Actor in a Drama Series: Brian Cox, Billy Crudup, Kieran Culkin, Matthew Macfadyen, Pedro Pascal
  • Female Actor in a Drama Series: Jennifer Aniston, Elizabeth Debicki, Bella Ramsey, Keri Russell, Sarah Snook
  • Male Actor in a Comedy Series: Brett Goldstein, Bill Hader, Ebon Moss-Bachrach, Jason Sudeikis, Jeremy Allen White
  • Female Actor in a Comedy Series: Alex Borstein, Rachel Brosnahan, Quinta Brunson, Ayo Edebiri, Hannah Waddingham
  • Stunt Ensemble in a TV Series: Ahsoka, Barry, Beef, The Last of Us, The Mandalorian
Categories
Science

Unlocking Flexibility: A Comprehensive Guide on How to Soften Rubber

Introduction:

Rubber, a versatile material known for its elasticity and durability, is used in a wide range of products, from tires and gaskets to footwear and household items. Over time, exposure to various conditions or prolonged storage can cause rubber to harden, losing its original flexibility. However, the good news is that there are effective methods for softening rubber and restoring its pliability. In this comprehensive guide, we will explore the reasons behind rubber hardening, the science of softening, and various techniques to rejuvenate rubber products.

Section 1: Understanding Rubber Hardening

  1. Factors Leading to Hardening:
    • Several factors contribute to rubber hardening over time. Exposure to sunlight, oxygen, ozone, extreme temperatures, and certain chemicals can cause the rubber molecules to crosslink, resulting in a stiff and inflexible texture.
  2. Common Hardened Rubber Products:
    • Various everyday items can experience rubber hardening, including tires, seals, gaskets, footwear, and even rubberized tools. Understanding the causes allows for effective prevention and remediation.

Section 2: Science Behind Softening Rubber

  1. Polymer Structure of Rubber:
    • Rubber is a polymer composed of long-chain molecules with unique properties. The crosslinking of these molecules is responsible for the hardening of rubber. Softening rubber involves disrupting or reversing these crosslinks to restore flexibility.
  2. Role of Heat and Solvents:
    • Softening rubber often involves the application of heat and/or solvents. Heat facilitates the mobility of polymer chains, while solvents can swell the rubber, allowing for increased movement of the molecular structure.

Section 3: Methods for Softening Rubber

  1. Applying Heat:
    • Heat is a common method for softening rubber. Techniques include using hot water, steam, or even a microwave to gently warm the rubber product. This encourages the polymer chains to move more freely, restoring flexibility.
  2. Boiling Water Technique:
    • Submerging the rubber item in boiling water for a specific duration softens the material. This method is effective for smaller rubber items such as seals, gaskets, or smaller tools.
  3. Using a Microwave:
    • Microwave heating provides a controlled and quick way to soften rubber. Proper precautions, such as monitoring closely and avoiding overheating, are essential to prevent damage to the rubber.
  4. Using a Hairdryer or Heat Gun:
    • Directing a hairdryer or heat gun onto the rubber surface allows for targeted heating. This method is suitable for smaller items or localized hardening.
  5. Solvent Softening:
    • Certain solvents can break down the crosslinks in rubber, softening the material. Common solvents include acetone, rubbing alcohol, or specialized rubber softening products.
  6. Soaking in Oil:
    • Immersing the rubber item in a lubricating oil, such as motor oil or vegetable oil, can help restore flexibility. This method is particularly useful for larger items like tires.
  7. Freezing and Thawing:
    • Alternating between freezing and thawing can disrupt the rubber’s molecular structure. Place the rubber item in a sealed bag and freeze it, then allow it to thaw at room temperature. Repeat as necessary.

Section 4: Step-by-Step Guides for Select Methods

  1. Boiling Water Technique:
    • Boil a pot of water.
    • Submerge the rubber item in the boiling water for 5-10 minutes.
    • Remove the item and check for flexibility.
    • Repeat if necessary.
  2. Using a Microwave:
    • Place the rubber item in a microwave-safe container.
    • Heat in short intervals, checking for softening after each interval.
    • Avoid overheating to prevent damage.
  3. Solvent Softening with Acetone:
    • Ventilate the area properly.
    • Submerge the rubber item in acetone for a few hours.
    • Remove and allow it to air-dry.
    • Check for flexibility.
  4. Soaking in Oil:
    • Submerge the rubber item in oil for 24-48 hours.
    • Wipe off excess oil.
    • Check for flexibility and repeat if necessary.

Section 5: Precautions and Safety Measures

  1. Ventilation:
    • When using solvents or applying heat, ensure proper ventilation to avoid inhalation of fumes.
  2. Avoid Overheating:
    • Exercise caution when using heat sources to prevent overheating, which can lead to damage or distortion of the rubber.
  3. Compatibility with Solvents:
    • Check the compatibility of the rubber with solvents to avoid potential damage. Perform a small test on a hidden area if unsure.

Section 6: Preventive Measures to Avoid Rubber Hardening

  1. Proper Storage:
    • Store rubber items in a cool, dark, and dry environment to minimize exposure to sunlight, heat, and humidity.
  2. Regular Use:
    • Regularly using and flexing rubber items helps prevent prolonged stagnation and hardening.
  3. Protective Coatings:
    • Applying protective coatings or treatments, such as silicone sprays or rubber conditioners, can help maintain the flexibility of rubber products.

Section 7: Applications and Practical Uses

  1. Automotive Maintenance:
    • Softening hardened rubber seals and gaskets in automotive applications can prevent leaks and ensure optimal performance.
  2. Tool Restoration:
    • Reviving rubberized tool handles enhances grip and comfort during use.
  3. Footwear Care:
    • Softening hardened shoe soles or rubber boots improves comfort and extends the lifespan of footwear.
  4. DIY Projects:
    • Softening rubber is beneficial for various DIY projects, from crafting to home repairs, where flexibility is crucial.

Section 8: Common Misconceptions and FAQs

  1. Can all types of rubber be softened?:
    • The effectiveness of softening methods depends on the type of rubber and its composition. Some rubber compounds may respond better to specific techniques.
  2. How long does it take to soften rubber?:
    • The time required varies based on the method used, the size of the rubber item, and the degree of hardening. Some methods may yield results in minutes, while others may take several hours.

Section 9: Conclusion

The ability to soften rubber extends the life and functionality of a wide array of products, from household items to automotive components. This comprehensive guide has equipped you with an understanding of why rubber hardens, the science behind softening, and various practical methods to rejuvenate rubber. Whether you’re restoring tool handles, enhancing footwear comfort, or tackling DIY projects, the knowledge gained here empowers you to unlock the flexibility of rubber and bring new life to your rubberized possessions. As you embark on the journey of rubber restoration, let this guide be your companion in ensuring the longevity and performance of rubber products in your daily life.

Categories
Science

Unveiling Nature’s Indicators: A Comprehensive Guide on How to Check Water Temperature Without a Thermometer

Introduction:

In various scenarios, from outdoor adventures to home activities, knowing the temperature of water is crucial. While thermometers are the conventional tool for this purpose, there are times when one may not be readily available. Fear not, as nature provides subtle clues and creative techniques that allow you to estimate water temperature without the aid of a thermometer. This comprehensive guide will explore various methods, both traditional and innovative, for checking water temperature without the reliance on a dedicated measuring tool.

Section 1: Importance of Water Temperature

  1. Relevance in Daily Life:
    • Water temperature is a vital parameter in numerous situations, including cooking, recreational activities, and even monitoring environmental conditions. Understanding the temperature of water ensures safety, comfort, and optimal performance in various endeavors.
  2. Common Applications:
    • Whether you’re brewing the perfect cup of tea, taking a soothing bath, or engaging in water-based sports, having a sense of the water temperature enhances the overall experience and helps avoid potential discomfort or risks.

Section 2: Traditional Methods for Estimating Water Temperature

  1. Touch Test:
    • The human touch is a remarkably sensitive tool for gauging water temperature. Different parts of the body, such as the wrist or back of the hand, have varying levels of sensitivity and can provide a reasonably accurate sense of whether the water is cold, warm, or hot.
  2. Dip Test:
    • Quickly dipping a finger into the water and gauging the immediate sensation can offer insights into its temperature. This method is more subjective but becomes more reliable with experience.
  3. Observing Steam:
    • Steam rising from hot water can provide visual cues about its temperature. The intensity, volume, and speed of the rising steam correlate with the water’s heat level.

Section 3: Creative Techniques for Water Temperature Assessment

  1. Handmade Temperature Chart:
    • Create a personalized temperature chart based on your experiences. Note the sensations you feel when immersing your hand in water of known temperatures, establishing a reference guide for future estimations.
  2. Natural Indicators:
    • Nature provides several indicators that can offer clues about water temperature. Observing the behavior of animals, the state of ice, or the presence of specific aquatic plants can serve as natural thermometers.

Section 4: The Hand Test – Understanding Sensations

  1. Cold Water Sensations:
    • When the water feels painfully cold, causes numbness, and prompts a quick withdrawal of the hand, it indicates that the temperature is likely below 50°F (10°C).
  2. Cool to Lukewarm Sensations:
    • A comfortable cool to lukewarm temperature, suitable for various activities, elicits a soothing and pleasant feeling without any discomfort.
  3. Warm Sensations:
    • As the water temperature rises, a warm sensation is felt, providing comfort without causing discomfort. This range typically falls between 85°F to 98°F (29°C to 37°C).
  4. Hot Sensations:
    • Water that feels hot, nearing the upper limit of comfort, produces a slightly uncomfortable warmth. This range often spans from 100°F to 110°F (38°C to 43°C).

Section 5: Utilizing Natural Indicators

  1. Animal Behavior:
    • Some animals, especially aquatic ones, exhibit distinct behaviors based on water temperature. Observing fish or other water-dwelling creatures can offer insights into whether the water is warm or cold.
  2. Presence of Ice:
    • The presence of ice or frost on the water’s surface indicates colder temperatures. However, this method is more applicable to outdoor bodies of water during colder seasons.

Section 6: Application in Different Settings

  1. In the Kitchen:
    • When cooking, the hand test can guide you in achieving the desired water temperature for various culinary tasks, from blanching vegetables to cooking pasta.
  2. Bathing:
    • Adjusting bathwater temperature is crucial for a relaxing experience. The hand test allows you to find the perfect balance between warmth and comfort.
  3. Outdoor Activities:
    • Whether you’re swimming in a natural body of water or adjusting the temperature of a portable shower while camping, the ability to estimate water temperature without a thermometer is invaluable.

Section 7: Challenges and Considerations

  1. Subjectivity:
    • One of the primary challenges is the subjectivity inherent in these methods. Sensations can vary from person to person, and individual tolerance to temperature differs.
  2. Environmental Factors:
    • External factors, such as air temperature and wind, can influence the perceived temperature of water. Consider these factors when estimating water temperature in outdoor settings.

Section 8: Safety Considerations

  1. Avoiding Scalds and Burns:
    • Exercise caution when estimating hot water temperatures to prevent scalds or burns. Start with conservative estimates and adjust accordingly.
  2. Ensuring Comfort:
    • Prioritize comfort and safety, especially in activities like bathing or swimming. The goal is to enjoy the experience without subjecting yourself to discomfort or potential harm.

Section 9: Conclusion

Mastering the art of estimating water temperature without a thermometer opens up a world of practical applications and enhances your ability to navigate various activities with confidence. From the kitchen to outdoor adventures, the hand test and natural indicators offer valuable insights into the temperature of water, ensuring optimal comfort and safety. As you explore these techniques, embrace the experiential nature of temperature estimation, and let your newfound skills guide you through a world where the touch of water becomes a sensory journey.

Categories
Science

Crafting Illusions: A Comprehensive Guide on How to Make a Hologram

Introduction:

Holograms, once considered the stuff of science fiction, have become a fascinating reality in the world of technology and visual arts. The allure of holographic images and displays captivates our imagination, creating three-dimensional illusions that seem to defy the constraints of the physical world. In this comprehensive guide, we will delve into the science, techniques, and DIY methods for creating holograms, exploring both the principles behind holography and practical steps for making your own holographic projections.

Section 1: Understanding the Science of Holography

  1. Defining Holography:
    • Holography is a photographic technique that records light patterns to create three-dimensional images. Unlike traditional photography, which captures only intensity and color, holography also records the phase of light waves, enabling the recreation of a realistic three-dimensional scene.
  2. Basic Principles of Holography:
    • Holography relies on the interference pattern created by the interaction of laser light with an object and a reference beam. This interference pattern, captured on a photosensitive surface, contains information about both the amplitude and phase of the light, allowing the recreation of a 3D image when illuminated.

Section 2: DIY Methods for Creating Holograms

  1. Creating a Holographic Image:
    • While professional holography involves sophisticated equipment and lasers, DIY holograms can be crafted using more accessible methods. One such method involves creating holographic images on photosensitive materials using a laser and a simple set-up.
  2. Materials Needed:
    • Gather materials such as laser pointer, photosensitive holographic plates or film, darkroom or a dark space, and developer and fixer solutions for processing the holographic plate.

Section 3: Step-by-Step Guide for Creating a Hologram

  1. Setting Up a Darkroom:
    • Choose or set up a darkroom to avoid exposure to unwanted light during the hologram creation process. Complete darkness is crucial for the proper development of holographic images.
  2. Preparing the Photosensitive Plate:
    • Handle the holographic plate with care to avoid contamination. In darkness, coat the plate with a thin layer of developer solution and let it dry. Once dry, place the plate in a holder or rig.
  3. Setting Up the Laser and Object:
    • Position the laser and the object you want to holograph on a stable surface. The laser should be coherent and aligned, and the object should be well-lit to create clear holographic interference patterns.
  4. Exposing the Holographic Plate:
    • Turn on the laser, allowing its light to interact with the object and create interference patterns. Direct the laser light onto the prepared holographic plate for the necessary exposure time, ensuring stability to avoid blurriness.
  5. Developing the Holographic Plate:
    • After exposure, carefully transfer the plate into the developer solution. Swirl the plate gently to ensure even development. Once developed, transfer the plate to the fixer solution to stabilize the holographic image.
  6. Drying and Illumination:
    • Allow the holographic plate to dry completely in darkness. Once dry, the holographic image is latent on the plate. To reveal the hologram, illuminate the plate with a laser beam at the same angle as during exposure.

Section 4: Making a Holographic Projector

  1. DIY Holographic Projector:
    • Creating a holographic projector for visualizing holographic images involves using transparent materials like acrylic or glass and carefully aligning them to project the reconstructed holographic image.
  2. Materials Needed:
    • Acrylic or glass sheets, a laser, holographic film, and a stable frame for holding the sheets at the right angles are essential for constructing a basic holographic projector.

Section 5: Step-by-Step Guide for Making a Holographic Projector

  1. Constructing the Frame:
    • Build a stable frame to hold the acrylic or glass sheets at the desired angles. The angles are critical for projecting the holographic image correctly.
  2. Attaching the Holographic Film:
    • Affix the holographic film onto one of the transparent sheets. The film should be positioned to allow light to pass through it and create the holographic projection.
  3. Positioning the Laser:
    • Set up the laser to illuminate the holographic film. Adjust the angle and distance of the laser to ensure optimal projection quality.
  4. Aligning the Sheets:
    • Align the acrylic or glass sheets to create the necessary reflections and refractions for projecting the holographic image. Precision is key to achieving a clear and vivid holographic projection.
  5. Testing and Adjusting:
    • Test the holographic projector by illuminating it with the laser. Make adjustments to the angles, positions, and distances to optimize the clarity and size of the projected holographic image.

Section 6: Applications and Future Developments

  1. Art and Entertainment:
    • Holography has found applications in art installations and entertainment, creating mesmerizing visual experiences. Artists and performers use holographic technology to push the boundaries of traditional visual displays.
  2. Scientific and Medical Imaging:
    • In scientific and medical fields, holography enables detailed 3D imaging. Holographic techniques provide insights into complex biological structures and aid in medical diagnostics.
  3. Holographic Displays:
    • Ongoing research focuses on developing holographic displays for everyday use, potentially replacing traditional screens with glasses-free 3D holographic images. This innovation could revolutionize the way we interact with digital content.
  4. Security and Authentication:
    • Holography is widely employed in security features for documents, credit cards, and packaging. The unique optical properties of holograms make them challenging to replicate, enhancing security and authentication measures.

Section 7: Challenges and Considerations

  1. Equipment Limitations:
    • DIY holography has limitations compared to professional holography equipment, resulting in lower resolution and quality. Understanding these limitations is crucial for managing expectations.
  2. Precision and Stability:
    • Achieving precise alignments and maintaining stability during hologram creation are critical. Any movement or misalignment can result in distorted holographic images.

Section 8: Ethical Considerations

  1. Responsible Use of Holographic Technology:
    • As holographic technology advances, ethical considerations arise, particularly in areas such as deepfakes and holographic projections of individuals. Responsible use and regulation are essential to address potential misuse.

Section 9: Conclusion

Crafting holograms, once the realm of scientific laboratories and futuristic visions, has become an accessible venture for enthusiasts and artists alike. This comprehensive guide has illuminated the principles of holography, provided step-by-step instructions for creating holographic images, and offered insights into constructing a basic holographic projector. As technology continues to push the boundaries of visual experiences, exploring the art and science of holography opens up a world of possibilities. Whether for artistic expression, scientific exploration, or technological innovation, the journey into holography invites us to embrace the limitless potential of three-dimensional illusions within our grasp.

Categories
Science

Mastering the Art of Distillation: A Comprehensive Guide on How to Make Distilled Water at Home

Introduction:

Distilled water, renowned for its purity and lack of impurities, is a staple in various applications, from laboratory experiments to household appliances. The process of distillation, which involves heating water to create steam and then cooling it to form pure water, is a simple yet effective method. This comprehensive guide will walk you through the step-by-step process of making distilled water at home, offering insights into the science behind distillation, equipment needed, and practical tips for ensuring the production of high-quality, pure water.

Section 1: Understanding the Science of Distillation

  1. Defining Distillation:
    • Distillation is a separation process that exploits the differences in boiling points of substances to purify liquids. In the context of water, the process involves heating water to its boiling point, collecting the resulting steam, and then condensing it back into liquid form to obtain pure water.
  2. Purity of Distilled Water:
    • Distilled water is lauded for its high purity, as the distillation process effectively removes contaminants, minerals, and impurities. The result is water in its most elemental form, free from minerals, chemicals, and other dissolved substances.

Section 2: Equipment Needed for Distillation

  1. Distillation Apparatus:
    • To make distilled water at home, you’ll need a distillation apparatus. This typically includes a boiling flask, a condenser, and a collection vessel. Distillation kits are available commercially, or you can assemble the components individually.
  2. Heat Source:
    • A reliable heat source is essential for boiling water in the distillation process. Common options include electric hot plates, gas burners, or even stovetops. Ensure the heat source is adjustable to control the intensity of the boiling.
  3. Cooling System:
    • The condenser acts as the cooling system, converting steam back into liquid water. This component is crucial for the success of the distillation process. Ensure the condenser is well-insulated and has a cooling mechanism, such as circulating cold water.
  4. Collection Container:
    • A clean and sterile container is needed to collect the distilled water. Use glass or food-grade plastic containers with tight-fitting lids to prevent contamination.

Section 3: Step-by-Step Guide on Making Distilled Water

  1. Setting Up the Distillation Apparatus:
    • Assemble the distillation apparatus, connecting the boiling flask to the condenser and ensuring a secure setup. Place the collection container at the end of the condenser to collect the distilled water.
  2. Filling the Boiling Flask:
    • Pour tap water or any water source into the boiling flask. Avoid overfilling to prevent spillage during the boiling process.
  3. Adjusting Heat Source:
    • Begin heating the water with the heat source. As the water reaches its boiling point, steam will rise from the boiling flask, leaving impurities behind.
  4. Collecting Distilled Water:
    • The steam travels through the condenser, where it is cooled and condensed back into liquid form. The pure, distilled water is collected in the container at the end of the condenser.
  5. Monitoring the Process:
    • Keep a close eye on the distillation process. Adjust the heat source to maintain a steady boil, and monitor the water level in the boiling flask to prevent it from running dry.
  6. Allowing Cooling Time:
    • Once you’ve collected a sufficient amount of distilled water, turn off the heat source and allow the apparatus to cool before disassembling. This prevents accidental burns and ensures a safe handling process.

Section 4: Tips for Ensuring High-Quality Distilled Water

  1. Starting with Clean Equipment:
    • Ensure that all components of the distillation apparatus are thoroughly cleaned before each use. Any residue or contaminants can affect the purity of the distilled water.
  2. Using High-Quality Water Source:
    • The quality of the source water matters. While distillation effectively removes impurities, starting with a relatively clean water source enhances the overall effectiveness of the process.
  3. Regular Maintenance of Equipment:
    • Periodically clean and inspect the distillation apparatus to prevent mineral deposits or buildup. This maintenance ensures consistent production of high-quality distilled water.
  4. Storing Distilled Water Properly:
    • Store distilled water in clean, airtight containers to prevent contamination. Keep containers away from direct sunlight and chemicals to maintain the water’s purity.

Section 5: Applications of Distilled Water

  1. Laboratory Use:
    • Distilled water is a standard requirement in laboratories for various experiments and analyses. Its purity ensures accurate and reliable results.
  2. Household Appliances:
    • Some household appliances, such as steam irons and humidifiers, benefit from the use of distilled water. Its lack of minerals prevents the buildup of deposits that can affect appliance performance.
  3. Medical and Cosmetic Applications:
    • Distilled water is often used in medical and cosmetic procedures where sterile, pure water is essential. It is a common ingredient in pharmaceutical preparations and medical equipment sterilization.
  4. Battery Maintenance:
    • Distilled water is recommended for topping up lead-acid batteries. Using distilled water prevents the introduction of impurities that could affect battery performance.

Section 6: Common Misconceptions and FAQs

  1. Does Boiling Water Make It Distilled?:
    • No, simply boiling water does not make it distilled. Distillation involves collecting the evaporated steam, condensing it back into liquid form, and separating it from impurities.
  2. Is Distilled Water Safe to Drink?:
    • Yes, distilled water is safe to drink. It lacks minerals and impurities, making it suitable for consumption. However, regular consumption of distilled water may not be recommended for extended periods due to the absence of minerals.
  3. Can Distillation Remove All Contaminants?:
    • Distillation is highly effective in removing most contaminants, including minerals, chemicals, and microorganisms. However, volatile organic compounds (VOCs) with lower boiling points than water may not be completely removed.

Section 7: Conclusion

Distilling water at home is a straightforward yet powerful process that yields pure, high-quality water free from impurities. This comprehensive guide has equipped you with the knowledge and practical steps needed to embark on the journey of making distilled water. Whether for laboratory experiments, household applications, or specialized uses, the ability to produce distilled water at home opens up a world of possibilities. As you explore the art of distillation, let this guide serve as your companion, ensuring a seamless and rewarding experience in the pursuit of pure, distilled water.