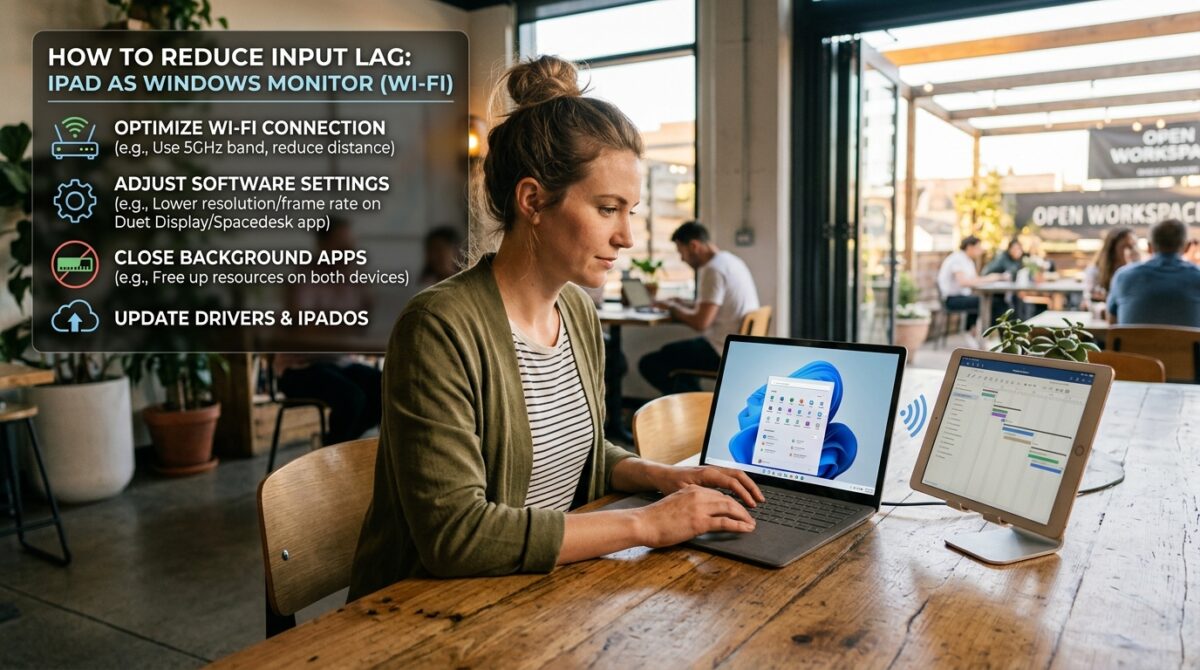
Categories
Entertainment & Arts

Chicago (2002) – Directed by Rob Marshall

“Chicago,” directed by Rob Marshall and released in 2002, is a dazzling musical film adaptation of the Broadway musical of the same name. Set in 1920s Chicago, the film combines elements of jazz, dance, and drama to tell a story of fame, corruption, and the pursuit of the American Dream. With a star-studded cast including Renée Zellweger, Catherine Zeta-Jones, and Richard Gere, “Chicago” captivated audiences with its stylish choreography, memorable musical numbers, and provocative narrative.

Plot Summary

“Chicago” follows the story of Roxie Hart (Renée Zellweger), a young aspiring performer who dreams of stardom on the vaudeville stage. When Roxie shoots her lover in a fit of rage, she finds herself in the Cook County Jail awaiting trial for murder. In prison, Roxie meets Velma Kelly (Catherine Zeta-Jones), a famous vaudeville performer also charged with murder. Both women vie for the spotlight and the attention of their slick lawyer, Billy Flynn (Richard Gere), who manipulates the media and courtroom to their advantage.

As Roxie’s trial becomes a media sensation, she and Velma compete not only for fame but also for the sympathy of the public and the outcome of their legal battles. The film explores themes of celebrity culture, corruption in the justice system, and the lengths people will go to achieve their ambitions in the Roaring Twenties.

Themes

“Chicago” delves into themes of fame, manipulation, justice, and the allure of celebrity in America’s Jazz Age. The characters navigate a world where perception often outweighs truth, and the pursuit of fame can lead to moral compromise and personal redemption. The film challenges perceptions of innocence and guilt, blurring the lines between reality and theatricality as characters use the media and public opinion to their advantage.

Visuals and Cinematic Style

Rob Marshall’s direction in “Chicago” brings the vibrant world of 1920s Chicago to life with dynamic choreography, elaborate set designs, and dazzling costumes. The film seamlessly integrates musical numbers into its narrative, blending fantasy and reality to create a visually stunning and immersive experience for audiences. Marshall’s background in musical theater shines through in his innovative staging and his ability to capture the energy and rhythm of the era’s jazz music.

Cast and Characters

Renée Zellweger delivers a standout performance as Roxie Hart, capturing the character’s ambition, vulnerability, and determination to achieve fame at any cost. Catherine Zeta-Jones shines as Velma Kelly, portraying the vaudeville star with confidence and charisma. Richard Gere brings charm and wit to the role of Billy Flynn, the smooth-talking lawyer who orchestrates Roxie’s legal defense and media circus.

The supporting cast includes John C. Reilly as Roxie’s naive and devoted husband Amos Hart, Queen Latifah as Matron Mama Morton, the prison warden with connections to Chicago’s underworld, and Christine Baranski as Mary Sunshine, a sensationalist journalist covering Roxie’s case.

Awards and Recognition

“Chicago” received widespread acclaim upon its release and went on to win six Academy Awards, including Best Picture, Best Supporting Actress (Catherine Zeta-Jones), and Best Art Direction. The film’s success at the Oscars and other awards ceremonies solidified its place as a modern classic in the musical genre. The soundtrack, featuring iconic songs like “All That Jazz” and “Cell Block Tango,” became a chart-topping hit and further contributed to the film’s cultural impact.

Legacy

As a cinematic adaptation of the long-running Broadway musical, “Chicago” revitalized interest in the musical genre and demonstrated the enduring appeal of theatrical storytelling on the silver screen. Rob Marshall’s innovative direction and the cast’s stellar performances brought new life to the characters and themes originally conceived by Bob Fosse and Fred Ebb.

“Chicago” continues to be celebrated for its stylish production values, memorable musical sequences, and timeless themes that resonate with audiences of all generations. The film’s exploration of fame, justice, and the price of ambition remains relevant in today’s entertainment landscape, reaffirming its status as a beloved classic in American cinema.

Conclusion

In conclusion, “Chicago” directed by Rob Marshall is a triumph of visual style, musicality, and storytelling that captures the essence of the Jazz Age while exploring timeless themes of fame, corruption, and the pursuit of dreams. Through its dynamic performances, dazzling choreography, and evocative cinematography, the film transports audiences to a world where appearances often deceive and where the quest for fame can lead to unexpected consequences. “Chicago” stands as a testament to the power of musical theater and its ability to entertain, provoke thought, and leave a lasting impression on audiences around the world.

Categories
Entertainment & Arts

Catch Me If You Can (2002) – Directed by Steven Spielberg

“Catch Me If You Can,” directed by Steven Spielberg and released in 2002, is a captivating biographical crime film based on the life of Frank Abagnale Jr., who gained notoriety in the 1960s for successfully performing cons worth millions of dollars while evading capture by the FBI. The film stars Leonardo DiCaprio as Frank Abagnale Jr., alongside Tom Hanks, Christopher Walken, and Martin Sheen in supporting roles. Spielberg’s direction brings to life a thrilling story of deception, pursuit, and personal growth set against the backdrop of the swinging 1960s.

Plot Summary

The film follows the extraordinary life of Frank Abagnale Jr., a talented young con artist who embarks on a spree of impersonations and fraudulent activities at a remarkably young age. After his parents’ divorce and his father’s financial troubles, Frank begins forging checks and posing as a Pan Am pilot to fund his lavish lifestyle. His schemes escalate as he adopts various identities, including a doctor and a lawyer, fooling everyone around him with his charm and intelligence.

Frank’s escapades catch the attention of FBI agent Carl Hanratty, played by Tom Hanks, who becomes obsessed with capturing him. A game of cat and mouse ensues as Carl and his team tirelessly pursue Frank across the globe, from New York to Miami to Europe. Along the way, Frank forms genuine connections with people he meets, including his romantic interest Brenda Strong (Amy Adams), all while staying one step ahead of the law.

Themes

“Catch Me If You Can” explores several themes, including identity, deception, family dynamics, and the pursuit of dreams. At its core, the film delves into the complexities of human nature and the motivations behind Frank’s daring exploits. It raises questions about morality and the blurred lines between right and wrong, as Frank navigates his dual life as a criminal and a son searching for stability.

Visuals and Cinematic Style

Spielberg’s direction in “Catch Me If You Can” captures the essence of the 1960s with vibrant visuals, stylish cinematography, and a nostalgic soundtrack that evokes the era’s glamour and allure. The film seamlessly blends suspenseful moments with light-hearted humor, showcasing Spielberg’s versatility as a director and his ability to balance drama with entertainment.

Cast and Characters

Leonardo DiCaprio delivers a charismatic and nuanced performance as Frank Abagnale Jr., portraying the character’s charm, intelligence, and vulnerability with finesse. Tom Hanks brings depth to the role of Carl Hanratty, capturing the relentless determination and moral integrity of the FBI agent pursuing Frank. Christopher Walken shines as Frank Abagnale Sr., Frank Jr.’s loving yet flawed father, whose influence shapes his son’s turbulent journey.

Awards and Recognition

Upon its release, “Catch Me If You Can” received widespread acclaim from critics and audiences alike. It was praised for its engaging storyline, strong performances, and Spielberg’s skillful direction. The film garnered several award nominations, including two Academy Award nominations for Best Actor in a Supporting Role (Christopher Walken) and Best Original Score (John Williams).

Legacy

“Catch Me If You Can” has earned a lasting place in popular culture as a classic crime drama that combines suspense with heartwarming moments of human connection. It remains a testament to Spielberg’s storytelling prowess and the enduring appeal of true stories brought to life on the silver screen. The film continues to be celebrated for its memorable characters, memorable scenes, and timeless themes that resonate with audiences of all ages.

Conclusion

In conclusion, “Catch Me If You Can” stands as a testament to Steven Spielberg’s mastery of storytelling and his ability to bring real-life narratives to vivid life on the screen. Through its compelling plot, dynamic characters, and evocative cinematography, the film captures the essence of Frank Abagnale Jr.’s incredible journey with depth and authenticity. “Catch Me If You Can” remains a captivating cinematic experience that continues to entertain and inspire audiences, reminding us of the enduring power of resilience, redemption, and the pursuit of one’s dreams.

Categories
Entertainment & Arts

The Lord of the Rings: The Two Towers (2002) – Directed by Peter Jackson

“The Lord of the Rings: The Two Towers” is a monumental fantasy epic film directed by Peter Jackson, released in 2002. It is the second installment in the epic film trilogy based on J.R.R. Tolkien’s novel “The Lord of the Rings.” This film continues the journey of the members of the Fellowship of the Ring as they face new challenges and threats in the fantastical world of Middle-earth.

Plot Summary

“The Two Towers” picks up right where its predecessor, “The Fellowship of the Ring,” left off. The Fellowship has been broken, with Frodo Baggins (Elijah Wood) and his loyal companion Samwise Gamgee (Sean Astin) continuing their perilous journey to destroy the One Ring in the fires of Mount Doom. Meanwhile, Aragorn (Viggo Mortensen), Legolas (Orlando Bloom), and Gimli (John Rhys-Davies) are in pursuit of Merry (Dominic Monaghan) and Pippin (Billy Boyd), who have been captured by orcs.

As Frodo and Sam edge closer to Mordor, they encounter Gollum (Andy Serkis), a creature corrupted by the Ring long ago. Gollum becomes both a guide and a threat to Frodo and Sam, adding tension to their already dangerous mission. Aragorn, Legolas, and Gimli join forces with the Riders of Rohan, led by King Théoden (Bernard Hill), in an effort to save Merry and Pippin from the Uruk-hai and their master, Saruman (Christopher Lee).

The film culminates in the Battle of Helm’s Deep, a breathtaking siege where the forces of Rohan, aided by Aragorn, Legolas, and Gimli, defend the fortress against Saruman’s overwhelming army. Meanwhile, Frodo and Sam face their own trials in the heart of Mordor, navigating treacherous landscapes and encountering unexpected allies and enemies.

Themes

“The Two Towers” explores themes of friendship, courage, sacrifice, and the corrupting influence of power. The central theme of the trilogy, the temptation and burden of the One Ring, is further developed as Frodo struggles with its allure and the toll it takes on his mind and soul. The loyalty and camaraderie among the characters are tested and strengthened through their shared hardships and battles.

Visuals and Cinematic Achievements

Directed by Peter Jackson, “The Two Towers” is renowned for its groundbreaking visual effects and breathtaking cinematography. The film transports viewers to the richly detailed world of Middle-earth, from the lush landscapes of the Shire to the towering peaks of Isengard and the ominous plains of Mordor. The Battle of Helm’s Deep, in particular, is celebrated as one of the most spectacular and well-choreographed battle sequences in cinematic history, showcasing Jackson’s masterful direction and the dedication of the production team.

Cast and Characters

The ensemble cast of “The Two Towers” delivers memorable performances that bring Tolkien’s characters to life:

  • Elijah Wood as Frodo Baggins, the Ring-bearer plagued by the burden of the One Ring.
  • Sean Astin as Samwise Gamgee, Frodo’s steadfast companion and protector.
  • Viggo Mortensen as Aragorn, the ranger and reluctant heir to the throne of Gondor.
  • Orlando Bloom as Legolas, the skilled Elven archer and member of the Fellowship.
  • John Rhys-Davies as Gimli, the dwarf warrior and loyal friend of Legolas.
  • Andy Serkis as Gollum, the tortured creature obsessed with reclaiming the One Ring.
  • Bernard Hill as King Théoden of Rohan, a once-great king struggling against the influence of Saruman.
  • Christopher Lee as Saruman the White, the corrupted wizard who allies himself with Sauron.

Awards and Recognition

“The Two Towers” received critical acclaim upon its release and was a box office success, grossing over $926 million worldwide. The film won numerous awards and nominations, including Academy Awards for Best Sound Editing and Best Visual Effects. Peter Jackson’s visionary direction and the film’s technical achievements set new standards for fantasy filmmaking and solidified its place in cinematic history.

Legacy

As the middle chapter of “The Lord of the Rings” trilogy, “The Two Towers” is celebrated for its epic scope, compelling storytelling, and emotional depth. It continues to be cherished by audiences worldwide and remains a cornerstone of modern fantasy cinema. The success of the trilogy paved the way for subsequent adaptations of fantasy literature and inspired a new generation of filmmakers to push the boundaries of visual storytelling.

Conclusion

“The Lord of the Rings: The Two Towers” is more than just a film; it is a cinematic achievement that captures the essence of Tolkien’s epic tale while showcasing the creativity and dedication of its filmmakers and cast. With its unforgettable characters, breathtaking visuals, and profound themes, “The Two Towers” continues to captivate and inspire audiences, proving that the power of storytelling knows no bounds in the world of Middle-earth.

Categories
Tech

How to connect to a wireless network

Understanding Wireless Network Connections

Wireless network connections, often referred to as Wi-Fi connections, enable devices to connect to the internet and communicate with other devices over a wireless network. Windows 10 supports a variety of Wi-Fi standards and encryption protocols, ensuring compatibility with different types of wireless networks.

Connecting to a Wireless Network

  1. Access Wi-Fi Settings:
    • Click on the network icon in the system tray (located in the lower-right corner of the screen, near the clock).
    • The network icon looks like a series of bars or a globe, depending on your current network status.
  2. View Available Networks:
    • In the network flyout menu, you’ll see a list of available wireless networks in your vicinity.
    • Networks that require a password are labeled as secured. Public networks or open networks typically do not require a password.
  3. Select the Desired Network:
    • Click on the name of the wireless network (SSID) you want to connect to from the list of available networks.
  4. Enter Network Password (if required):
    • If the selected network is secured, you will be prompted to enter the network security key (password).
    • Type the password carefully and ensure that “Show characters” is checked if you need to verify the characters entered.
  5. Connect to the Network:
    • Once the correct password is entered, click on “Connect” to initiate the connection process.
    • Windows will attempt to connect to the wireless network using the provided credentials.
  6. Establishing Connection:
    • After a few moments, Windows will establish a connection to the wireless network.
    • The network icon in the system tray will display a connected status, and you will have access to the internet and network resources.

Advanced Wi-Fi Settings

  1. Manage Known Networks:
    • To manage previously connected networks or forget a network, click on “Network & Internet settings” in the network flyout menu.
    • Under “Wi-Fi,” click on “Manage known networks.” Here, you can view a list of saved networks, rename them, or remove networks you no longer use.
  2. Wi-Fi Troubleshooting:
    • If you encounter issues connecting to a wireless network, use the “Network troubleshooter” in Windows to diagnose and resolve common connection problems.
    • Right-click on the network icon in the system tray, select “Troubleshoot problems,” and follow the on-screen prompts to troubleshoot Wi-Fi connectivity.

Security Considerations

  1. Network Security:
    • Use strong passwords and encryption protocols (such as WPA2) to secure your wireless network and protect against unauthorized access.
    • Avoid connecting to open or unsecured networks, especially when transmitting sensitive information.
  2. Public Wi-Fi Safety:
    • Exercise caution when connecting to public Wi-Fi networks, such as those in cafes, airports, or hotels. Use a VPN (Virtual Private Network) to encrypt your internet traffic for added security.

Additional Tips for Wireless Network Connections

  1. Wi-Fi Signal Strength:
    • Ensure your computer is within range of the wireless router or access point to maintain a stable connection.
    • Avoid physical obstructions and interference from other electronic devices that may weaken the Wi-Fi signal.
  2. Updating Wi-Fi Drivers:
    • Periodically update your Wi-Fi adapter drivers to ensure compatibility with the latest Wi-Fi standards and security enhancements.
    • Check the manufacturer’s website or use Windows Update to download and install the latest drivers for your Wi-Fi adapter.

Conclusion

Connecting to a wireless network in Windows 10 allows you to access the internet and network resources conveniently and securely. By following the steps outlined in this guide, you can easily connect to Wi-Fi networks, manage wireless connections, and troubleshoot common issues to ensure a seamless internet experience.

Regularly review and update Wi-Fi settings, prioritize network security, and maintain good Wi-Fi signal strength to optimize your wireless network connection in Windows 10.

Categories
Tech

How to use Remote Desktop Connection

Introduction to Remote Desktop Connection

Remote Desktop Connection (RDC) is a feature built into Windows that enables you to connect to and control a remote computer from another location. It uses the Remote Desktop Protocol (RDP) to establish a secure connection between your local computer and the remote machine, allowing you to interact with the desktop environment and access applications, files, and resources as if you were sitting in front of the remote computer.

Enabling Remote Desktop on the Remote Computer

Before you can connect to a remote computer using Remote Desktop Connection, you need to enable Remote Desktop on the remote computer:

  1. Access System Properties:
    • On the remote computer, right-click on the Start menu (Windows icon) and select “System.”
    • Alternatively, press Win + Pause/Break to open System Properties.
  2. Enable Remote Desktop:
    • In the System window, click on “Remote settings” in the left sidebar.
    • Under the Remote tab, select “Allow remote connections to this computer.”
    • Optionally, choose “Allow connections only from computers running Remote Desktop with Network Level Authentication (recommended)” for enhanced security.
    • Click “Apply” and then “OK” to save the changes.

Connecting to a Remote Computer Using Remote Desktop Connection

Once Remote Desktop is enabled on the remote computer, you can connect to it from your local computer using Remote Desktop Connection:

  1. Open Remote Desktop Connection:
    • On your local computer, click on the Start menu (Windows icon) and search for “Remote Desktop Connection” or type mstsc and press Enter to open the Remote Desktop Connection app.
  2. Enter Remote Computer’s IP Address or Hostname:
    • In the Remote Desktop Connection window, enter the IP address or hostname of the remote computer you want to connect to.
    • If connecting over the internet, you may need to enter the public IP address or domain name associated with the remote computer.
  3. Enter Credentials:
    • Click on “Connect.”
    • Enter the username and password for the remote computer’s user account that has permission to access Remote Desktop.
    • Optionally, you can save your credentials by checking “Remember me” for future connections.
  4. Establishing Connection:
    • Click on “Connect” to initiate the connection. Remote Desktop Connection will establish a secure connection to the remote computer.
  5. Interacting with Remote Desktop:
    • Once connected, you will see the remote computer’s desktop environment displayed in the Remote Desktop Connection window.
    • Use your local keyboard and mouse to interact with the remote desktop as if you were physically present at the remote computer.

Advanced Remote Desktop Connection Settings

  1. Customizing Display Settings:
    • In the Remote Desktop Connection window, click on “Show Options” to reveal additional settings.
    • Navigate through tabs like Display, Local Resources, Experience, and Advanced to customize display resolution, color depth, audio redirection, printer sharing, and other options.
  2. Clipboard and File Transfer:
    • Use the clipboard redirection feature to copy and paste text and files between your local computer and the remote desktop.
    • Drag and drop files between your local computer and the remote desktop using the Remote Desktop Connection window.

Disconnecting and Ending Remote Desktop Session

  1. Disconnecting:
    • To disconnect from the remote computer without logging out, click on the “X” button in the Remote Desktop Connection window’s title bar or press Ctrl + Alt + End and select “Disconnect.”
  2. Ending Session:
    • To log out and end the remote session completely, click on the Start menu on the remote desktop, select “Power,” and then choose “Sign out” or “Shut down.”

Security Considerations

  1. Network Security:
    • Ensure that Remote Desktop connections are secured by using strong passwords and enabling Network Level Authentication (NLA) to protect against unauthorized access.
    • Avoid exposing Remote Desktop directly to the internet without proper security measures such as VPN or firewall rules.
  2. Firewall Settings:
    • Configure firewall settings on both the local and remote computers to allow Remote Desktop connections through TCP port 3389, or modify the port if necessary for security reasons.

Troubleshooting Remote Desktop Connection Issues

  1. Connection Problems:
    • Verify network connectivity between your local and remote computers.
    • Check firewall settings to ensure that Remote Desktop connections are allowed.
    • Ensure that Remote Desktop is enabled on the remote computer and that the correct username and password are entered.
  2. Performance Issues:
    • Adjust Remote Desktop settings such as display resolution, color depth, and audio redirection to optimize performance over slow network connections.

Conclusion

Remote Desktop Connection in Windows 10 provides a powerful tool for accessing and managing remote computers or virtual machines from anywhere. By following the steps outlined in this guide, you can effectively use Remote Desktop Connection to troubleshoot issues, access files and applications remotely, and maintain productivity across multiple devices.

Regularly review and update Remote Desktop settings, maintain network security, and troubleshoot connection issues to ensure a seamless remote desktop experience in Windows 10.

Categories
Tech

How to adjust date and time settings

Understanding Date and Time Settings in Windows

Date and time settings in Windows control how your computer displays and manages time-related information. Accurate date and time settings are crucial for scheduling tasks, organizing files, and ensuring synchronization across devices and networks.

Accessing Date and Time Settings

  1. Open Settings:
    • Click on the Start menu (Windows icon) in the bottom-left corner of the screen.
    • Select “Settings” (gear icon) to open the Settings window.
  2. Navigate to Date & Time Settings:
    • In the Settings window, click on “Time & language.”
    • Choose “Date & time” from the left sidebar to access date and time settings.

Adjusting Date and Time

  1. Setting Date and Time:
    • Under the Date & time settings, toggle “Set time automatically” to ON to allow Windows to set the date and time automatically based on your time zone and internet connection.
    • If automatic settings are disabled, click on “Change” under “Set the date and time manually” to set the correct date and time manually.
  2. Selecting Time Zone:
    • Below the date and time settings, toggle “Set time zone automatically” to ON to allow Windows to detect and set your time zone automatically based on your location.
    • If automatic time zone detection is disabled, manually select your time zone from the drop-down menu.
  3. Adjusting Additional Date and Time Options:
    • Click on “Additional date, time, & regional settings” to access more advanced settings in the Control Panel.
    • Here, you can configure settings such as formatting for dates, times, and calendars based on your regional preferences.

Synchronizing Time with Online Servers

  1. Synchronize with Internet Time Server:
    • In the Date & Time settings window, click on “Sync now” under “Synchronize your clock” to manually synchronize your computer’s clock with an online time server.
    • Windows uses time.windows.com by default, but you can change the server by clicking on “Change settings” and selecting a different server from the dropdown or entering a custom server address.

Adjusting Date and Time Format

  1. Change Date and Time Format:
    • Under “Formats,” click on “Change date and time formats” to customize how dates and times are displayed on your computer.
    • Adjust formats for short date, long date, short time, and long time to match your preferences.

Additional Tips for Managing Date and Time Settings

  1. Daylight Saving Time Adjustments:
    • Windows automatically adjusts for daylight saving time if “Set time automatically” and “Set time zone automatically” are enabled.
    • Ensure these settings are toggled ON to automatically update for daylight saving time changes.
  2. Troubleshooting Date and Time Issues:
    • If you encounter issues with date and time synchronization, ensure your internet connection is stable and check that your computer’s time settings are configured correctly.
    • Manually synchronize with an online time server if automatic synchronization fails to resolve the issue.

Conclusion

Accurate date and time settings are fundamental for maintaining synchronization across devices, scheduling tasks, and organizing data effectively in Windows 10. By following the steps outlined in this guide, you can easily adjust date and time settings, synchronize your computer’s clock with online time servers, and customize date and time formats to suit your preferences.

Regularly review and update date and time settings based on changes in time zones, daylight saving time adjustments, or personal preferences to ensure your computer’s clock remains accurate and synchronized with global time standards.

Categories
Tech

How to change power settings

Understanding Power Settings in Windows

Power settings in Windows control how your computer manages energy consumption by adjusting screen brightness, sleep modes, and other power-related behaviors. By customizing these settings, you can balance performance, energy efficiency, and battery life according to your preferences.

Accessing Power Settings

  1. Open Settings:
    • Click on the Start menu (Windows icon) in the bottom-left corner of the screen.
    • Select “Settings” (gear icon) to open the Settings window.
  2. Navigate to Power & Sleep Settings:
    • In the Settings window, click on “System.”
    • Choose “Power & sleep” from the left sidebar to access power settings.
  3. Additional Power Options:
    • To access more advanced power settings, click on “Additional power settings” under the Related settings section. This opens the Power Options control panel.

Adjusting Power Plans

Windows offers predefined power plans that optimize settings for different usage scenarios. You can customize these plans or create your own to suit specific needs:

  1. Choosing a Power Plan:
    • In the Power Options control panel, you’ll see a list of available power plans like “Balanced,” “Power saver,” and “High performance.”
    • Select a plan based on your priorities—Balanced balances performance and energy consumption, Power saver conserves battery by reducing performance, and High performance maximizes system performance at the cost of energy efficiency.
  2. Customizing Power Plans:
    • Click on “Change plan settings” next to your selected power plan to customize its settings.
    • Adjust settings such as screen brightness, sleep and display timeouts, and system cooling policy to meet your preferences.
  3. Creating a Custom Power Plan:
    • If none of the default plans suit your needs, click on “Create a power plan” in the Power Options control panel.
    • Enter a name for your custom plan and select the desired settings for sleep, display, and power management. Click “Next” to create the plan.

Advanced Power Settings

  1. Accessing Advanced Settings:
    • In the Power Options control panel, click on “Change advanced power settings” to access detailed settings for your selected power plan.
  2. Configuring Advanced Options:
    • Customize advanced settings such as processor power management, PCI Express settings, and battery settings to optimize energy usage and performance.

Additional Power Settings Tips

  1. Battery Settings for Laptops:
    • If you’re using a laptop, consider adjusting battery settings under “Battery” in the Power Options control panel to maximize battery life. Options include setting critical battery action and low battery level notifications.
  2. Dynamic Brightness Control:
    • Some laptops and monitors support dynamic brightness control to adjust screen brightness based on ambient light conditions. Check your device settings or display driver settings for this feature.
  3. Power Settings for Desktops:
    • For desktop computers, focus on optimizing power settings to balance performance and energy efficiency without the need to conserve battery.

Monitoring Power Usage

  1. Battery Report:
    • Windows includes a built-in battery report feature that provides detailed information about battery usage, capacity history, and battery life estimates. To generate a battery report:
      • Open Command Prompt as an administrator.
      • Type powercfg /batteryreport and press Enter.
      • A battery report will be saved to your computer’s directory, detailing battery health and usage statistics.

Conclusion

Customizing power settings in Windows 10 allows you to optimize energy consumption, maximize battery life on laptops, and tailor performance settings on desktops to meet your specific needs. By following the steps outlined in this guide, you can effectively manage power settings, balance performance with energy efficiency, and ensure a personalized computing experience.

Regularly review and adjust power settings based on your usage patterns and preferences to maintain optimal system performance and battery life in Windows 10.

Categories
Tech

How to use Windows Backup and Restore

Windows Backup and Restore is a built-in feature in Windows operating systems that allows users to create backups of important files, folders, and system images. It provides a convenient way to protect your data from accidental loss, hardware failure, or other unforeseen events by enabling you to restore files or recover your entire system to a previous state. This guide provides comprehensive instructions on how to use Windows Backup and Restore in Windows 10, covering essential features such as creating backups, restoring files, configuring backup settings, and managing backup storage:


Introduction to Windows Backup and Restore

Windows Backup and Restore (formerly known as Windows Backup and Restore Center) is a backup and recovery feature available in Windows operating systems. It enables users to create backups of files, folders, and system images, allowing them to restore data in case of data loss or system failure. By regularly backing up your data, you can safeguard important files and ensure peace of mind knowing that you can recover them if needed.

Getting Started with Windows Backup and Restore

  1. Accessing Backup and Restore:
    • Click on the Start button (Windows icon) in the bottom-left corner of the screen.
    • Type “Backup settings” in the search box and select “Backup settings” from the search results to open the Backup settings window.
  2. Setting Up Backup:
    • In the Backup settings window, click on “Go to Backup and Restore (Windows 7)” to access the Backup and Restore control panel.
  3. Navigating Backup and Restore Interface:
    • The Backup and Restore control panel provides options to create a backup, restore files from a backup, or change settings related to backup configuration and storage.

Creating a Backup

  1. Setting Backup Destination:
    • In the Backup and Restore control panel, click on “Set up backup” to start the Backup wizard.
    • Choose a location where you want to save your backup, such as an external hard drive, network location, or a separate partition on your computer.
  2. Selecting Files and Folders:
    • Choose the files and folders you want to include in the backup. You can select specific libraries (Documents, Pictures, Videos) or customize selections by clicking on “Let me choose.”
  3. Scheduling Backup:
    • Configure a backup schedule by selecting “Change schedule” and specifying how often you want Windows to create backups automatically (e.g., daily, weekly).
  4. Completing Backup Setup:
    • Review the summary of your backup settings. Click on “Save settings and run backup” to initiate the backup process.

Restoring Files from Backup

  1. Accessing Restore Options:
    • In the Backup and Restore control panel, click on “Restore my files” to open the Restore Files wizard.
  2. Selecting Backup Location:
    • Choose the backup location where your files are stored (e.g., external drive, network location).
  3. Browsing Backup Contents:
    • Browse through the backup folder to locate the files or folders you want to restore. You can use search filters or browse through specific dates if multiple backups are available.
  4. Restoring Files:
    • Select the files or folders you want to restore. Click on “Restore” to restore them to their original location or “Restore to” to choose a different location.
  5. Completing Restore Process:
    • Follow the on-screen prompts to complete the file restoration process. Windows will restore the selected files to their original or specified location.

Managing Backup Settings

  1. Changing Backup Settings:
    • In the Backup and Restore control panel, click on “Change settings” to modify backup configuration options.
  2. Adding or Removing Files from Backup:
    • Click on “Change what to back up” to add new files or remove existing files from the backup selection.
  3. Viewing Backup History:
    • Click on “Manage space” to view the backup history and manage backup storage settings, including deleting older backups to free up disk space.
  4. Monitoring Backup Status:
    • Monitor the status of backup operations and view detailed reports by clicking on “View details” in the Backup and Restore control panel.

Additional Tips and Considerations

  1. Backup Frequency:
    • Schedule regular backups to ensure your data is up-to-date and protected against data loss or system failure.
  2. Storage Location:
    • Choose a reliable and secure storage location for backups, such as an external hard drive or network location, to prevent data loss in case of hardware failure or computer theft.
  3. System Image Backup:
    • Consider creating a system image backup to capture the entire system state, including installed programs and system settings, which allows for full system recovery in case of system corruption or hard drive failure.
  4. Testing Restorations:
    • Periodically test the restoration process by restoring a few files or folders from backup to ensure that backups are functioning correctly and your data is recoverable.

Conclusion

Windows Backup and Restore provides a convenient and reliable solution for backing up and restoring files, folders, and system images in Windows 10. By following the step-by-step instructions and best practices provided in this guide, you can effectively use Windows Backup and Restore to protect your data, recover from data loss or system failure, and maintain system reliability and productivity.

Regularly review and update backup settings, monitor backup status, and perform test restorations to ensure your backups are current and your data remains secure. Take advantage of Windows Backup and Restore features to safeguard your valuable files and maintain peace of mind knowing that your data is protected against unexpected events.

Categories
Business

How to Develop a Brand Identity

Developing a brand identity is crucial for businesses aiming to establish a strong, recognizable presence in the market. A well-defined brand identity encompasses the visual elements, messaging, values, and personality that distinguish a brand and resonate with its target audience. In this comprehensive guide, we will explore the key components and steps involved in developing an effective brand identity.

Table of Contents

  1. Introduction to Brand Identity
    • Importance of Brand Identity
    • Elements of Brand Identity
  2. Understanding Your Brand
    • Define Your Brand Values
    • Conduct Brand Research
    • Identify Target Audience
  3. Creating Visual Brand Elements
    • Logo Design
    • Color Palette
    • Typography
    • Imagery and Photography
  4. Crafting Brand Messaging
    • Brand Voice and Tone
    • Tagline and Slogan
    • Value Proposition
  5. Developing Brand Guidelines
    • Consistency in Branding
    • Guidelines for Visual and Verbal Identity
  6. Implementing Your Brand Identity
    • Integration Across Platforms
    • Launch and Rollout Strategy
    • Internal Brand Alignment
  7. Evolving and Maintaining Your Brand
    • Monitoring Brand Perception
    • Adapting to Market Changes
    • Brand Identity Refresh
  8. Measuring Brand Identity Success
    • Key Performance Indicators (KPIs)
    • Feedback and Evaluation
  9. Conclusion

1. Introduction to Brand Identity

Importance of Brand Identity

Brand identity defines how a business wants to be perceived by its customers, stakeholders, and the market at large. It encompasses the visual aspects, messaging, values, and personality that distinguish a brand from its competitors. Key benefits include:

  • Differentiation: Stand out in a crowded marketplace and create a unique position.
  • Consistency: Build trust and recognition through consistent brand representation.
  • Connection: Forge emotional connections with customers based on shared values and experiences.

Elements of Brand Identity

  • Visual Identity: Logo, color palette, typography, and imagery.
  • Verbal Identity: Brand voice, messaging, tagline, and value proposition.
  • Brand Values: Core principles and beliefs that guide the brand’s actions and decisions.

2. Understanding Your Brand

Define Your Brand Values

  • Mission Statement: Define the purpose and reason for your brand’s existence.
  • Vision Statement: Envision the future direction and aspirations of your brand.
  • Values: Identify core principles and beliefs that shape your brand’s behavior and relationships.

Conduct Brand Research

  • Market Analysis: Understand market trends, competitor positioning, and consumer preferences.
  • Brand Audit: Assess current brand perception, strengths, weaknesses, and opportunities for improvement.
  • Customer Insights: Gather feedback and insights from target audience through surveys, interviews, and focus groups.

Identify Target Audience

  • Demographics: Age, gender, income, education, etc.
  • Psychographics: Values, lifestyles, interests, behaviors.
  • Needs and Pain Points: Understand customer motivations and challenges.

3. Creating Visual Brand Elements

Logo Design

  • Purpose: Symbolic representation of your brand’s identity and values.
  • Design Process: Work with a professional designer or agency to create a memorable and versatile logo.
  • Versatility: Ensure the logo works well across different platforms and mediums.

Color Palette

  • Color Psychology: Choose colors that evoke desired emotions and associations.
  • Consistency: Establish primary and secondary colors that reflect your brand’s personality.
  • Accessibility: Consider color contrast and readability for inclusivity.

Typography

  • Font Selection: Choose fonts that align with your brand’s tone and personality.
  • Hierarchy: Establish font styles for headlines, body text, and call-to-action elements.
  • Readability: Ensure fonts are legible across digital and print materials.

Imagery and Photography

  • Visual Style: Define a cohesive style for images and photography that aligns with your brand’s aesthetic.
  • Authenticity: Use original and authentic visuals that resonate with your target audience.
  • Consistency: Maintain consistency in image quality, composition, and editing techniques.

4. Crafting Brand Messaging

Brand Voice and Tone

  • Voice: Define the personality and style of your brand’s communication (e.g., friendly, authoritative, playful).
  • Tone: Adapt your voice to different contexts and audience segments while maintaining consistency.
  • Messaging Framework: Develop key messages that communicate your brand’s values, benefits, and unique selling propositions.

Tagline and Slogan

  • Tagline: Concise and memorable phrase that captures your brand’s essence and positioning.
  • Slogan: Short, catchy phrase used in marketing campaigns to reinforce brand messaging.
  • Brand Promise: Communicate what customers can expect from your brand and why it matters.

Value Proposition

  • Unique Selling Proposition (USP): Highlight what sets your brand apart from competitors.
  • Benefits: Communicate how your products or services solve customer problems or fulfill needs.
  • Emotional Appeal: Appeal to customers’ emotions and aspirations to build deeper connections.

5. Developing Brand Guidelines

Consistency in Branding

  • Brand Guidelines: Document standards for using visual and verbal elements across all brand communications.
  • Logo Usage: Specify logo variations, clear space requirements, and prohibited uses.
  • Color and Typography: Provide guidelines for color palettes, font usage, and design principles.
  • Voice and Tone: Define guidelines for writing style, language preferences, and communication guidelines.

Guidelines for Visual and Verbal Identity

  • Application: Ensure brand consistency in digital and print materials, advertising campaigns, and social media.
  • Training: Educate employees, partners, and stakeholders on brand guidelines and implementation.
  • Updates: Regularly review and update brand guidelines to reflect evolving brand strategies and market trends.

6. Implementing Your Brand Identity

Integration Across Platforms

  • Website: Apply brand elements consistently in website design, layout, and content.
  • Social Media: Maintain brand voice and visual consistency across social media platforms.
  • Collateral Materials: Design marketing materials, packaging, and signage that reflect your brand identity.

Launch and Rollout Strategy

  • Internal Launch: Educate employees on brand identity, values, and guidelines.
  • External Launch: Communicate your brand’s story, values, and offerings through marketing campaigns and PR efforts.
  • Feedback: Gather feedback from customers and stakeholders to refine brand implementation.

Internal Brand Alignment

  • Employee Engagement: Foster a brand-centric culture by aligning employee behaviors and actions with brand values.
  • Training and Development: Provide ongoing training to reinforce brand identity and customer service standards.
  • Recognition: Recognize and reward employees who exemplify brand values and deliver exceptional customer experiences.

7. Evolving and Maintaining Your Brand

Monitoring Brand Perception

  • Brand Tracking: Measure brand awareness, perception, and sentiment over time.
  • Competitor Analysis: Monitor competitors’ branding strategies and market positioning.
  • Customer Feedback: Gather insights through surveys, reviews, and social media interactions.

Adapting to Market Changes

  • Trends and Insights: Stay informed about industry trends, consumer behaviors, and technological advancements.
  • Brand Refresh: Update brand elements or messaging to stay relevant and resonate with changing audience preferences.
  • Crisis Management: Respond effectively to brand crises and protect brand reputation.

Brand Identity Refresh

  • Reasons for Refresh: Rebranding due to mergers/acquisitions, market repositioning, or evolving brand values.
  • Strategic Planning: Conduct thorough research and planning before embarking on a brand refresh initiative.
  • Communicate Changes: Transparently communicate changes to stakeholders and customers to maintain trust and loyalty.

8. Measuring Brand Identity Success

Key Performance Indicators (KPIs)

  • Brand Awareness: Measure reach and recognition of your brand among target audience.
  • Brand Engagement: Track customer interactions, engagement rates, and social media metrics.
  • Brand Loyalty: Monitor repeat purchases, customer retention rates, and advocacy metrics.

Feedback and Evaluation

  • Surveys and Focus Groups: Gather qualitative insights on brand perception and customer experiences.
  • Analytics Tools: Utilize web analytics, social media analytics, and CRM data to track performance.
  • Benchmarking: Compare KPIs against industry standards and competitors to assess performance.

9. Conclusion

Developing a strong brand identity requires strategic planning, creative execution, and ongoing evaluation to ensure alignment with business goals and customer expectations. By defining your brand values, creating cohesive visual and verbal elements, implementing brand guidelines, and maintaining consistency across all touchpoints, you can build a compelling brand that resonates with your target audience. Regularly monitor brand performance, adapt to market changes, and leverage customer insights to strengthen your brand’s position and achieve long-term success. Embrace brand identity development as a continuous process of evolution and refinement, reflecting your brand’s growth, values, and commitment to delivering exceptional customer experiences.

Categories
Business

How to Create a Marketing Strategy

Creating a marketing strategy is essential for businesses aiming to reach their target audience, promote their products or services effectively, and achieve their business goals. A well-crafted marketing strategy aligns marketing efforts with overall business objectives, identifies target markets, and outlines specific tactics to engage customers and drive sales. In this comprehensive guide, we will explore the key components and steps involved in creating an effective marketing strategy.

Table of Contents

  1. Introduction to Marketing Strategy
    • Importance of a Marketing Strategy
    • Components of a Marketing Strategy
  2. Understanding Your Business and Market
    • Define Your Business Goals
    • Conduct Market Research
    • Identify Target Audience
  3. Developing Your Marketing Mix
    • Product Strategy
    • Pricing Strategy
    • Distribution Strategy
    • Promotional Strategy
  4. Setting Marketing Objectives
    • SMART Goals Framework
    • Aligning with Business Goals
  5. Choosing Marketing Tactics and Channels
    • Digital Marketing Channels
    • Traditional Marketing Channels
    • Integrated Marketing Communications (IMC)
  6. Creating a Budget and Allocating Resources
    • Budgeting for Marketing Activities
    • Resource Allocation
  7. Implementing Your Marketing Plan
    • Action Plan and Timeline
    • Monitoring and Evaluation
  8. Measuring and Analyzing Results
    • Key Performance Indicators (KPIs)
    • Tools for Measurement and Analysis
  9. Adapting and Improving Your Strategy
    • Continuous Optimization
    • Responding to Market Changes
  10. Conclusion

1. Introduction to Marketing Strategy

Importance of a Marketing Strategy

A marketing strategy is a roadmap that outlines how a business will promote its products or services to achieve its goals. It ensures that marketing efforts are focused, consistent, and aligned with business objectives. Key benefits include:

  • Target Audience Engagement: Tailoring messages to resonate with specific customer segments.
  • Competitive Advantage: Differentiating the business from competitors.
  • ROI: Maximizing return on investment by focusing resources on effective tactics.

Components of a Marketing Strategy

  • Market Analysis: Understanding market trends, customer needs, and competitor landscape.
  • Target Market: Identifying specific customer segments most likely to purchase your products/services.
  • Marketing Mix: Combining product, price, place, and promotion strategies to meet customer needs effectively.
  • Tactics and Channels: Choosing marketing tactics and channels to reach and engage target audiences.
  • Budget and Resources: Allocating resources and budgeting for marketing activities.

2. Understanding Your Business and Market

Define Your Business Goals

  • Long-Term Goals: Vision for the business’s growth and market position.
  • Short-Term Objectives: Specific, measurable goals to achieve within a defined period.

Conduct Market Research

  • Market Trends: Analyze industry trends, customer preferences, and competitor strategies.
  • SWOT Analysis: Assess strengths, weaknesses, opportunities, and threats to inform strategy.

Identify Target Audience

  • Demographics: Age, gender, income level, education, etc.
  • Psychographics: Values, lifestyles, attitudes, behaviors.
  • Buyer Personas: Detailed profiles of ideal customers based on research insights.

3. Developing Your Marketing Mix

Product Strategy

  • Product Development: Enhancing features, quality, or packaging to meet customer needs.
  • Product Differentiation: Unique selling propositions (USPs) that set your product apart from competitors.

Pricing Strategy

  • Pricing Objectives: Profit maximization, market penetration, competitive parity.
  • Pricing Tactics: Discounting, bundling, value-based pricing.

Distribution Strategy

  • Channel Selection: Direct sales, retail partnerships, online distribution.
  • Logistics and Fulfillment: Efficient delivery and inventory management.

Promotional Strategy

  • Advertising: Paid media placements (TV, radio, digital ads).
  • Public Relations: Earned media coverage, press releases, events.
  • Sales Promotions: Discounts, coupons, contests.
  • Personal Selling: Direct sales, relationship building with customers.

4. Setting Marketing Objectives

SMART Goals Framework

  • Specific: Clear and specific objectives (e.g., increase sales by 20%).
  • Measurable: Quantifiable metrics (e.g., achieve 1,000 new leads per month).
  • Achievable: Realistic goals based on market conditions and resources.
  • Relevant: Aligned with overall business objectives.
  • Time-bound: Defined timeframe for achieving goals (e.g., within 6 months).

Aligning with Business Goals

  • Revenue Targets: Increase revenue by launching new products or entering new markets.
  • Market Share: Expand market presence and capture larger market share.
  • Brand Awareness: Increase brand visibility and recognition among target audience.

5. Choosing Marketing Tactics and Channels

Digital Marketing Channels

  • Website: SEO, content marketing, blogging.
  • Social Media: Facebook, Instagram, LinkedIn, Twitter.
  • Email Marketing: Newsletters, promotional emails, lead nurturing campaigns.
  • PPC Advertising: Google Ads, social media ads.
  • Video Marketing: YouTube, Vimeo, TikTok.

Traditional Marketing Channels

  • Print Media: Newspapers, magazines, direct mail.
  • Broadcast Media: TV, radio advertisements.
  • Outdoor Advertising: Billboards, posters, banners.
  • Events and Sponsorships: Trade shows, conferences, community events.

Integrated Marketing Communications (IMC)

  • Consistency: Ensure messaging and branding are consistent across all channels.
  • Synergy: Combine multiple channels to amplify reach and impact.
  • Customer Journey: Create seamless experiences for customers across touchpoints.

6. Creating a Budget and Allocating Resources

Budgeting for Marketing Activities

  • Allocation: Determine percentage of revenue or fixed budget for marketing.
  • Prioritization: Allocate resources based on expected ROI and strategic priorities.

Resource Allocation

  • Personnel: Marketing team roles and responsibilities.
  • Technology: Marketing automation tools, CRM systems.
  • Creative Assets: Design, photography, video production.

7. Implementing Your Marketing Plan

Action Plan and Timeline

  • Campaign Calendar: Schedule activities, launches, and promotions.
  • Task Assignments: Assign responsibilities and timelines to team members.

Monitoring and Evaluation

  • Performance Metrics: Track KPIs (Key Performance Indicators) such as ROI, conversion rates, and customer acquisition cost.
  • Analytics Tools: Google Analytics, social media insights, CRM reports.

8. Measuring and Analyzing Results

Key Performance Indicators (KPIs)

  • Sales Metrics: Revenue growth, sales conversion rates.
  • Engagement Metrics: Website traffic, social media interactions, email open rates.
  • Customer Metrics: Customer lifetime value, retention rates, satisfaction scores.

Tools for Measurement and Analysis

  • Analytics Platforms: Google Analytics, Adobe Analytics.
  • CRM Systems: Salesforce, HubSpot.
  • Social Media Tools: Hootsuite, Sprout Social.

9. Adapting and Improving Your Strategy

Continuous Optimization

  • A/B Testing: Experiment with different marketing tactics to optimize performance.
  • Customer Feedback: Gather insights through surveys, reviews, and focus groups.
  • Competitor Analysis: Monitor competitors’ strategies and adapt accordingly.

Responding to Market Changes

  • Trends: Stay updated on industry trends, consumer behaviors, and market shifts.
  • Agility: Adapt marketing strategies quickly to capitalize on opportunities and mitigate risks.

10. Conclusion

Creating a marketing strategy requires careful planning, research, and execution to effectively reach and engage your target audience. By understanding your business goals, defining your target market, developing a comprehensive marketing mix, and choosing appropriate tactics and channels, you can create a roadmap for success. Regularly monitor and evaluate your marketing efforts, measure performance against KPIs, and adapt strategies based on data-driven insights to achieve sustainable growth and competitive advantage in your industry. Embrace marketing strategy as a dynamic process that evolves with market changes and consumer preferences, positioning your business for long-term success and profitability.