Categories
Science

Aristotle: The Founding Father of Zoology – A Comprehensive Exploration of his Contributions and Legacy

Introduction:

Aristotle, the ancient Greek philosopher and polymath, stands as a towering figure in the history of natural philosophy and scientific inquiry. Often hailed as the “father of zoology,” Aristotle’s profound observations, meticulous classifications, and insightful analyses laid the groundwork for the systematic study of the animal kingdom. In this extensive exploration, we delve into Aristotle’s life, his pioneering contributions to zoology, his methodologies, and the enduring impact of his work on the understanding of the natural world.

I. Aristotle’s Life and Background:

A. Birth and Education:

  1. Date and Place: Aristotle was born in 384 BCE in Stagira, a Greek colony in Macedonia.
  2. Tutorship under Plato: At the age of 17, Aristotle became a student at Plato’s Academy in Athens, where he studied for nearly two decades.

B. Relationship with Alexander the Great:

  1. Tutor to the Future King: Aristotle served as the tutor to a young Alexander, later known as Alexander the Great.
  2. Influence on Alexander: Aristotle’s teachings influenced Alexander’s interest in the natural world, fostering a curiosity that had a lasting impact.

C. The Lyceum:

  1. Founder: After Plato’s death, Aristotle founded the Lyceum in Athens, an institution where he conducted extensive studies and research.
  2. Scholarly Legacy: The Lyceum became a center for philosophical and scientific inquiry, contributing significantly to the intellectual landscape of ancient Greece.

II. Aristotle’s Approach to Zoology:

A. Empirical Observations:

  1. Fieldwork: Aristotle engaged in extensive fieldwork, observing and cataloging various species of animals.
  2. Comparative Anatomy: He dissected animals, comparing anatomical structures across species to identify similarities and differences.

B. Classification and Taxonomy:

  1. Hierarchical System: Aristotle introduced a hierarchical system for classifying living organisms, grouping them based on shared characteristics.
  2. Scala Naturae: Aristotle’s “Great Chain of Being” depicted a ladder of life, where organisms were arranged from the simplest to the most complex.

III. Contributions to Zoology:

A. “Historia Animalium” (The History of Animals):

  1. Pioneering Work: Aristotle’s seminal work, “Historia Animalium,” is a comprehensive compilation of his observations on the anatomy, behavior, and classification of animals.
  2. Systematic Approach: The book encompasses various volumes, each dedicated to specific aspects of zoology, showcasing Aristotle’s systematic approach.

B. Biological Diversity:

  1. Species Descriptions: Aristotle documented detailed descriptions of diverse species, categorizing them into distinct groups.
  2. Organismal Characteristics: He highlighted the distinctive features of animals, including their habits, reproductive methods, and physiological functions.

C. Comparative Anatomy:

  1. Homology and Analogy: Aristotle distinguished between homologous structures (similar in origin) and analogous structures (similar in function) among different species.
  2. Influential Concepts: His insights into comparative anatomy laid the foundation for understanding evolutionary relationships and adaptations.

IV. Legacy and Enduring Influence:

A. Aristotle’s Influence on Medieval Thought:

  1. Scholasticism: Aristotle’s works became foundational texts in medieval scholasticism, shaping the intellectual discourse of the time.
  2. Integration with Theology: Scholars such as Thomas Aquinas integrated Aristotle’s philosophy into Christian theology, blending reason and faith.

B. Renaissance Rediscovery:

  1. Manuscript Translations: During the Renaissance, Aristotle’s works were translated from Greek into Latin, leading to a resurgence of interest in classical knowledge.
  2. Scientific Revolution: Aristotle’s ideas influenced early modern scientists, even as they began to challenge certain aspects of his theories during the Scientific Revolution.

C. Modern Zoology:

  1. Linnaean System: While Carl Linnaeus later developed a more structured system of taxonomy, Aristotle’s contributions laid the groundwork for the classification of living organisms.
  2. Evolutionary Biology: Concepts introduced by Aristotle, such as the Scala Naturae, influenced early ideas about evolutionary relationships among species.

V. Criticisms and Evolving Perspectives:

A. Limitations of Aristotelian Biology:

  1. Essentialism: Aristotle’s view of fixed, unchanging species faced criticism with the rise of evolutionary biology and the concept of species change over time.
  2. Lack of Experimentation: Aristotle’s reliance on observational rather than experimental methods limited the depth of his biological insights.

B. Evolving Zoological Thought:

  1. Darwinian Revolution: Charles Darwin’s theory of evolution challenged aspects of Aristotle’s ideas, particularly in relation to the dynamic nature of species.
  2. Molecular Biology: Advances in molecular biology provided a deeper understanding of genetic relationships, surpassing the descriptive approach of Aristotle’s time.

VI. Conclusion:

Aristotle’s profound contributions to zoology have left an indelible mark on the history of scientific inquiry. As the father of zoology, his meticulous observations, classifications, and systematic approach laid the groundwork for the study of the natural world. While some aspects of Aristotle’s biology have been surpassed by modern methodologies and discoveries, his enduring legacy is evident in the evolution of zoological thought and the ongoing quest to unravel the mysteries of the animal kingdom. Aristotle’s impact resonates not only through the pages of ancient texts but also in the very fabric of contemporary biological understanding, reminding us that the pursuit of knowledge is an ongoing journey with foundations rooted in the wisdom of the past.

Categories
Science

Spermology Unveiled: Navigating the Intriguing World of Seed Study

Introduction:

Spermology, often colloquially referred to as seed study, is a multidisciplinary field that encompasses the study of seeds, their characteristics, functions, and the pivotal role they play in the life cycle of plants. Seeds, often overlooked in their humble appearance, are remarkable capsules of life, holding the genetic information necessary for plant reproduction. In this comprehensive exploration, we delve into the fascinating realm of spermology, unraveling the intricacies of seed structure, the diversity of seed types, their ecological significance, and the critical role they play in sustaining biodiversity and ecosystems worldwide.

I. The Basics of Spermology:

A. Definition:

  1. Spermology: The term “spermology” is derived from the Greek word “sperma,” meaning seed, and “logos,” meaning study or science.
  2. Seed Study: Spermology involves the scientific examination and analysis of seeds.

B. Historical Context:

  1. Early Observations: Human fascination with seeds dates back to ancient civilizations, where seeds were recognized for their importance in agriculture and sustenance.
  2. Scientific Foundations: The formal study of seeds gained momentum with the development of botanical sciences in the 17th and 18th centuries.

II. Seed Structure and Morphology:

A. Seed Coat:

  1. Protective Layer: The outer covering of a seed that protects it from external influences.
  2. Permeable Features: The seed coat may have permeable structures allowing for gas exchange and water absorption.

B. Embryo:

  1. Miniature Plant: The embryonic plant within the seed that develops into a mature plant upon germination.
  2. Cotyledons: The first leaves of the embryo that serve as nutrient storage or the first photosynthetic organs.

C. Endosperm:

  1. Nutrient Reserve: Tissue containing stored nutrients, providing nourishment for the developing embryo.
  2. Varied Compositions: Endosperm composition varies among different seed types, serving different functions.

III. Types of Seeds:

A. Gymnosperms:

  1. Naked Seeds: Seeds not enclosed in fruits.
  2. Conifers and Cycads: Examples of gymnosperms with exposed seeds.

B. Angiosperms:

  1. Enclosed Seeds: Seeds enclosed within fruits.
  2. Monocots and Dicots: Angiosperms classified based on the number of cotyledons.

C. Non-Flowering Plants:

  1. Ferns and Mosses: Reproduction through spores, not seeds.
  2. Seedless Vascular Plants: A group that includes ferns and horsetails.

IV. Seed Germination:

A. Activation of Embryo:

  1. Water Uptake: Absorption of water triggers metabolic changes in the embryo.
  2. Hormonal Activation: Plant hormones like gibberellins play a role in the germination process.

B. Emergence of Radicle:

  1. Root Development: The radicle, or embryonic root, emerges first, anchoring the seedling in the soil.
  2. Shoot Emergence: The shoot emerges, developing into the aerial part of the plant.

C. Nutrient Utilization:

  1. Mobilization of Reserves: Stored nutrients in cotyledons or endosperm are utilized.
  2. Photosynthesis Initiation: Once the shoot emerges, the plant begins photosynthesizing to produce its own food.

V. Ecological Significance:

A. Biodiversity Conservation:

  1. Seed Banks: Preservation of seeds in seed banks for biodiversity conservation.
  2. Ecological Restoration: Seeds play a vital role in restoring ecosystems through natural processes.

B. Food Chain Dynamics:

  1. Primary Producers: Plants, starting from seeds, form the base of the food chain.
  2. Herbivores and Predators: Animals rely on seeds directly or indirectly for sustenance.

VI. Seed Dispersal:

A. Mechanisms:

  1. Wind Dispersal: Seeds equipped with structures for wind dispersal, such as wings or parachutes.
  2. Animal Dispersal: Seeds may attach to fur or be ingested by animals, facilitating dispersal.

B. Adaptations:

  1. Seed Coatings: Adaptations in seed coatings for effective dispersal.
  2. Mimicry: Seeds may mimic the appearance or scent of fruits to attract dispersers.

VII. Agricultural Importance:

A. Crop Production:

  1. Seed Agriculture: The foundation of agriculture, where seeds are sown for crop production.
  2. Genetic Improvement: Selective breeding and genetic modification to enhance crop seed characteristics.

B. Global Food Security:

  1. Seed Banks: Global repositories safeguarding diverse seed varieties for future food security.
  2. Sustainable Agriculture: The conservation and responsible use of seeds for long-term agricultural sustainability.

VIII. Challenges and Future Directions:

A. Seed Preservation:

  1. Threats to Diversity: Loss of seed diversity due to monoculture and habitat destruction.
  2. Climate Change: Altered environmental conditions affecting seed germination and distribution.

B. Biotechnology and Genetic Engineering:

  1. Improved Traits: Developing seeds with enhanced traits, such as drought resistance or higher nutritional content.
  2. Ethical Considerations: Ethical debates surrounding genetically modified seeds and their impact on ecosystems.

IX. Conclusion:

Spermology, the science of seed study, unveils the profound importance of these small but mighty capsules of life. From their diverse structures to their ecological significance, seeds are integral to the sustenance of life on Earth. This comprehensive exploration has journeyed through the basics of spermology, seed structure and morphology, types of seeds, germination processes, ecological roles, and their pivotal importance in agriculture. As we navigate the challenges and future directions of spermology, it becomes evident that the study of seeds is not only a scientific endeavor but a cornerstone of sustainable practices, biodiversity conservation, and global food security. Embracing the profound significance of seeds, we pave the way for a future where spermology continues to shape our understanding of plant life, ecosystems, and the delicate balance that sustains our planet.

Categories
Science

A Comprehensive Exploration of Hepatology: Unraveling the Intricacies of Liver Health and Disease

Introduction:

Hepatology, a specialized branch of medicine focused on the study and management of liver diseases, plays a pivotal role in understanding and addressing a diverse array of conditions affecting one of the body’s most vital organs. The liver, with its multifaceted functions, is central to metabolic processes, detoxification, and maintaining homeostasis. In this exhaustive exploration, we delve into the realm of hepatology, unraveling the complexities of liver health, the intricacies of various liver diseases, diagnostic approaches, treatment modalities, and the forefront of research shaping the future of hepatological care.

I. Anatomy and Physiology of the Liver:

A. Structure:

  1. Lobes and Segments: The liver is divided into lobes and segments, each serving distinct functions.
  2. Hepatocytes: The primary functional cells of the liver, hepatocytes, play a crucial role in metabolic processes.

B. Functions:

  1. Metabolism: The liver regulates carbohydrate, protein, and lipid metabolism.
  2. Detoxification: It detoxifies harmful substances, including drugs and toxins.
  3. Synthesis: The liver synthesizes proteins, clotting factors, and bile.

II. Common Liver Diseases:

A. Viral Hepatitis:

  1. Hepatitis A: Typically transmitted through contaminated food or water.
  2. Hepatitis B and C: Bloodborne infections that can lead to chronic liver disease.

B. Non-Alcoholic Fatty Liver Disease (NAFLD):

  1. Steatosis: Accumulation of fat in the liver cells without inflammation.
  2. Non-Alcoholic Steatohepatitis (NASH): Inflammation and liver cell damage due to fat accumulation.

C. Cirrhosis:

  1. Advanced Liver Scarring: Cirrhosis results from long-term liver damage and leads to impaired liver function.
  2. Causes: Chronic viral hepatitis, alcohol abuse, and other liver diseases can contribute to cirrhosis.

D. Liver Cancer:

  1. Hepatocellular Carcinoma (HCC): The most common type of liver cancer, often associated with underlying liver disease.
  2. Risk Factors: Cirrhosis, chronic viral hepatitis, and certain genetic conditions increase the risk of liver cancer.

III. Diagnosis and Evaluation:

A. Blood Tests:

  1. Liver Function Tests: Assess liver enzymes and other markers to evaluate liver health.
  2. Viral Hepatitis Serology: Detect antibodies and viral genetic material to diagnose viral hepatitis.

B. Imaging Studies:

  1. Ultrasound: Provides images of the liver’s structure and helps identify abnormalities.
  2. CT Scan and MRI: Advanced imaging techniques for a more detailed assessment of liver conditions.

C. Liver Biopsy:

  1. Tissue Sample: Involves taking a small sample of liver tissue for microscopic examination.
  2. Diagnostic Accuracy: Liver biopsy is a definitive diagnostic tool for certain liver diseases.

IV. Treatment Modalities:

A. Medications:

  1. Antiviral Drugs: Target viruses like hepatitis B and C to suppress viral replication.
  2. Immunosuppressants: Used in autoimmune liver diseases to modulate the immune response.

B. Lifestyle Modifications:

  1. Diet and Exercise: Essential for managing NAFLD and promoting overall liver health.
  2. Alcohol Abstinence: Crucial for individuals with alcoholic liver disease.

C. Surgical Interventions:

  1. Liver Transplantation: An option for end-stage liver disease when other treatments are ineffective.
  2. Tumor Resection: Surgical removal of liver tumors in selected cases.

V. Advancements in Hepatology Research:

A. Genomic Discoveries:

  1. Genetic Predispositions: Identifying genetic factors influencing susceptibility to liver diseases.
  2. Personalized Medicine: Tailoring treatments based on an individual’s genetic profile.

B. Immunotherapies:

  1. Targeting Immune Response: Developing therapies that modulate the immune system for specific liver diseases.
  2. Vaccine Development: Ongoing efforts to develop vaccines for preventing certain liver infections.

VI. Hepatology and Public Health:

A. Vaccination Programs:

  1. Hepatitis B: Inclusion of hepatitis B vaccination in routine immunization programs.
  2. Public Awareness Campaigns: Educating the public about the importance of liver health and disease prevention.

B. Screening Initiatives:

  1. Early Detection: Promoting screening programs for high-risk populations to detect liver diseases early.
  2. Accessibility: Ensuring access to affordable screening and diagnostic services.

VII. The Role of Hepatologists:

A. Specialized Expertise:

  1. Disease Management: Hepatologists are trained to diagnose and manage a wide range of liver conditions.
  2. Multidisciplinary Approach: Collaborating with other specialists for comprehensive patient care.

B. Patient Education:

  1. Lifestyle Modifications: Providing guidance on diet, exercise, and alcohol abstinence.
  2. Treatment Adherence: Educating patients on the importance of following prescribed treatments.

VIII. Challenges and Future Directions:

A. Global Burden:

  1. Increasing Prevalence: The rising incidence of liver diseases poses a significant global health challenge.
  2. Access to Care: Disparities in healthcare access contribute to varying outcomes in liver disease management.

B. Research Focus:

  1. Precision Medicine: Advancing towards personalized treatments based on individual patient characteristics.
  2. Innovative Therapies: Exploring novel therapeutic approaches, including gene therapies and targeted interventions.

IX. Conclusion:

Hepatology, with its intricate understanding of the liver’s structure, function, and diseases, stands at the forefront of medical science. This comprehensive exploration has journeyed through the anatomy and physiology of the liver, common liver diseases, diagnostic approaches, treatment modalities, and the ongoing advancements in hepatology research. As we navigate the complexities of liver health, it becomes evident that hepatology not only addresses individual patient needs but also plays a vital role in public health initiatives. With ongoing research, the collaborative efforts of healthcare professionals, and a commitment to public awareness, the field of hepatology continues to evolve, offering hope for improved treatments, better outcomes, and ultimately, a healthier global population.

Categories
Science

Unlocking Flexibility: A Comprehensive Guide on How to Soften Rubber

Introduction:

Rubber, a versatile material known for its elasticity and durability, is used in a wide range of products, from tires and gaskets to footwear and household items. Over time, exposure to various conditions or prolonged storage can cause rubber to harden, losing its original flexibility. However, the good news is that there are effective methods for softening rubber and restoring its pliability. In this comprehensive guide, we will explore the reasons behind rubber hardening, the science of softening, and various techniques to rejuvenate rubber products.

Section 1: Understanding Rubber Hardening

  1. Factors Leading to Hardening:
    • Several factors contribute to rubber hardening over time. Exposure to sunlight, oxygen, ozone, extreme temperatures, and certain chemicals can cause the rubber molecules to crosslink, resulting in a stiff and inflexible texture.
  2. Common Hardened Rubber Products:
    • Various everyday items can experience rubber hardening, including tires, seals, gaskets, footwear, and even rubberized tools. Understanding the causes allows for effective prevention and remediation.

Section 2: Science Behind Softening Rubber

  1. Polymer Structure of Rubber:
    • Rubber is a polymer composed of long-chain molecules with unique properties. The crosslinking of these molecules is responsible for the hardening of rubber. Softening rubber involves disrupting or reversing these crosslinks to restore flexibility.
  2. Role of Heat and Solvents:
    • Softening rubber often involves the application of heat and/or solvents. Heat facilitates the mobility of polymer chains, while solvents can swell the rubber, allowing for increased movement of the molecular structure.

Section 3: Methods for Softening Rubber

  1. Applying Heat:
    • Heat is a common method for softening rubber. Techniques include using hot water, steam, or even a microwave to gently warm the rubber product. This encourages the polymer chains to move more freely, restoring flexibility.
  2. Boiling Water Technique:
    • Submerging the rubber item in boiling water for a specific duration softens the material. This method is effective for smaller rubber items such as seals, gaskets, or smaller tools.
  3. Using a Microwave:
    • Microwave heating provides a controlled and quick way to soften rubber. Proper precautions, such as monitoring closely and avoiding overheating, are essential to prevent damage to the rubber.
  4. Using a Hairdryer or Heat Gun:
    • Directing a hairdryer or heat gun onto the rubber surface allows for targeted heating. This method is suitable for smaller items or localized hardening.
  5. Solvent Softening:
    • Certain solvents can break down the crosslinks in rubber, softening the material. Common solvents include acetone, rubbing alcohol, or specialized rubber softening products.
  6. Soaking in Oil:
    • Immersing the rubber item in a lubricating oil, such as motor oil or vegetable oil, can help restore flexibility. This method is particularly useful for larger items like tires.
  7. Freezing and Thawing:
    • Alternating between freezing and thawing can disrupt the rubber’s molecular structure. Place the rubber item in a sealed bag and freeze it, then allow it to thaw at room temperature. Repeat as necessary.

Section 4: Step-by-Step Guides for Select Methods

  1. Boiling Water Technique:
    • Boil a pot of water.
    • Submerge the rubber item in the boiling water for 5-10 minutes.
    • Remove the item and check for flexibility.
    • Repeat if necessary.
  2. Using a Microwave:
    • Place the rubber item in a microwave-safe container.
    • Heat in short intervals, checking for softening after each interval.
    • Avoid overheating to prevent damage.
  3. Solvent Softening with Acetone:
    • Ventilate the area properly.
    • Submerge the rubber item in acetone for a few hours.
    • Remove and allow it to air-dry.
    • Check for flexibility.
  4. Soaking in Oil:
    • Submerge the rubber item in oil for 24-48 hours.
    • Wipe off excess oil.
    • Check for flexibility and repeat if necessary.

Section 5: Precautions and Safety Measures

  1. Ventilation:
    • When using solvents or applying heat, ensure proper ventilation to avoid inhalation of fumes.
  2. Avoid Overheating:
    • Exercise caution when using heat sources to prevent overheating, which can lead to damage or distortion of the rubber.
  3. Compatibility with Solvents:
    • Check the compatibility of the rubber with solvents to avoid potential damage. Perform a small test on a hidden area if unsure.

Section 6: Preventive Measures to Avoid Rubber Hardening

  1. Proper Storage:
    • Store rubber items in a cool, dark, and dry environment to minimize exposure to sunlight, heat, and humidity.
  2. Regular Use:
    • Regularly using and flexing rubber items helps prevent prolonged stagnation and hardening.
  3. Protective Coatings:
    • Applying protective coatings or treatments, such as silicone sprays or rubber conditioners, can help maintain the flexibility of rubber products.

Section 7: Applications and Practical Uses

  1. Automotive Maintenance:
    • Softening hardened rubber seals and gaskets in automotive applications can prevent leaks and ensure optimal performance.
  2. Tool Restoration:
    • Reviving rubberized tool handles enhances grip and comfort during use.
  3. Footwear Care:
    • Softening hardened shoe soles or rubber boots improves comfort and extends the lifespan of footwear.
  4. DIY Projects:
    • Softening rubber is beneficial for various DIY projects, from crafting to home repairs, where flexibility is crucial.

Section 8: Common Misconceptions and FAQs

  1. Can all types of rubber be softened?:
    • The effectiveness of softening methods depends on the type of rubber and its composition. Some rubber compounds may respond better to specific techniques.
  2. How long does it take to soften rubber?:
    • The time required varies based on the method used, the size of the rubber item, and the degree of hardening. Some methods may yield results in minutes, while others may take several hours.

Section 9: Conclusion

The ability to soften rubber extends the life and functionality of a wide array of products, from household items to automotive components. This comprehensive guide has equipped you with an understanding of why rubber hardens, the science behind softening, and various practical methods to rejuvenate rubber. Whether you’re restoring tool handles, enhancing footwear comfort, or tackling DIY projects, the knowledge gained here empowers you to unlock the flexibility of rubber and bring new life to your rubberized possessions. As you embark on the journey of rubber restoration, let this guide be your companion in ensuring the longevity and performance of rubber products in your daily life.

Categories
Science

Unveiling Nature’s Indicators: A Comprehensive Guide on How to Check Water Temperature Without a Thermometer

Introduction:

In various scenarios, from outdoor adventures to home activities, knowing the temperature of water is crucial. While thermometers are the conventional tool for this purpose, there are times when one may not be readily available. Fear not, as nature provides subtle clues and creative techniques that allow you to estimate water temperature without the aid of a thermometer. This comprehensive guide will explore various methods, both traditional and innovative, for checking water temperature without the reliance on a dedicated measuring tool.

Section 1: Importance of Water Temperature

  1. Relevance in Daily Life:
    • Water temperature is a vital parameter in numerous situations, including cooking, recreational activities, and even monitoring environmental conditions. Understanding the temperature of water ensures safety, comfort, and optimal performance in various endeavors.
  2. Common Applications:
    • Whether you’re brewing the perfect cup of tea, taking a soothing bath, or engaging in water-based sports, having a sense of the water temperature enhances the overall experience and helps avoid potential discomfort or risks.

Section 2: Traditional Methods for Estimating Water Temperature

  1. Touch Test:
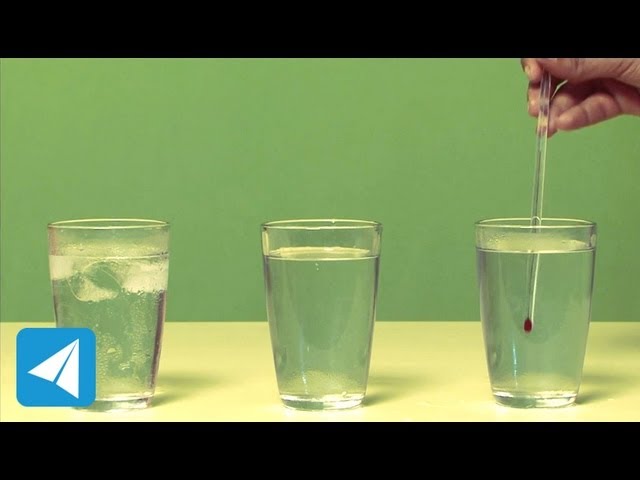
    • The human touch is a remarkably sensitive tool for gauging water temperature. Different parts of the body, such as the wrist or back of the hand, have varying levels of sensitivity and can provide a reasonably accurate sense of whether the water is cold, warm, or hot.
  2. Dip Test:
    • Quickly dipping a finger into the water and gauging the immediate sensation can offer insights into its temperature. This method is more subjective but becomes more reliable with experience.
  3. Observing Steam:
    • Steam rising from hot water can provide visual cues about its temperature. The intensity, volume, and speed of the rising steam correlate with the water’s heat level.

Section 3: Creative Techniques for Water Temperature Assessment

  1. Handmade Temperature Chart:
    • Create a personalized temperature chart based on your experiences. Note the sensations you feel when immersing your hand in water of known temperatures, establishing a reference guide for future estimations.
  2. Natural Indicators:
    • Nature provides several indicators that can offer clues about water temperature. Observing the behavior of animals, the state of ice, or the presence of specific aquatic plants can serve as natural thermometers.

Section 4: The Hand Test – Understanding Sensations

  1. Cold Water Sensations:
    • When the water feels painfully cold, causes numbness, and prompts a quick withdrawal of the hand, it indicates that the temperature is likely below 50°F (10°C).
  2. Cool to Lukewarm Sensations:
    • A comfortable cool to lukewarm temperature, suitable for various activities, elicits a soothing and pleasant feeling without any discomfort.
  3. Warm Sensations:
    • As the water temperature rises, a warm sensation is felt, providing comfort without causing discomfort. This range typically falls between 85°F to 98°F (29°C to 37°C).
  4. Hot Sensations:
    • Water that feels hot, nearing the upper limit of comfort, produces a slightly uncomfortable warmth. This range often spans from 100°F to 110°F (38°C to 43°C).

Section 5: Utilizing Natural Indicators

  1. Animal Behavior:
    • Some animals, especially aquatic ones, exhibit distinct behaviors based on water temperature. Observing fish or other water-dwelling creatures can offer insights into whether the water is warm or cold.
  2. Presence of Ice:
    • The presence of ice or frost on the water’s surface indicates colder temperatures. However, this method is more applicable to outdoor bodies of water during colder seasons.

Section 6: Application in Different Settings

  1. In the Kitchen:
    • When cooking, the hand test can guide you in achieving the desired water temperature for various culinary tasks, from blanching vegetables to cooking pasta.
  2. Bathing:
    • Adjusting bathwater temperature is crucial for a relaxing experience. The hand test allows you to find the perfect balance between warmth and comfort.
  3. Outdoor Activities:
    • Whether you’re swimming in a natural body of water or adjusting the temperature of a portable shower while camping, the ability to estimate water temperature without a thermometer is invaluable.

Section 7: Challenges and Considerations

  1. Subjectivity:
    • One of the primary challenges is the subjectivity inherent in these methods. Sensations can vary from person to person, and individual tolerance to temperature differs.
  2. Environmental Factors:
    • External factors, such as air temperature and wind, can influence the perceived temperature of water. Consider these factors when estimating water temperature in outdoor settings.

Section 8: Safety Considerations

  1. Avoiding Scalds and Burns:
    • Exercise caution when estimating hot water temperatures to prevent scalds or burns. Start with conservative estimates and adjust accordingly.
  2. Ensuring Comfort:
    • Prioritize comfort and safety, especially in activities like bathing or swimming. The goal is to enjoy the experience without subjecting yourself to discomfort or potential harm.

Section 9: Conclusion

Mastering the art of estimating water temperature without a thermometer opens up a world of practical applications and enhances your ability to navigate various activities with confidence. From the kitchen to outdoor adventures, the hand test and natural indicators offer valuable insights into the temperature of water, ensuring optimal comfort and safety. As you explore these techniques, embrace the experiential nature of temperature estimation, and let your newfound skills guide you through a world where the touch of water becomes a sensory journey.

Categories
Science

Crafting Illusions: A Comprehensive Guide on How to Make a Hologram

Introduction:

Holograms, once considered the stuff of science fiction, have become a fascinating reality in the world of technology and visual arts. The allure of holographic images and displays captivates our imagination, creating three-dimensional illusions that seem to defy the constraints of the physical world. In this comprehensive guide, we will delve into the science, techniques, and DIY methods for creating holograms, exploring both the principles behind holography and practical steps for making your own holographic projections.

Section 1: Understanding the Science of Holography

  1. Defining Holography:
    • Holography is a photographic technique that records light patterns to create three-dimensional images. Unlike traditional photography, which captures only intensity and color, holography also records the phase of light waves, enabling the recreation of a realistic three-dimensional scene.
  2. Basic Principles of Holography:
    • Holography relies on the interference pattern created by the interaction of laser light with an object and a reference beam. This interference pattern, captured on a photosensitive surface, contains information about both the amplitude and phase of the light, allowing the recreation of a 3D image when illuminated.

Section 2: DIY Methods for Creating Holograms

  1. Creating a Holographic Image:
    • While professional holography involves sophisticated equipment and lasers, DIY holograms can be crafted using more accessible methods. One such method involves creating holographic images on photosensitive materials using a laser and a simple set-up.
  2. Materials Needed:
    • Gather materials such as laser pointer, photosensitive holographic plates or film, darkroom or a dark space, and developer and fixer solutions for processing the holographic plate.

Section 3: Step-by-Step Guide for Creating a Hologram

  1. Setting Up a Darkroom:
    • Choose or set up a darkroom to avoid exposure to unwanted light during the hologram creation process. Complete darkness is crucial for the proper development of holographic images.
  2. Preparing the Photosensitive Plate:
    • Handle the holographic plate with care to avoid contamination. In darkness, coat the plate with a thin layer of developer solution and let it dry. Once dry, place the plate in a holder or rig.
  3. Setting Up the Laser and Object:
    • Position the laser and the object you want to holograph on a stable surface. The laser should be coherent and aligned, and the object should be well-lit to create clear holographic interference patterns.
  4. Exposing the Holographic Plate:
    • Turn on the laser, allowing its light to interact with the object and create interference patterns. Direct the laser light onto the prepared holographic plate for the necessary exposure time, ensuring stability to avoid blurriness.
  5. Developing the Holographic Plate:
    • After exposure, carefully transfer the plate into the developer solution. Swirl the plate gently to ensure even development. Once developed, transfer the plate to the fixer solution to stabilize the holographic image.
  6. Drying and Illumination:
    • Allow the holographic plate to dry completely in darkness. Once dry, the holographic image is latent on the plate. To reveal the hologram, illuminate the plate with a laser beam at the same angle as during exposure.

Section 4: Making a Holographic Projector

  1. DIY Holographic Projector:
    • Creating a holographic projector for visualizing holographic images involves using transparent materials like acrylic or glass and carefully aligning them to project the reconstructed holographic image.
  2. Materials Needed:
    • Acrylic or glass sheets, a laser, holographic film, and a stable frame for holding the sheets at the right angles are essential for constructing a basic holographic projector.

Section 5: Step-by-Step Guide for Making a Holographic Projector

  1. Constructing the Frame:
    • Build a stable frame to hold the acrylic or glass sheets at the desired angles. The angles are critical for projecting the holographic image correctly.
  2. Attaching the Holographic Film:
    • Affix the holographic film onto one of the transparent sheets. The film should be positioned to allow light to pass through it and create the holographic projection.
  3. Positioning the Laser:
    • Set up the laser to illuminate the holographic film. Adjust the angle and distance of the laser to ensure optimal projection quality.
  4. Aligning the Sheets:
    • Align the acrylic or glass sheets to create the necessary reflections and refractions for projecting the holographic image. Precision is key to achieving a clear and vivid holographic projection.
  5. Testing and Adjusting:
    • Test the holographic projector by illuminating it with the laser. Make adjustments to the angles, positions, and distances to optimize the clarity and size of the projected holographic image.

Section 6: Applications and Future Developments

  1. Art and Entertainment:
    • Holography has found applications in art installations and entertainment, creating mesmerizing visual experiences. Artists and performers use holographic technology to push the boundaries of traditional visual displays.
  2. Scientific and Medical Imaging:
    • In scientific and medical fields, holography enables detailed 3D imaging. Holographic techniques provide insights into complex biological structures and aid in medical diagnostics.
  3. Holographic Displays:
    • Ongoing research focuses on developing holographic displays for everyday use, potentially replacing traditional screens with glasses-free 3D holographic images. This innovation could revolutionize the way we interact with digital content.
  4. Security and Authentication:
    • Holography is widely employed in security features for documents, credit cards, and packaging. The unique optical properties of holograms make them challenging to replicate, enhancing security and authentication measures.

Section 7: Challenges and Considerations

  1. Equipment Limitations:
    • DIY holography has limitations compared to professional holography equipment, resulting in lower resolution and quality. Understanding these limitations is crucial for managing expectations.
  2. Precision and Stability:
    • Achieving precise alignments and maintaining stability during hologram creation are critical. Any movement or misalignment can result in distorted holographic images.

Section 8: Ethical Considerations

  1. Responsible Use of Holographic Technology:
    • As holographic technology advances, ethical considerations arise, particularly in areas such as deepfakes and holographic projections of individuals. Responsible use and regulation are essential to address potential misuse.

Section 9: Conclusion

Crafting holograms, once the realm of scientific laboratories and futuristic visions, has become an accessible venture for enthusiasts and artists alike. This comprehensive guide has illuminated the principles of holography, provided step-by-step instructions for creating holographic images, and offered insights into constructing a basic holographic projector. As technology continues to push the boundaries of visual experiences, exploring the art and science of holography opens up a world of possibilities. Whether for artistic expression, scientific exploration, or technological innovation, the journey into holography invites us to embrace the limitless potential of three-dimensional illusions within our grasp.

Categories
Science

Mastering the Art of Distillation: A Comprehensive Guide on How to Make Distilled Water at Home

Introduction:

Distilled water, renowned for its purity and lack of impurities, is a staple in various applications, from laboratory experiments to household appliances. The process of distillation, which involves heating water to create steam and then cooling it to form pure water, is a simple yet effective method. This comprehensive guide will walk you through the step-by-step process of making distilled water at home, offering insights into the science behind distillation, equipment needed, and practical tips for ensuring the production of high-quality, pure water.

Section 1: Understanding the Science of Distillation

  1. Defining Distillation:
    • Distillation is a separation process that exploits the differences in boiling points of substances to purify liquids. In the context of water, the process involves heating water to its boiling point, collecting the resulting steam, and then condensing it back into liquid form to obtain pure water.
  2. Purity of Distilled Water:
    • Distilled water is lauded for its high purity, as the distillation process effectively removes contaminants, minerals, and impurities. The result is water in its most elemental form, free from minerals, chemicals, and other dissolved substances.

Section 2: Equipment Needed for Distillation

  1. Distillation Apparatus:
    • To make distilled water at home, you’ll need a distillation apparatus. This typically includes a boiling flask, a condenser, and a collection vessel. Distillation kits are available commercially, or you can assemble the components individually.
  2. Heat Source:
    • A reliable heat source is essential for boiling water in the distillation process. Common options include electric hot plates, gas burners, or even stovetops. Ensure the heat source is adjustable to control the intensity of the boiling.
  3. Cooling System:
    • The condenser acts as the cooling system, converting steam back into liquid water. This component is crucial for the success of the distillation process. Ensure the condenser is well-insulated and has a cooling mechanism, such as circulating cold water.
  4. Collection Container:
    • A clean and sterile container is needed to collect the distilled water. Use glass or food-grade plastic containers with tight-fitting lids to prevent contamination.

Section 3: Step-by-Step Guide on Making Distilled Water

  1. Setting Up the Distillation Apparatus:
    • Assemble the distillation apparatus, connecting the boiling flask to the condenser and ensuring a secure setup. Place the collection container at the end of the condenser to collect the distilled water.
  2. Filling the Boiling Flask:
    • Pour tap water or any water source into the boiling flask. Avoid overfilling to prevent spillage during the boiling process.
  3. Adjusting Heat Source:
    • Begin heating the water with the heat source. As the water reaches its boiling point, steam will rise from the boiling flask, leaving impurities behind.
  4. Collecting Distilled Water:
    • The steam travels through the condenser, where it is cooled and condensed back into liquid form. The pure, distilled water is collected in the container at the end of the condenser.
  5. Monitoring the Process:
    • Keep a close eye on the distillation process. Adjust the heat source to maintain a steady boil, and monitor the water level in the boiling flask to prevent it from running dry.
  6. Allowing Cooling Time:
    • Once you’ve collected a sufficient amount of distilled water, turn off the heat source and allow the apparatus to cool before disassembling. This prevents accidental burns and ensures a safe handling process.

Section 4: Tips for Ensuring High-Quality Distilled Water

  1. Starting with Clean Equipment:
    • Ensure that all components of the distillation apparatus are thoroughly cleaned before each use. Any residue or contaminants can affect the purity of the distilled water.
  2. Using High-Quality Water Source:
    • The quality of the source water matters. While distillation effectively removes impurities, starting with a relatively clean water source enhances the overall effectiveness of the process.
  3. Regular Maintenance of Equipment:
    • Periodically clean and inspect the distillation apparatus to prevent mineral deposits or buildup. This maintenance ensures consistent production of high-quality distilled water.
  4. Storing Distilled Water Properly:
    • Store distilled water in clean, airtight containers to prevent contamination. Keep containers away from direct sunlight and chemicals to maintain the water’s purity.

Section 5: Applications of Distilled Water

  1. Laboratory Use:
    • Distilled water is a standard requirement in laboratories for various experiments and analyses. Its purity ensures accurate and reliable results.
  2. Household Appliances:
    • Some household appliances, such as steam irons and humidifiers, benefit from the use of distilled water. Its lack of minerals prevents the buildup of deposits that can affect appliance performance.
  3. Medical and Cosmetic Applications:
    • Distilled water is often used in medical and cosmetic procedures where sterile, pure water is essential. It is a common ingredient in pharmaceutical preparations and medical equipment sterilization.
  4. Battery Maintenance:
    • Distilled water is recommended for topping up lead-acid batteries. Using distilled water prevents the introduction of impurities that could affect battery performance.

Section 6: Common Misconceptions and FAQs

  1. Does Boiling Water Make It Distilled?:
    • No, simply boiling water does not make it distilled. Distillation involves collecting the evaporated steam, condensing it back into liquid form, and separating it from impurities.
  2. Is Distilled Water Safe to Drink?:
    • Yes, distilled water is safe to drink. It lacks minerals and impurities, making it suitable for consumption. However, regular consumption of distilled water may not be recommended for extended periods due to the absence of minerals.
  3. Can Distillation Remove All Contaminants?:
    • Distillation is highly effective in removing most contaminants, including minerals, chemicals, and microorganisms. However, volatile organic compounds (VOCs) with lower boiling points than water may not be completely removed.

Section 7: Conclusion

Distilling water at home is a straightforward yet powerful process that yields pure, high-quality water free from impurities. This comprehensive guide has equipped you with the knowledge and practical steps needed to embark on the journey of making distilled water. Whether for laboratory experiments, household applications, or specialized uses, the ability to produce distilled water at home opens up a world of possibilities. As you explore the art of distillation, let this guide serve as your companion, ensuring a seamless and rewarding experience in the pursuit of pure, distilled water.

Categories
Science

Michael Faraday: Pioneer of Electromagnetism and Inventor of the Electric Motor

Introduction:

In the realm of scientific innovation, Michael Faraday stands as a luminary whose contributions to electromagnetism and the development of the electric motor have left an indelible mark on the course of human history. Born in 1791 in Newington Butts, Surrey, England, Faraday’s journey from humble beginnings to becoming one of the most influential experimentalists and scientists of the 19th century is a testament to his insatiable curiosity and relentless pursuit of knowledge. In this extensive exploration, we delve into the life, discoveries, and lasting legacy of Michael Faraday, the ingenious inventor of the electric motor.

Early Life and Education:

1. Humble Beginnings:

  • Faraday’s early life was marked by financial struggles. Born into a poor family, he received only a basic formal education.

2. Apprenticeship with Humphry Davy:

  • Faraday’s fortunes changed when, at the age of 14, he secured an apprenticeship with renowned chemist and scientist Sir Humphry Davy at the Royal Institution in London.

3. Curiosity and Dedication:

  • Faraday’s boundless curiosity and dedication to learning propelled him to conduct numerous experiments and immerse himself in the world of science.

Contributions to Electromagnetism:

1. Faraday’s Laws of Electrolysis (1833):

  • Faraday’s groundbreaking work on electrolysis laid the foundation for understanding the relationship between electric current and chemical reactions.

2. Faraday’s Law of Electromagnetic Induction (1831):

  • One of Faraday’s most pivotal contributions, this law established the principle that a changing magnetic field induces an electromotive force (EMF) in a conductor.

3. Discovery of Benzene (1825):

  • Faraday’s work on the chemical compound benzene significantly contributed to the understanding of hydrocarbons and their structures.

The Electric Motor:

1. Principle of Electromagnetic Rotation (1821):

  • Faraday’s initial foray into electromagnetism involved the discovery that an electric current could induce magnetic rotation. This laid the groundwork for the electric motor.

2. Invention of the Electric Motor (1822):

  • Building on his previous discoveries, Faraday successfully created the first electric motor. His design consisted of a wire suspended in a pool of mercury, creating a continuous rotation through the interaction of magnetic fields.

3. Practical Applications:

  • Faraday’s invention of the electric motor laid the foundation for numerous practical applications in various industries, including manufacturing, transportation, and later, the widespread use of electric power.

The Faraday Cage:

1. Shielding from Electric Fields:

  • Faraday’s research also led to the development of the Faraday cage, a conductive enclosure that shields its contents from external electric fields.

2. Applications in Electronics:

  • The Faraday cage finds applications in modern electronics, providing protection against electromagnetic interference and securing sensitive equipment.

Faraday’s Lectures and Public Engagement:

1. Popularization of Science:

  • Faraday’s renowned Christmas Lectures at the Royal Institution aimed to make science accessible to the general public. His engaging and informative lectures garnered widespread acclaim.

2. Influence on Future Scientists:

  • Faraday’s engaging teaching style inspired generations of scientists, including James Clerk Maxwell, who later formalized Faraday’s work into the equations of electromagnetism.

Legacy and Recognition:

1. Scientific Honors:

  • Despite lacking a formal education, Faraday received numerous scientific honors, including the Royal Medal and Copley Medal.

2. Faraday Society and Farad:

  • The Faraday Society, founded in 1903, perpetuates his legacy, and the unit of capacitance, the farad, is named in his honor.

Faraday’s Lasting Impact:

1. Electrical Revolution:

  • Faraday’s work laid the groundwork for the electrical revolution, transforming society by harnessing electric power for various applications.

2. Technological Advancements:

  • The electric motor, a fundamental invention, became a cornerstone of technological advancements, powering machinery, transportation, and a myriad of devices.

3. Continued Scientific Exploration:

  • Faraday’s discoveries continue to influence modern physics, with his laws forming the basis for understanding electromagnetic phenomena.

Conclusion:

Michael Faraday’s legacy as the inventor of the electric motor and a trailblazer in the field of electromagnetism is a testament to the transformative power of scientific curiosity and dedication. From his early days as an apprentice to his groundbreaking experiments and inventions, Faraday’s influence extends far beyond his time. As the world continues to reap the benefits of electric power and technological advancements, we owe a debt of gratitude to the inquisitive mind and pioneering spirit of Michael Faraday, whose contributions continue to illuminate the path of scientific exploration and discovery.

Categories
Science

Unlocking the Enigma: The Intriguing Secrets of Marie Curie’s Diary

Introduction:

Marie Curie, a pioneering scientist renowned for her groundbreaking contributions to the field of radioactivity, left an indelible mark on the pages of scientific history. Beyond her transformative work, a mysterious artifact has captured the imagination of scholars and enthusiasts alike – Marie Curie’s diary. This enigmatic journal, shrouded in curiosity and speculation, conceals the personal thoughts, struggles, and perhaps undiscovered revelations of one of the most brilliant minds in scientific history. In this extensive exploration, we delve into the secrets of Marie Curie’s diary, examining its significance, the challenges in accessing it, and the potential revelations it might hold.

The Significance of Marie Curie’s Diary:

1. Personal Insights:

  • Marie Curie’s diary is believed to provide intimate insights into her personal life, emotions, and thoughts, offering a glimpse beyond her public persona as a renowned scientist.

2. Scientific Process:

  • Scholars speculate that the diary might contain details about her scientific process, experiments, and the challenges she faced while unraveling the mysteries of radioactivity.

3. Romantic Relationship:

  • Marie Curie’s relationship with Pierre Curie, her fellow scientist and husband, is a subject of historical fascination. The diary may shed light on the dynamics of their partnership, both in scientific and personal realms.

4. Struggles and Triumphs:

  • The diary could potentially unveil the personal struggles, triumphs, and moments of self-reflection that accompanied Marie Curie’s journey as a pioneering woman in a male-dominated scientific landscape.

Challenges in Accessing Marie Curie’s Diary:

1. Preservation Concerns:

  • The delicate nature of historical documents raises concerns about preserving the diary. Archivists and historians must balance the need for access with the imperative to protect the artifact.

2. Privacy Considerations:

  • Marie Curie’s diary is a private document, leading to ethical considerations regarding the extent to which scholars and the public should have access. Respecting her privacy is paramount.

3. Language and Interpretation:

  • Marie Curie wrote in French, and the nuances of her language, along with potential personal codes or symbols, may pose challenges in accurate interpretation.

4. Ownership and Permissions:

  • Issues related to ownership, copyright, and permissions can complicate efforts to access and study the diary. Legal and ethical considerations are integral in determining who can access the document.

The Quest for Access:

1. Archival Repositories:

  • Marie Curie’s diary is likely stored in archives or repositories that house her personal documents. Institutions such as the Curie Museum in Paris may hold the key to unlocking this historical treasure.

2. Collaborations and Research Grants:

  • Scholars and researchers often seek collaborations and research grants to gain access to restricted or private archives. Such initiatives require a delicate balance between scholarly pursuit and ethical considerations.

3. Technological Advancements:

  • Technological innovations, such as digitization and advanced imaging techniques, offer new possibilities for preserving and studying delicate historical artifacts without compromising their integrity.

Potential Revelations:

1. Scientific Insights:

  • Marie Curie’s diary could contain unexplored scientific insights, including details about her experiments, discoveries, and thoughts on the implications of her groundbreaking work in radioactivity.

2. Personal Reflections:

  • Insights into Marie Curie’s personal reflections, challenges faced as a woman in science, and the emotional aspects of her life could deepen our understanding of the person behind the scientific legacy.

3. Collaborative Dynamics:

  • Details about her collaboration with Pierre Curie and their dynamic as both scientific partners and life companions could provide a nuanced understanding of their shared journey.

4. Impact on Future Generations:

  • The contents of Marie Curie’s diary could inspire future generations of scientists, particularly women in STEM, offering a unique perspective on the challenges and triumphs inherent in the pursuit of scientific excellence.

The Intersection of Science and Personal History:

1. Dual Legacy:

  • Marie Curie’s legacy extends beyond her scientific achievements; it encompasses her role as a trailblazer for women in science. The diary may illuminate the intersection of her scientific pursuits and personal experiences.

2. Cultural and Historical Context:

  • Placing Marie Curie’s diary in its cultural and historical context could enhance our understanding of the challenges faced by women in science during her era and the societal perceptions surrounding her work.

Conclusion:

Marie Curie’s diary stands as an alluring enigma, holding the potential to unveil hidden facets of her life and contributions to science. The quest to access and interpret this personal document requires a delicate balance between scholarly pursuit and ethical considerations. As the scientific community and historians continue their efforts to unlock the secrets within Marie Curie’s diary, the anticipation of potential revelations fuels a collective curiosity about the woman who revolutionized our understanding of radioactivity and left an enduring legacy in the annals of scientific history.