How to Deep Clean Your Mechanical Keyboard Without Removing Every Single Keycap (Dry Cleaning Method)
Over time, mechanical keyboards tend to gather dust, crumbs, and dirt between the switches, despite the fact that they are highly valued for their tactile feedback, durability, and adaptability via customization. When it comes to cleaning, completely removing each and every keycap may be a laborious and time-consuming process, particularly on big layouts. To your good fortune, there is a technique of dry cleaning that is both efficient and effective, enabling you to clean your keyboard fully without having to disassemble it entirely. This strategy focuses on eliminating dirt from the surface and between switches while maintaining the integrity of the switch arrangement, keycap layout, and stabilizers. It also attempts to loosen and remove debris from the surface. Your keyboard will continue to be responsive, sanitary, and visually clean if you do routine maintenance using this approach. This saves you the trouble of having to completely disassemble it.
The first cleaning of the surface
It is recommended that you begin by removing your keyboard from the computer or, if it is wireless, turning it off. To clean the top surface of the keyboard, including the tops of the keycaps and the spaces around them, use a microfiber cloth that is gentle. This prevents the surface from being scratched as dirt and oils are removed from the fingertips. The keyboard may be gently tapped upside down to dislodge stray crumbs as well as particles that are difficult to remove. Regular surface cleaning helps avoid accumulation, which may lead to the need for more thorough cleaning, and it also ensures that your keyboard continues to seem well-maintained.
Making use of either a manual air blower or compressed air
It is best to use either compressed air or a manual air blower in order to access the narrow gaps that exist between the keys. The keyboard should be held at an angle, and quick bursts of air should be directed down the rows of keycaps. This will ensure that debris is released from the switches rather than being pushed deeper into them. In addition to this method, a gentle brush that may be held in one’s hand can be used to dislodge particles that the air is unable to move. A significant amount of dust, hair, and crumbs may be removed without actually touching the keycaps themselves if you use a combination of air and brush approaches. This will allow you to maintain the keycaps’ alignment and stabilizers.
Utilizing Brushes to Clean the Space Between Keycaps
It is possible to remove debris that has been embedded between keys by using a paintbrush or a tiny brush with delicate bristles. Make use of the brush to move it in a circular manner and from side to side in order to release tiny dust and dirt. Pay attention to the areas around stabilizers and bigger keys, since they are more likely to get clogged with crumbs. By doing this step, the necessity to remove the keycap in its entirety is reduced, but at the same time, places that cannot be cleaned by a microfiber cloth alone are still cleaned. By applying little pressure, you limit the risk of causing harm to mechanical switches or keycap mounts.
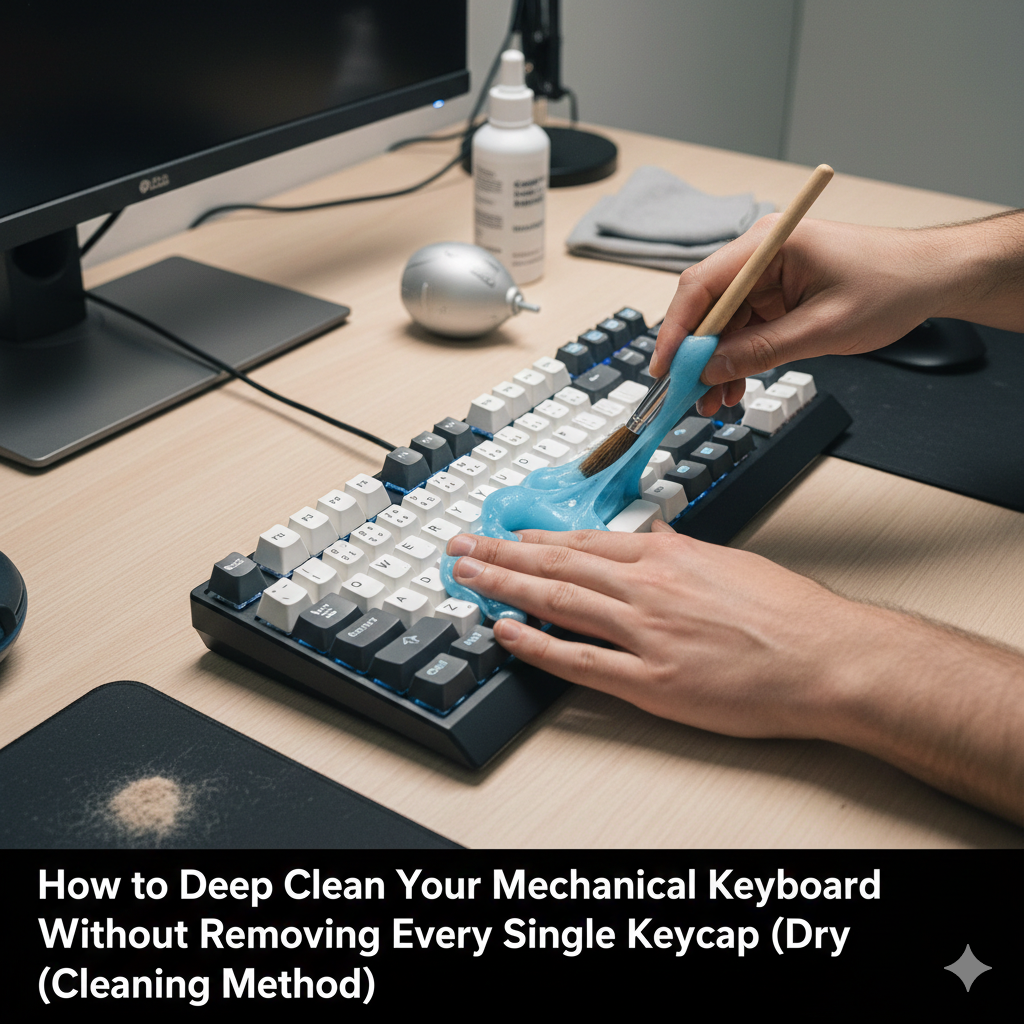
With the use of cleaning putty or gel
Cleaning putty, which is also known as keyboard gel, is a material that is malleable and can be molded to fit into the crevices between keys. It is also capable of collecting dust and other particles. It should be softly pressed onto the key surfaces, and then it should be peeled off to remove any dirt. This technique is particularly useful for addressing difficult-to-reach locations, such as the spaces between clustered keys and the areas around stabilizers. In order to clean the switches, it is not necessary to remove the keycaps since cleaning gel may be used repeatedly without causing any harm to the switches.
Resolving the Problem of Persistent Dust and Particles
It’s possible that some detritus, like hair strands or sticky crumbs, may withstand the force of air and brushing. In these circumstances, you should only make limited use of a keycap puller, removing just the keys that are causing the greatest trouble rather than the whole keyboard. Utilizing this focused method allows for precision cleaning of difficult areas while yet preserving the overall assembly. The keycaps should be gently returned to their original places once the obstinate debris has been removed. At the same time, the stabilizers and mounts should be aligned appropriately to ensure that the typing feel and stability are maintained.
Preserving Personal Hygiene
Even if the item is not completely disassembled, it is essential to maintain proper cleanliness. On a regular basis, clean the keycaps and the surfaces around them with a microfiber cloth that has been gently dampened or with an alcohol-based wipe that is designed for plastics. Excess moisture should be avoided since it has the potential to leak into switches and cause harm. Dust collection may be prevented by doing basic cleaning on the keyboard on a daily or weekly basis. This eliminates the need for more extensive interventions over time, ensuring that the keyboard remains clean and functioning.
Practices of Preventive Measures to Decrease Debris
Increasing the effectiveness of dry cleaning may be accomplished by adopting preventative behaviors. To prevent crumbs and dust from accumulating on your workplace, you should avoid eating directly over the keyboard. Additionally, you might think about utilizing a desk mat that can be cleaned separately. It is possible to limit the buildup of particles by covering the keyboard while it is not being used or by using dust covers. This allows dry cleaning techniques to continue to be effective for extended periods of time.
Some Closing Suggestions for Effective Dry Cleaning
A program that includes surface wiping, compressed air, brushing, and cleaning gel should be followed on a regular basis to guarantee that your mechanical keyboard remains clean without the need for the laborious process of removing the keycaps in their entirety. In the event of very tenacious dirt or for periodic thorough cleaning, keycaps should only be removed. By using this strategy, the integrity of the keyboard is maintained, the life of the switch is protected, and a pleasurable typing experience is maintained while experiencing the least amount of disturbance and downtime possible. Maintaining a keyboard in a way that is manageable, safe, and highly effective for everyday usage may be accomplished by following these steps.