Understanding Wireless Network Connections
Wireless network connections, often referred to as Wi-Fi connections, enable devices to connect to the internet and communicate with other devices over a wireless network. Windows 10 supports a variety of Wi-Fi standards and encryption protocols, ensuring compatibility with different types of wireless networks.
Connecting to a Wireless Network
- Access Wi-Fi Settings:
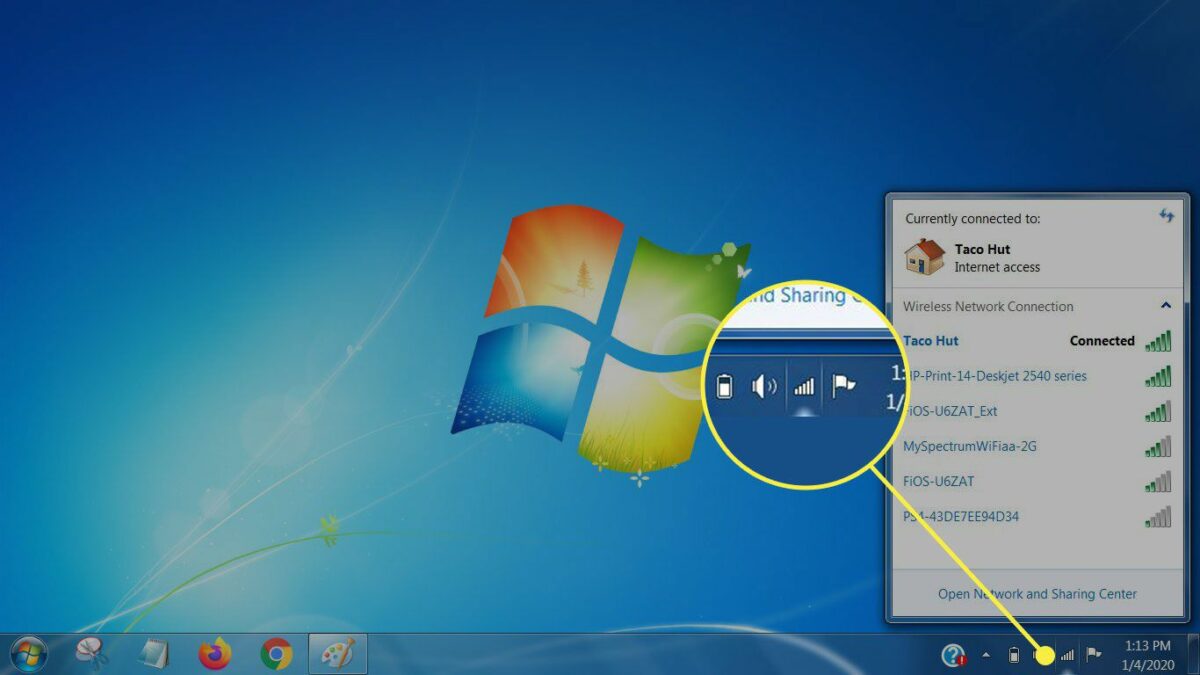
- Click on the network icon in the system tray (located in the lower-right corner of the screen, near the clock).
- The network icon looks like a series of bars or a globe, depending on your current network status.
- View Available Networks:
- In the network flyout menu, you’ll see a list of available wireless networks in your vicinity.
- Networks that require a password are labeled as secured. Public networks or open networks typically do not require a password.
- Select the Desired Network:
- Click on the name of the wireless network (SSID) you want to connect to from the list of available networks.
- Enter Network Password (if required):
- If the selected network is secured, you will be prompted to enter the network security key (password).
- Type the password carefully and ensure that “Show characters” is checked if you need to verify the characters entered.
- Connect to the Network:
- Once the correct password is entered, click on “Connect” to initiate the connection process.
- Windows will attempt to connect to the wireless network using the provided credentials.
- Establishing Connection:
- After a few moments, Windows will establish a connection to the wireless network.
- The network icon in the system tray will display a connected status, and you will have access to the internet and network resources.
Advanced Wi-Fi Settings
- Manage Known Networks:
- To manage previously connected networks or forget a network, click on “Network & Internet settings” in the network flyout menu.
- Under “Wi-Fi,” click on “Manage known networks.” Here, you can view a list of saved networks, rename them, or remove networks you no longer use.
- Wi-Fi Troubleshooting:
- If you encounter issues connecting to a wireless network, use the “Network troubleshooter” in Windows to diagnose and resolve common connection problems.
- Right-click on the network icon in the system tray, select “Troubleshoot problems,” and follow the on-screen prompts to troubleshoot Wi-Fi connectivity.
Security Considerations
- Network Security:
- Use strong passwords and encryption protocols (such as WPA2) to secure your wireless network and protect against unauthorized access.
- Avoid connecting to open or unsecured networks, especially when transmitting sensitive information.
- Public Wi-Fi Safety:
- Exercise caution when connecting to public Wi-Fi networks, such as those in cafes, airports, or hotels. Use a VPN (Virtual Private Network) to encrypt your internet traffic for added security.
Additional Tips for Wireless Network Connections
- Wi-Fi Signal Strength:
- Ensure your computer is within range of the wireless router or access point to maintain a stable connection.
- Avoid physical obstructions and interference from other electronic devices that may weaken the Wi-Fi signal.
- Updating Wi-Fi Drivers:
- Periodically update your Wi-Fi adapter drivers to ensure compatibility with the latest Wi-Fi standards and security enhancements.
- Check the manufacturer’s website or use Windows Update to download and install the latest drivers for your Wi-Fi adapter.
Conclusion
Connecting to a wireless network in Windows 10 allows you to access the internet and network resources conveniently and securely. By following the steps outlined in this guide, you can easily connect to Wi-Fi networks, manage wireless connections, and troubleshoot common issues to ensure a seamless internet experience.
Regularly review and update Wi-Fi settings, prioritize network security, and maintain good Wi-Fi signal strength to optimize your wireless network connection in Windows 10.
