Understanding Date and Time Settings in Windows
Date and time settings in Windows control how your computer displays and manages time-related information. Accurate date and time settings are crucial for scheduling tasks, organizing files, and ensuring synchronization across devices and networks.
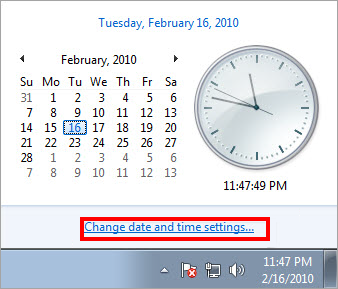
Accessing Date and Time Settings
- Open Settings:
- Click on the Start menu (Windows icon) in the bottom-left corner of the screen.
- Select “Settings” (gear icon) to open the Settings window.
- Navigate to Date & Time Settings:
- In the Settings window, click on “Time & language.”
- Choose “Date & time” from the left sidebar to access date and time settings.
Adjusting Date and Time
- Setting Date and Time:
- Under the Date & time settings, toggle “Set time automatically” to ON to allow Windows to set the date and time automatically based on your time zone and internet connection.
- If automatic settings are disabled, click on “Change” under “Set the date and time manually” to set the correct date and time manually.
- Selecting Time Zone:
- Below the date and time settings, toggle “Set time zone automatically” to ON to allow Windows to detect and set your time zone automatically based on your location.
- If automatic time zone detection is disabled, manually select your time zone from the drop-down menu.
- Adjusting Additional Date and Time Options:
- Click on “Additional date, time, & regional settings” to access more advanced settings in the Control Panel.
- Here, you can configure settings such as formatting for dates, times, and calendars based on your regional preferences.
Synchronizing Time with Online Servers
- Synchronize with Internet Time Server:
- In the Date & Time settings window, click on “Sync now” under “Synchronize your clock” to manually synchronize your computer’s clock with an online time server.
- Windows uses time.windows.com by default, but you can change the server by clicking on “Change settings” and selecting a different server from the dropdown or entering a custom server address.
Adjusting Date and Time Format
- Change Date and Time Format:
- Under “Formats,” click on “Change date and time formats” to customize how dates and times are displayed on your computer.
- Adjust formats for short date, long date, short time, and long time to match your preferences.
Additional Tips for Managing Date and Time Settings
- Daylight Saving Time Adjustments:
- Windows automatically adjusts for daylight saving time if “Set time automatically” and “Set time zone automatically” are enabled.
- Ensure these settings are toggled ON to automatically update for daylight saving time changes.
- Troubleshooting Date and Time Issues:
- If you encounter issues with date and time synchronization, ensure your internet connection is stable and check that your computer’s time settings are configured correctly.
- Manually synchronize with an online time server if automatic synchronization fails to resolve the issue.
Conclusion
Accurate date and time settings are fundamental for maintaining synchronization across devices, scheduling tasks, and organizing data effectively in Windows 10. By following the steps outlined in this guide, you can easily adjust date and time settings, synchronize your computer’s clock with online time servers, and customize date and time formats to suit your preferences.
Regularly review and update date and time settings based on changes in time zones, daylight saving time adjustments, or personal preferences to ensure your computer’s clock remains accurate and synchronized with global time standards.